Ingesting audit events to Microsoft Sentinel via Azure Logic App
Overview
This guide explains how to configure Afi to send audit events to Microsoft Sentinel through an Azure Logic App webhook.
What Afi Sends
Architecture
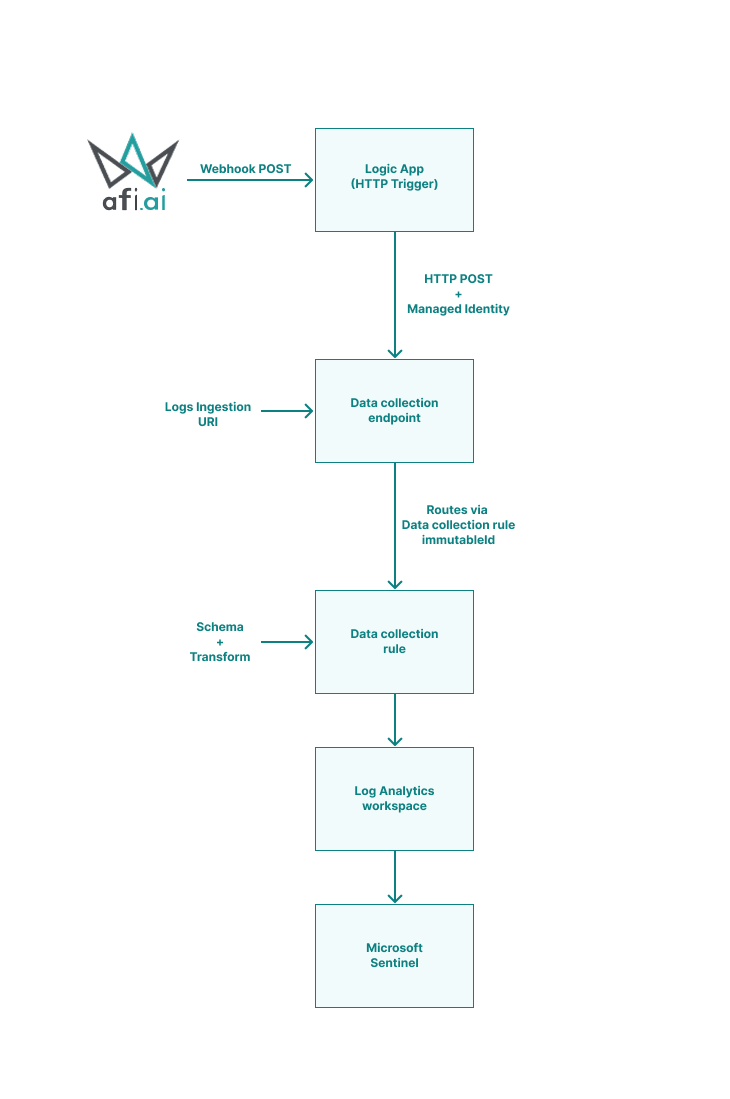
Components
| Component | Role |
|---|---|
| Afi | Sends audit events via webhook |
| Logic App | Processes incoming webhooks and forwards data to Data collection endpoint |
| Data collection endpoint/DCE | Receives data from Logic App for ingestion |
| Data collection rule/DCR | Parses incoming data and applies transformations |
| Log Analytics workspace | Stores ingested data for analysis and queries |
| Microsoft Sentinel | SIEM platform for security analysis and response |
Prerequisites
- Azure subscription
- Azure account with Owner, User Access Administrator, or Role-Based Access Control Administrator permissions
- Afi organization administrator account
Part 1: Create Log Analytics workspace and enable Microsoft Sentinel
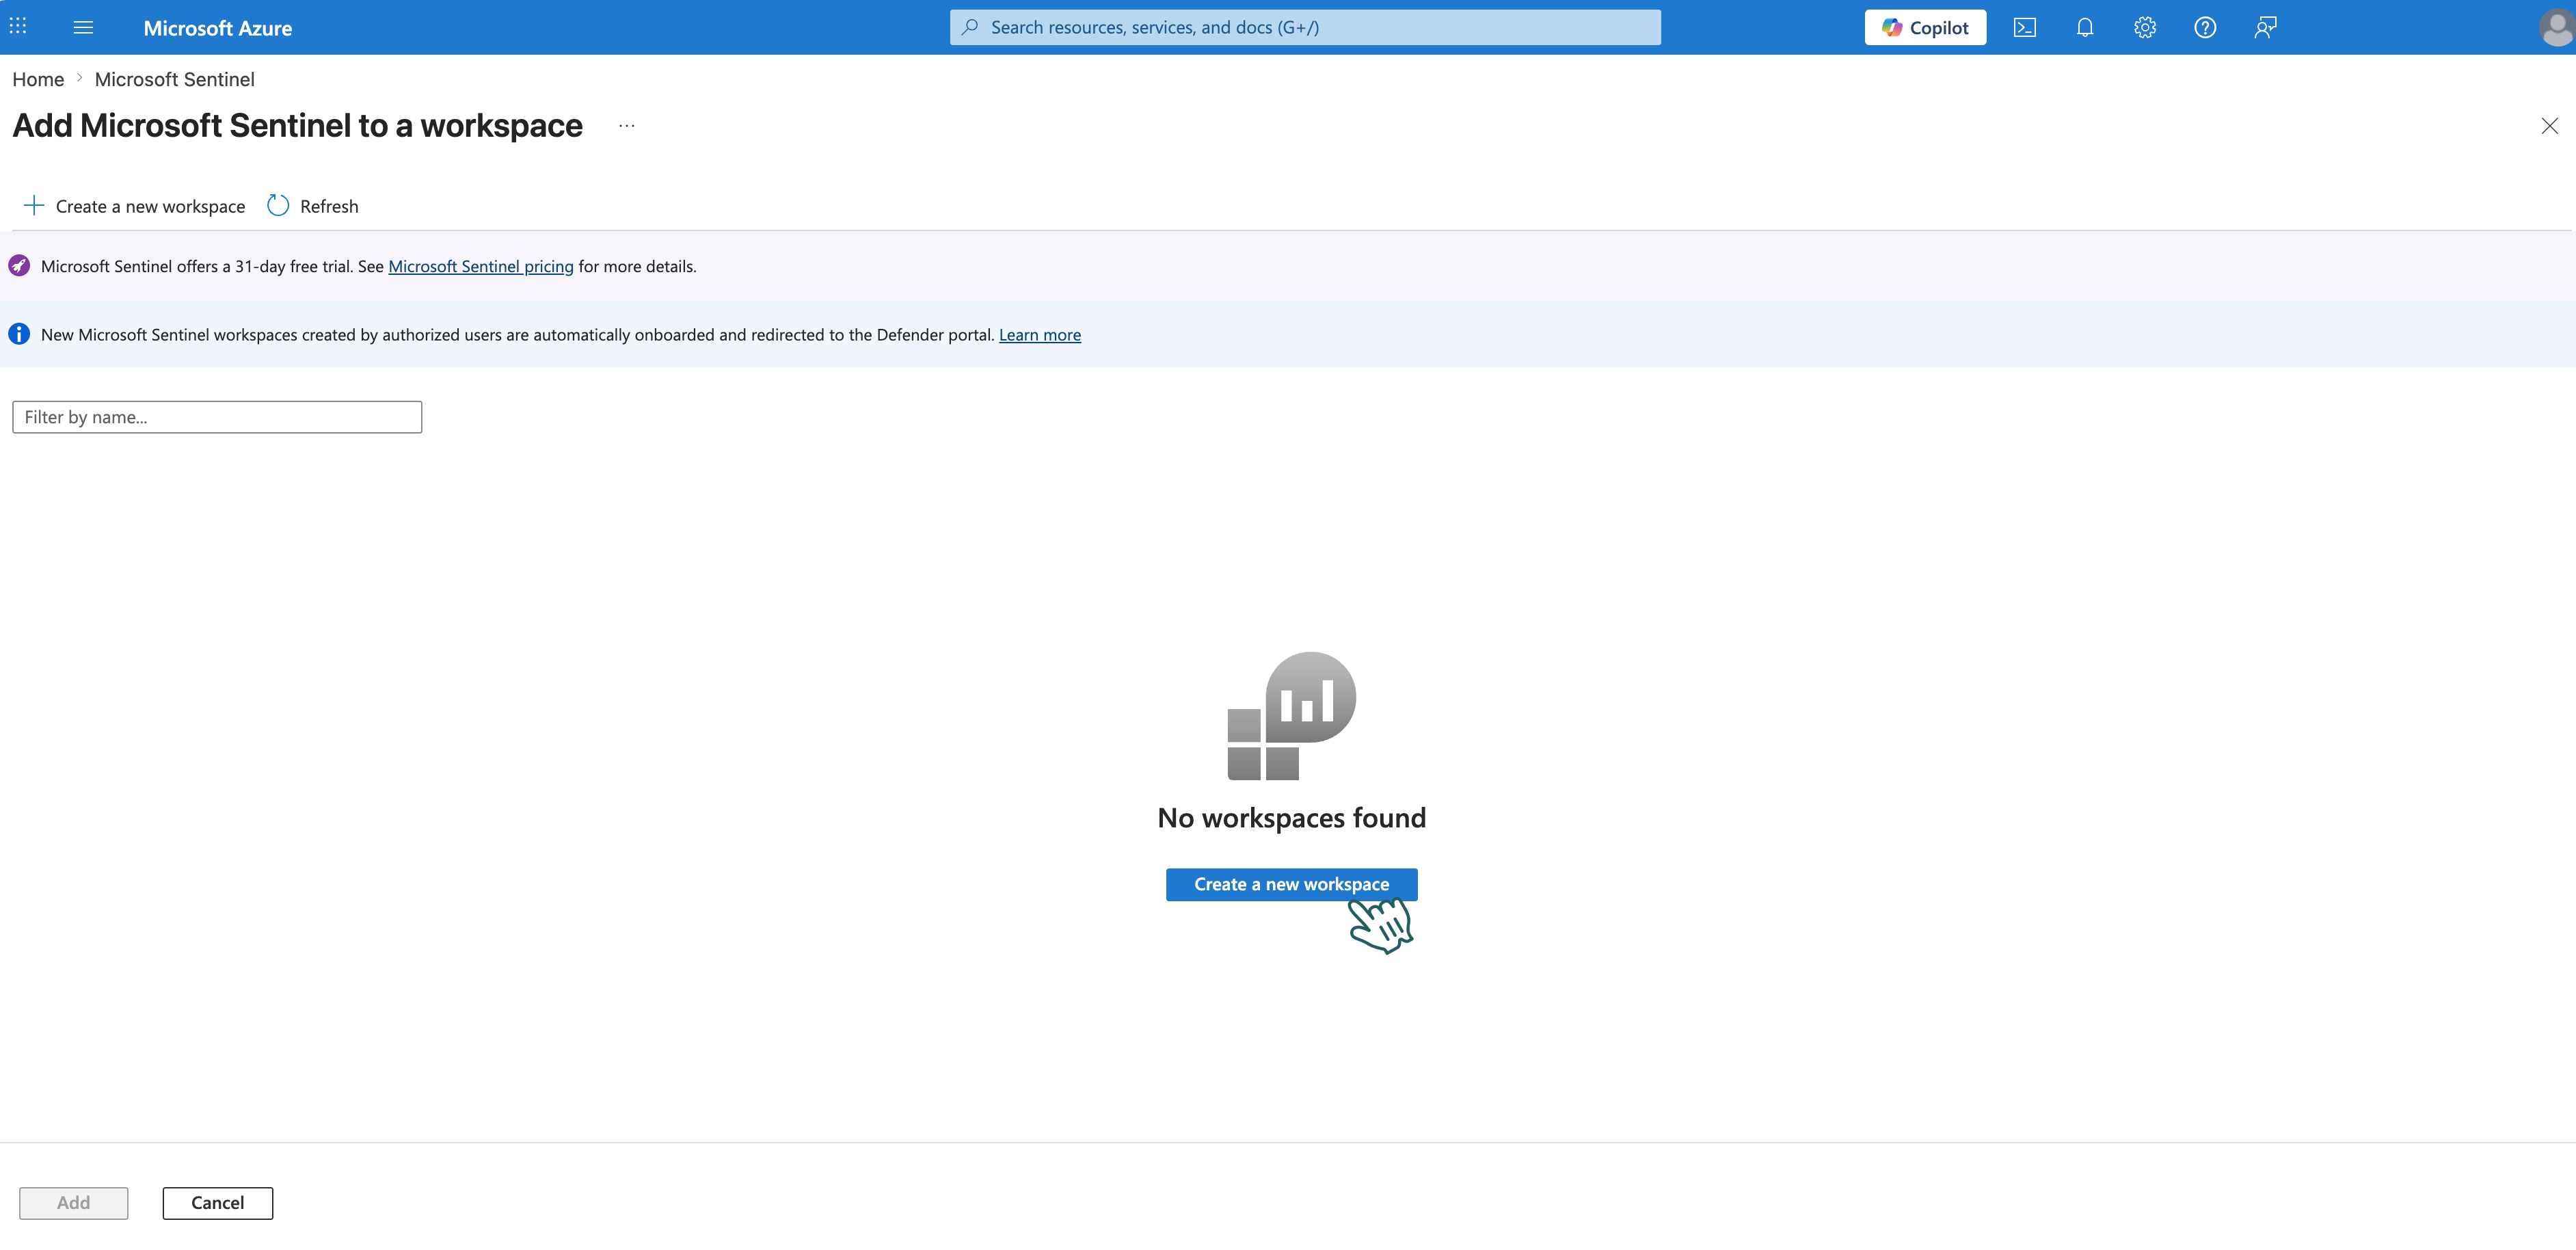
- In Azure Portal, search for Microsoft Sentinel and open it.
- Click + Create.
-
Click + Create a new workspace.
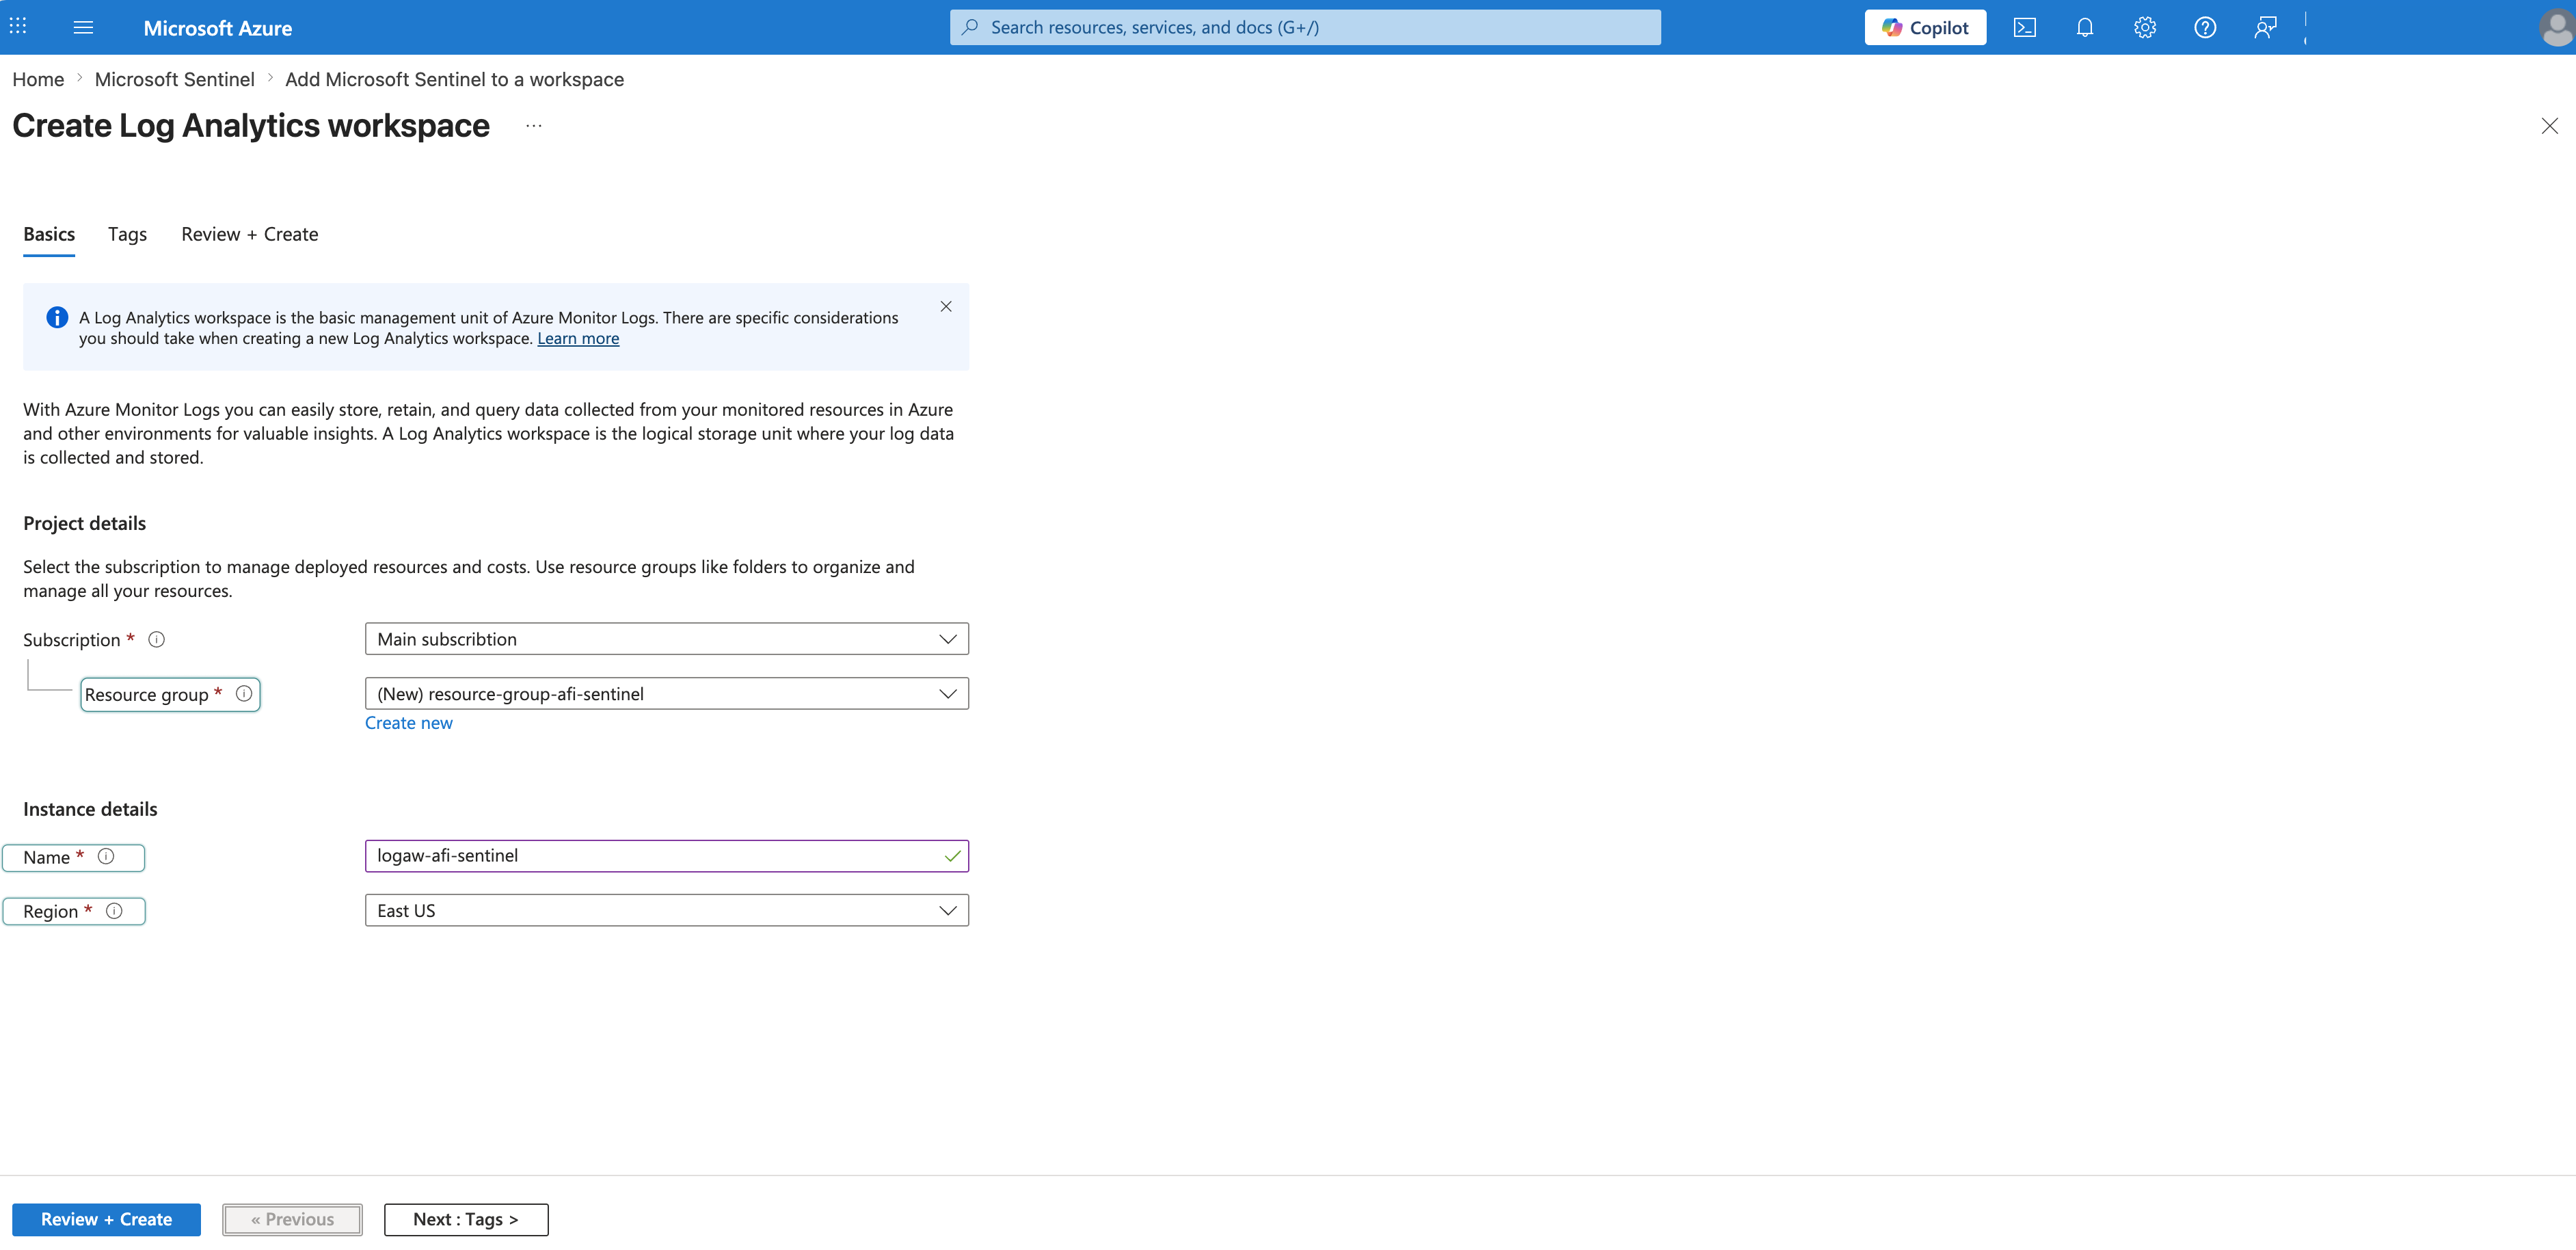
-
Fill in:
- Subscription: Your subscription
- Resource Group: Click Create new and enter a name (e.g.,
resource-group-afi-sentinel) - Name: Enter a workspace name (e.g.,
logaw-afi-sentinel) - Region: Your preferred region (e.g., East US)
Info
If you already have Microsoft Sentinel with an existing Log Analytics workspace, you can skip creating new resources and use your existing ones. Adjust the resource names in the following steps accordingly.
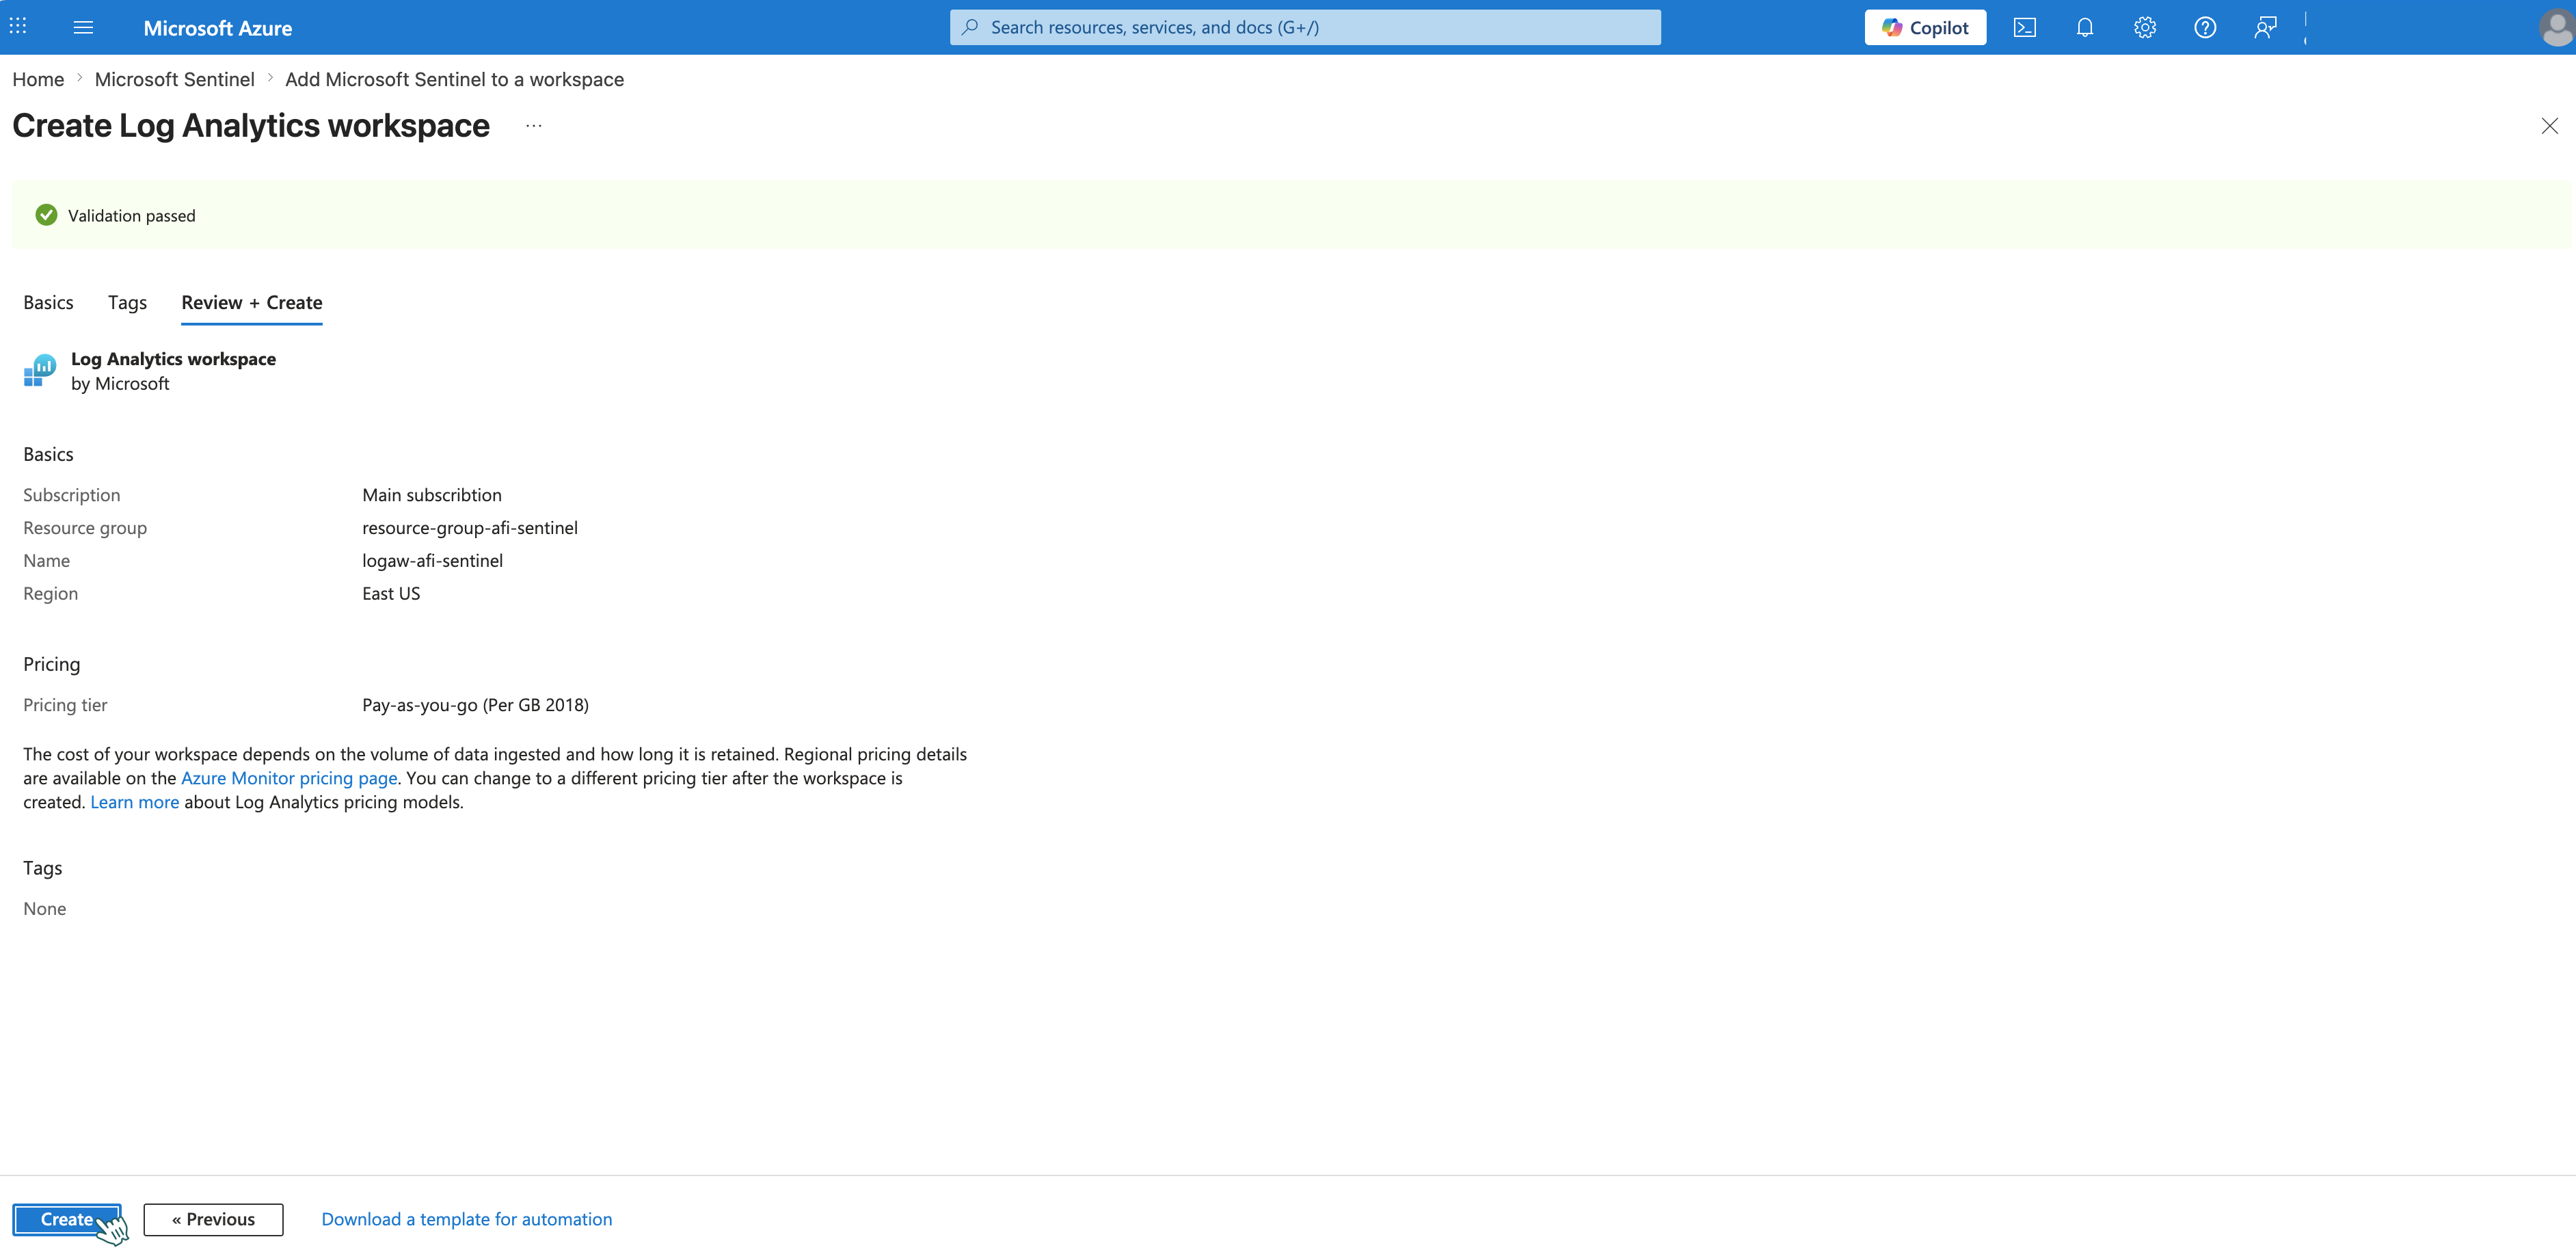
-
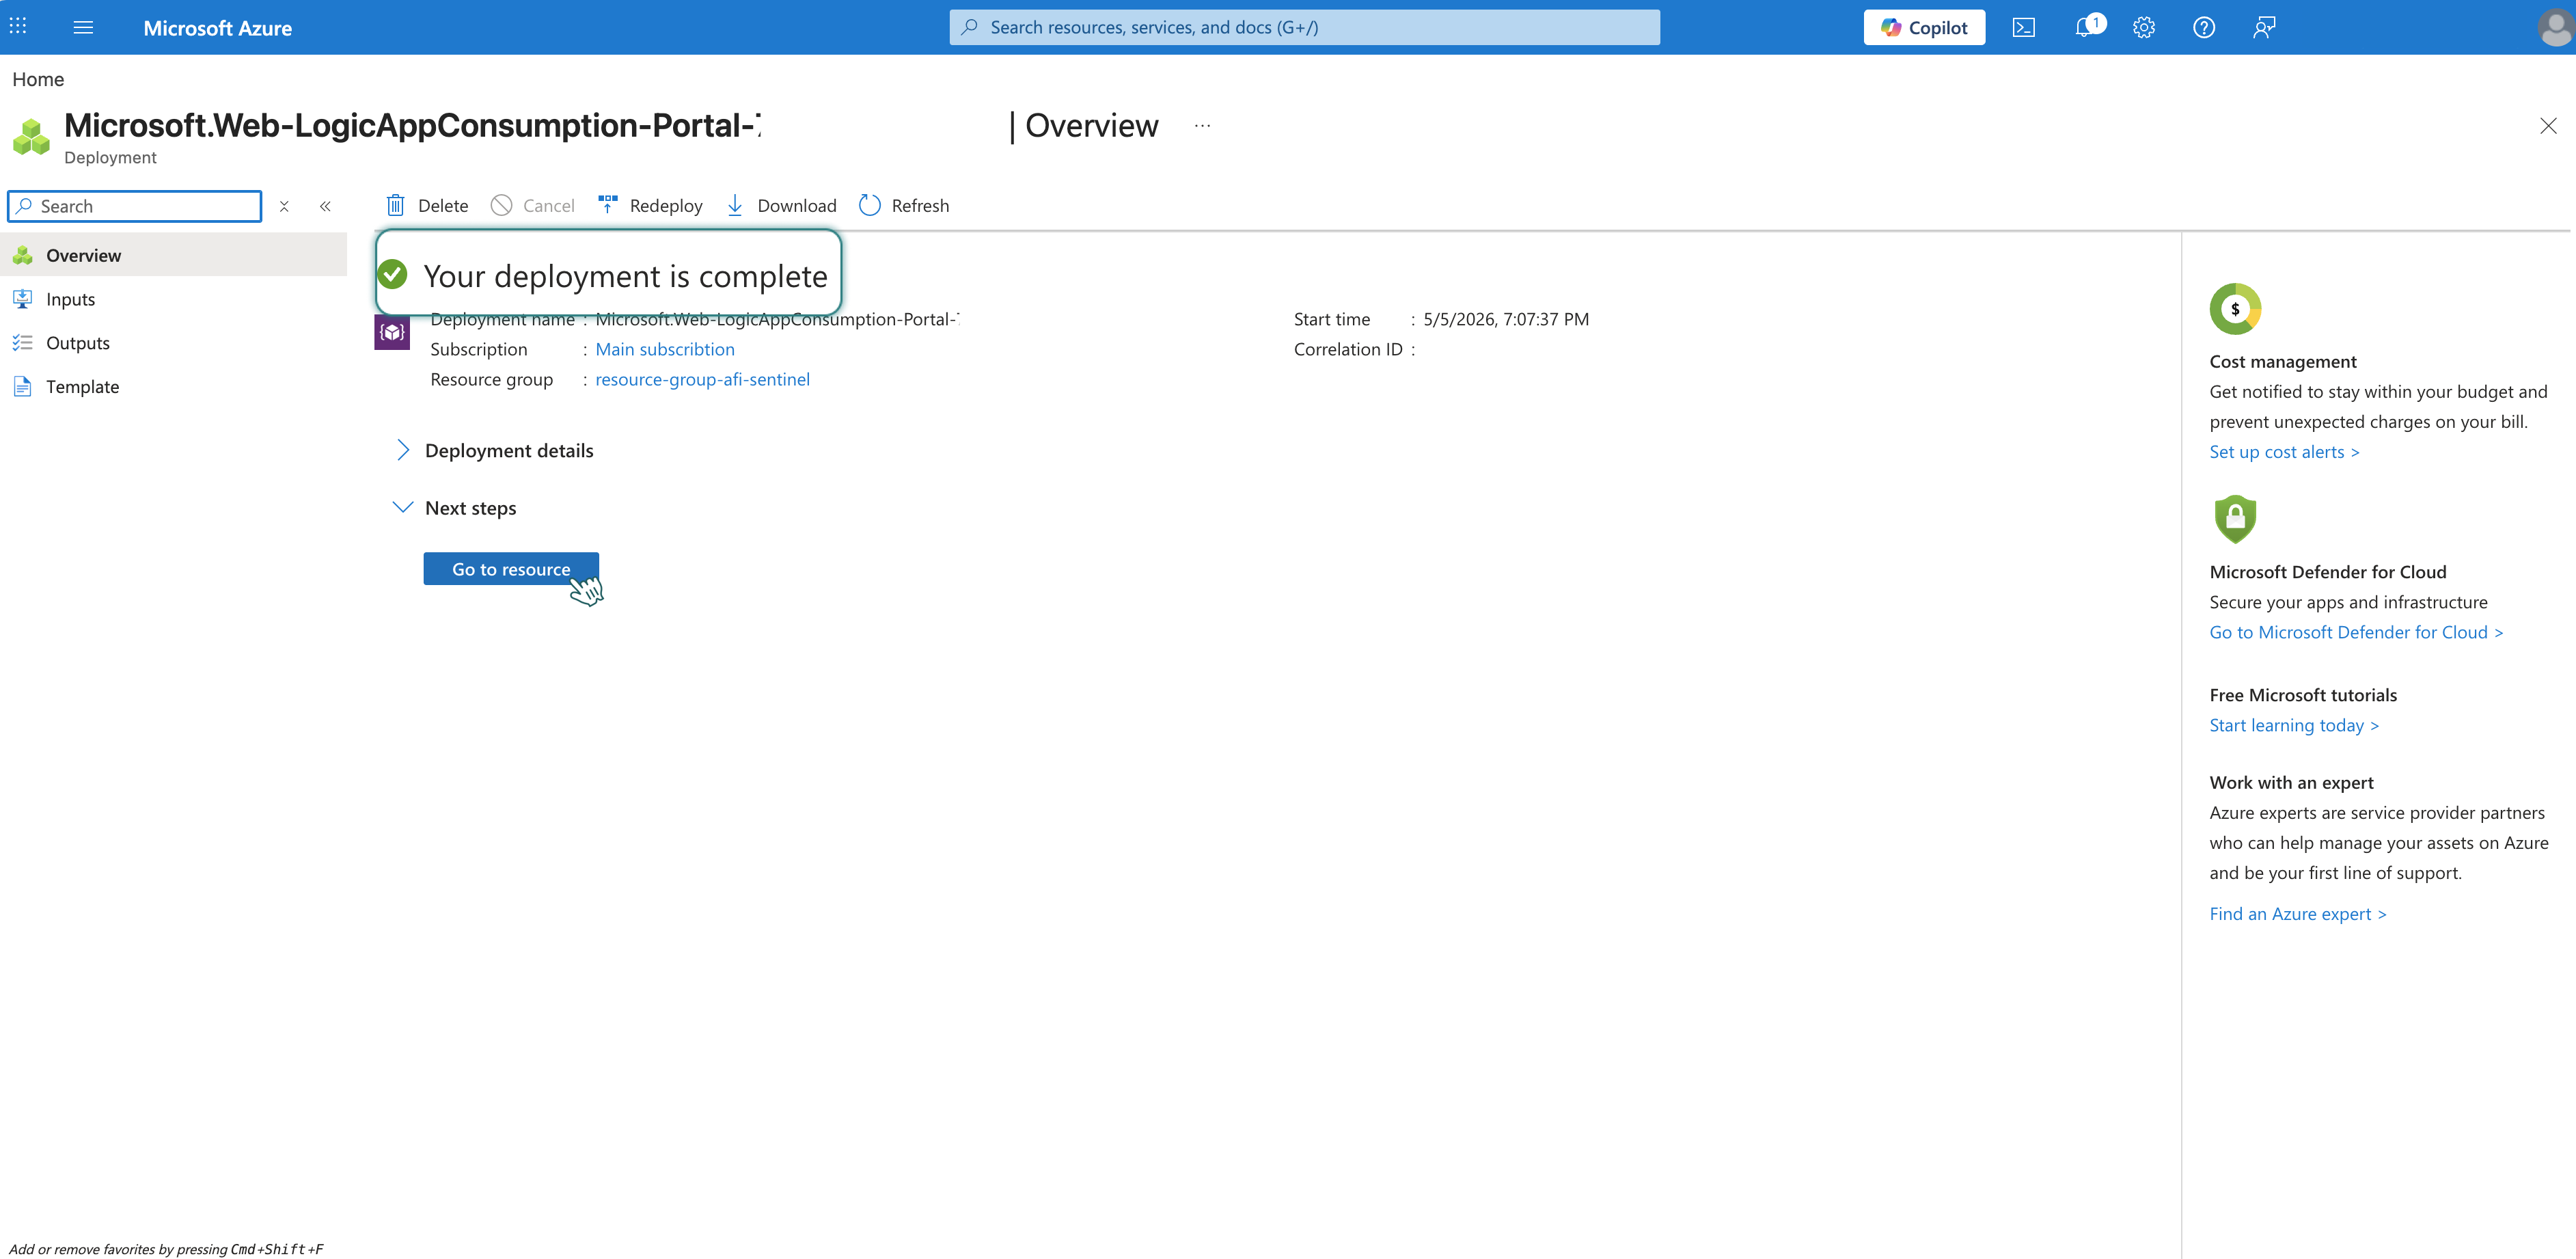
Click Review + Create → Create. Wait for deployment to complete — you should see Your deployment is complete.
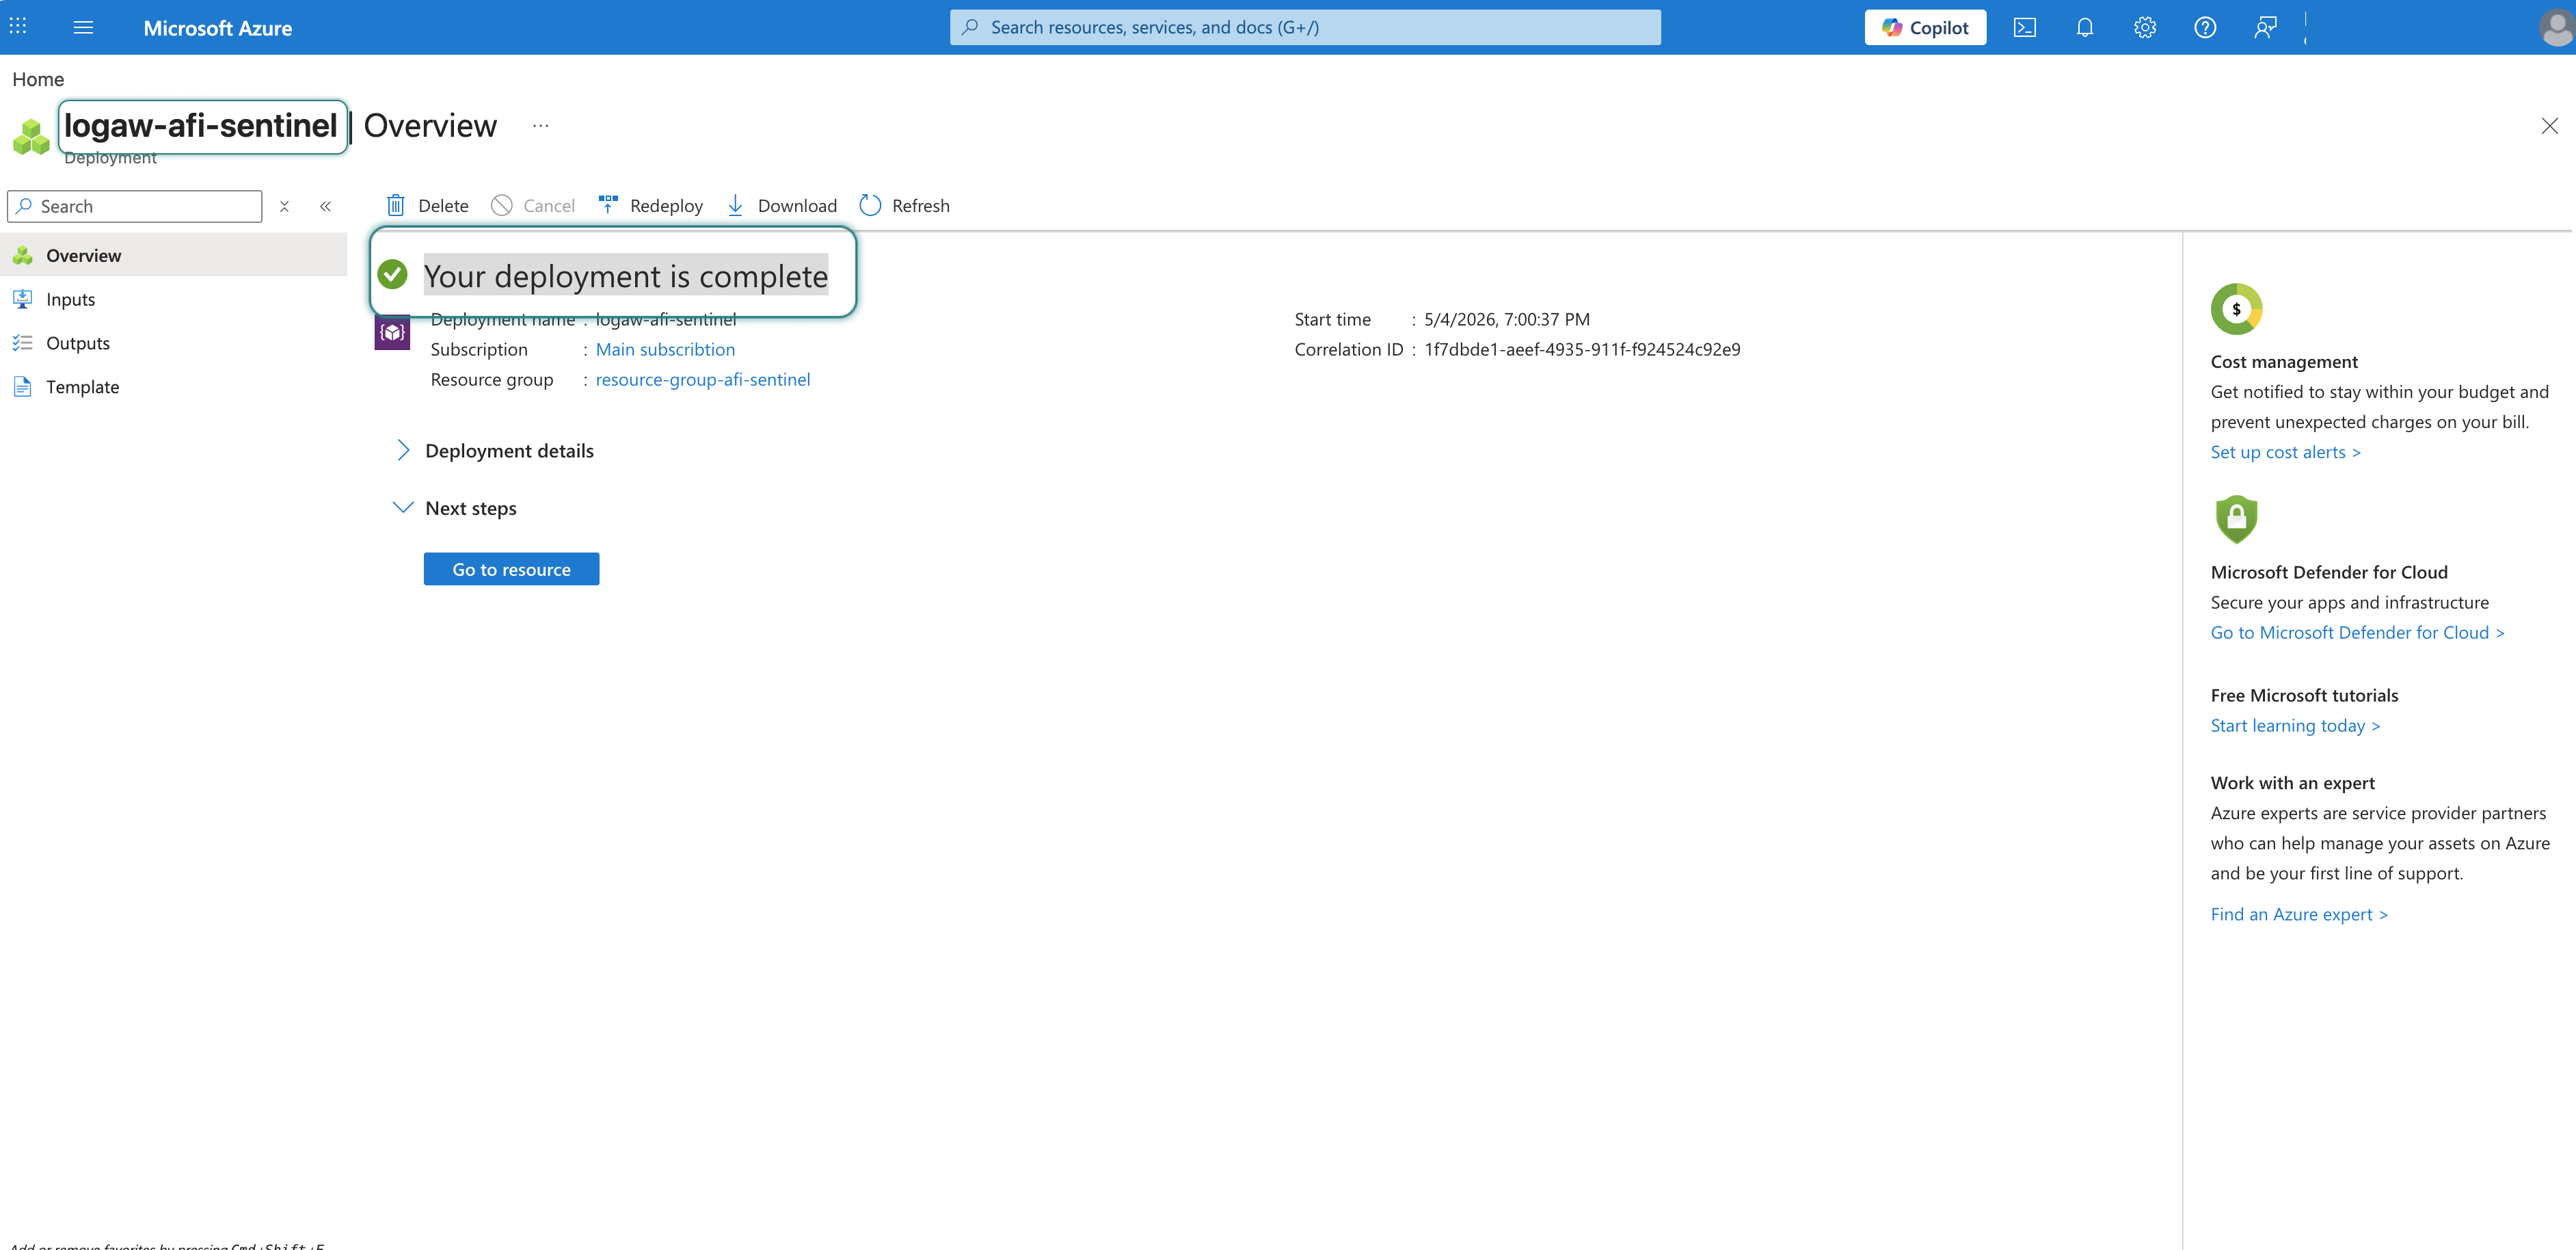
-
Go back to Microsoft Sentinel and click + Create.
- Select your workspace from the list (e.g.,
logaw-afi-sentinel) and click Add.
Part 2: Create Data collection endpoint
Step 1 - Create Data collection endpoint
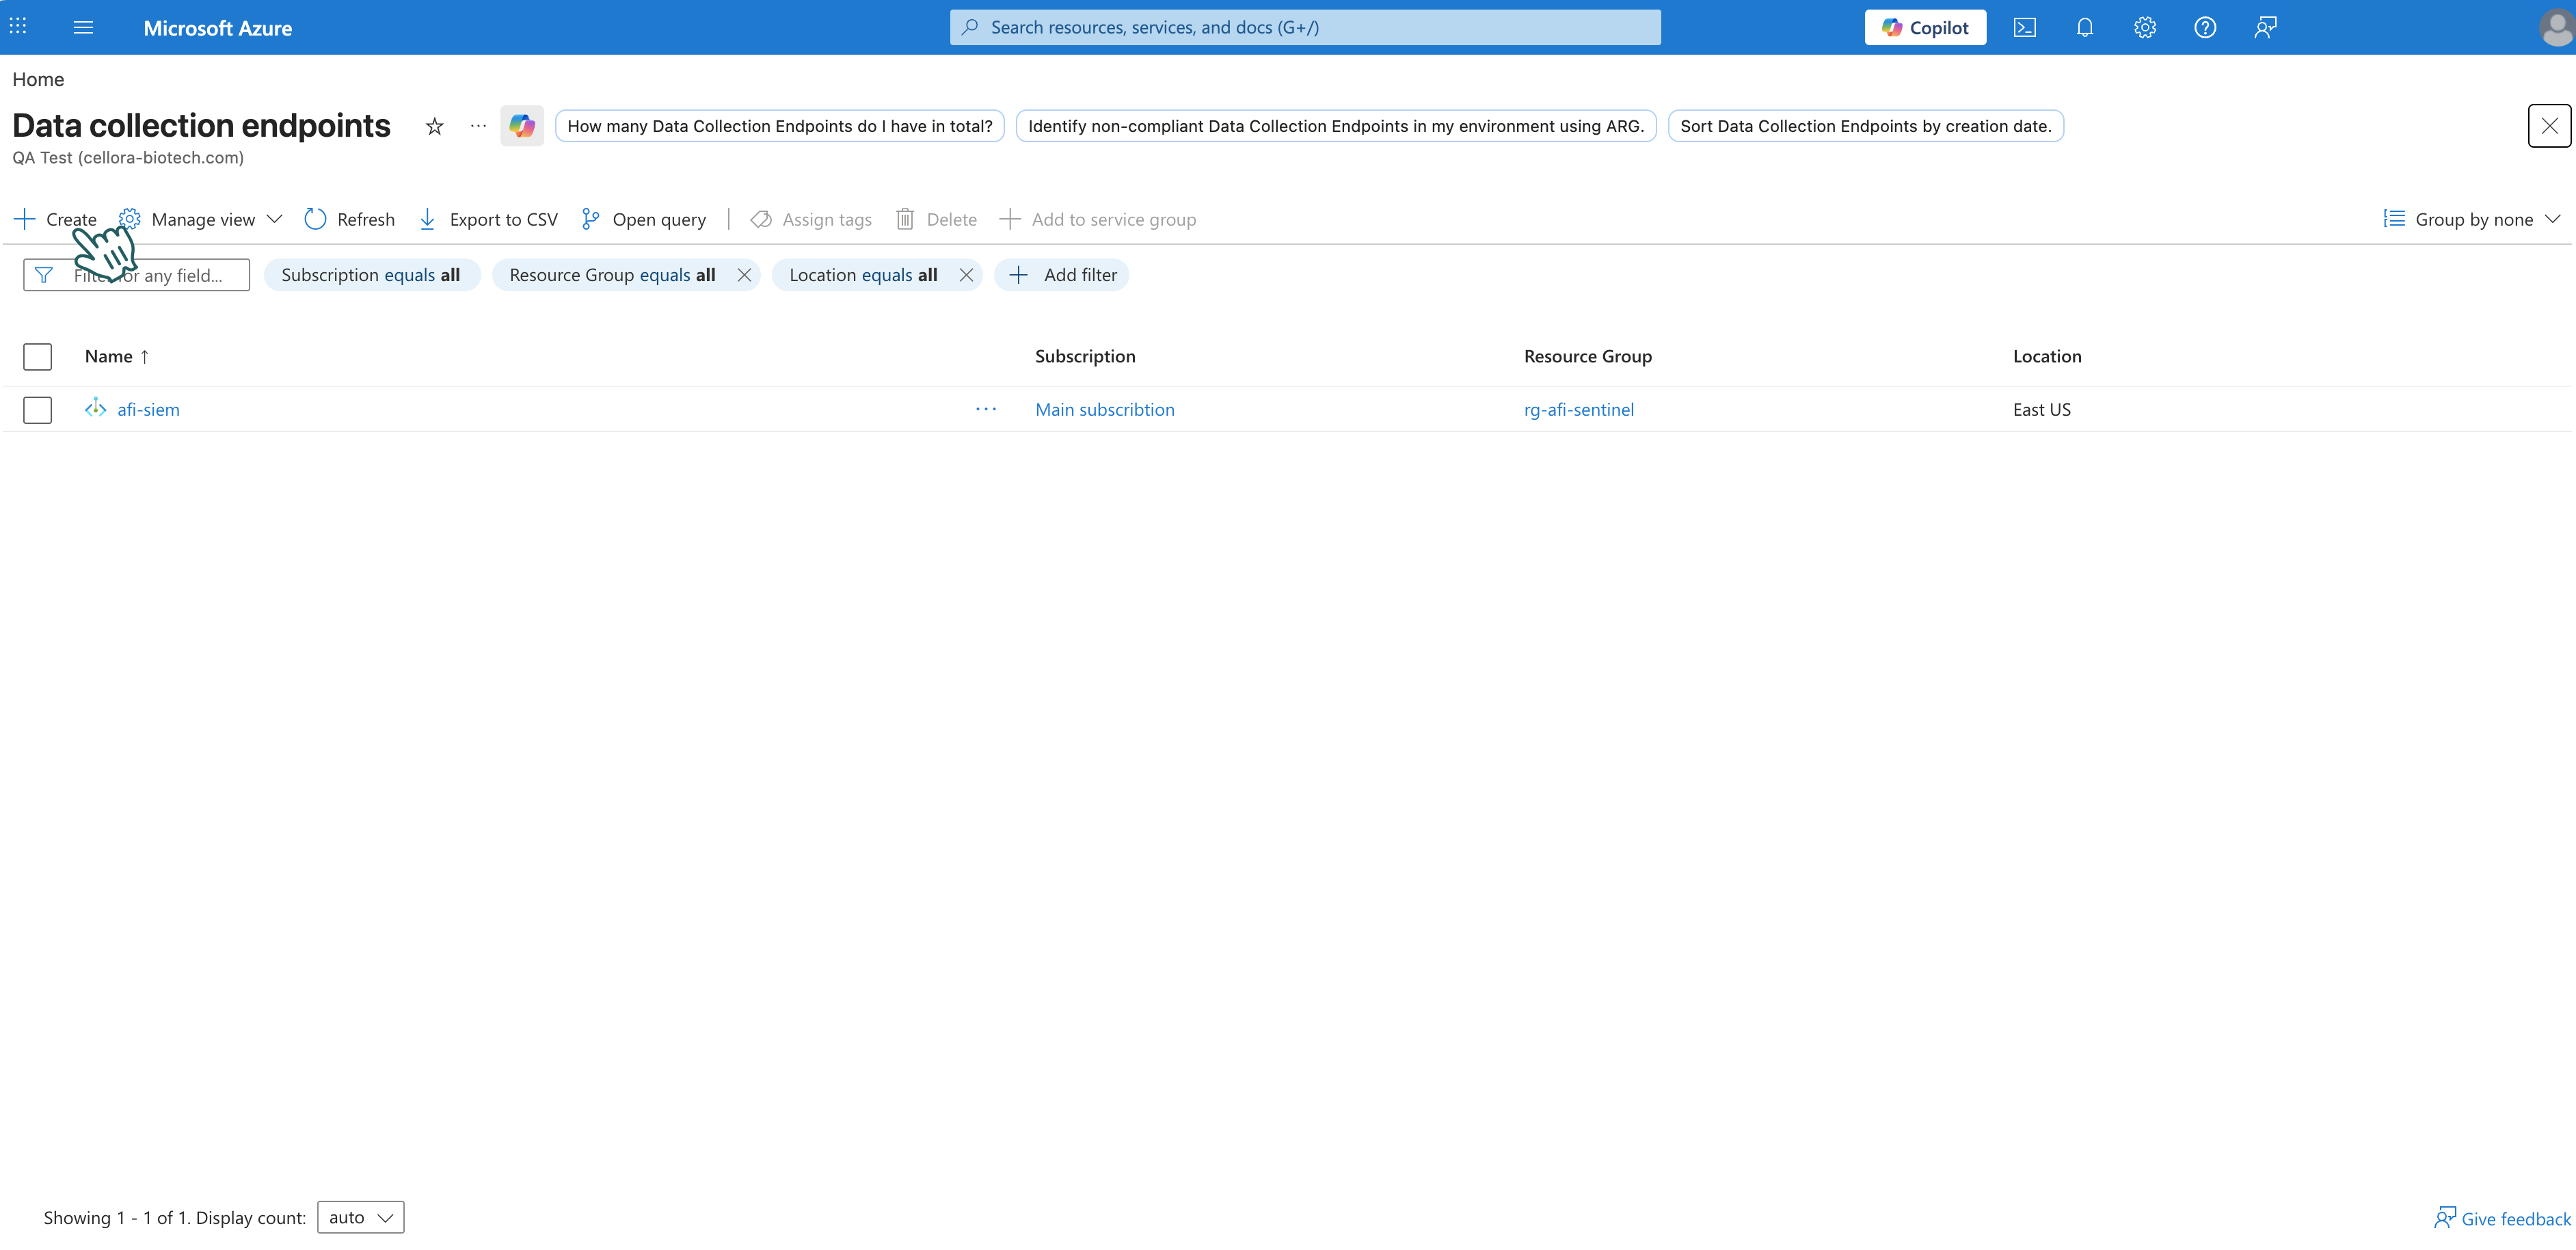
- In Azure Portal, search for Data collection endpoints and open it.
-
Click + Create.
-
Fill in:
- Endpoint Name: Enter a name (e.g.,
dcendpoint-afi-sentinel) - Subscription: Your subscription
- Resource Group: Select your resource group (e.g.,
resource-group-afi-sentinel) - Region: Same as your Log Analytics workspace (e.g., East US)
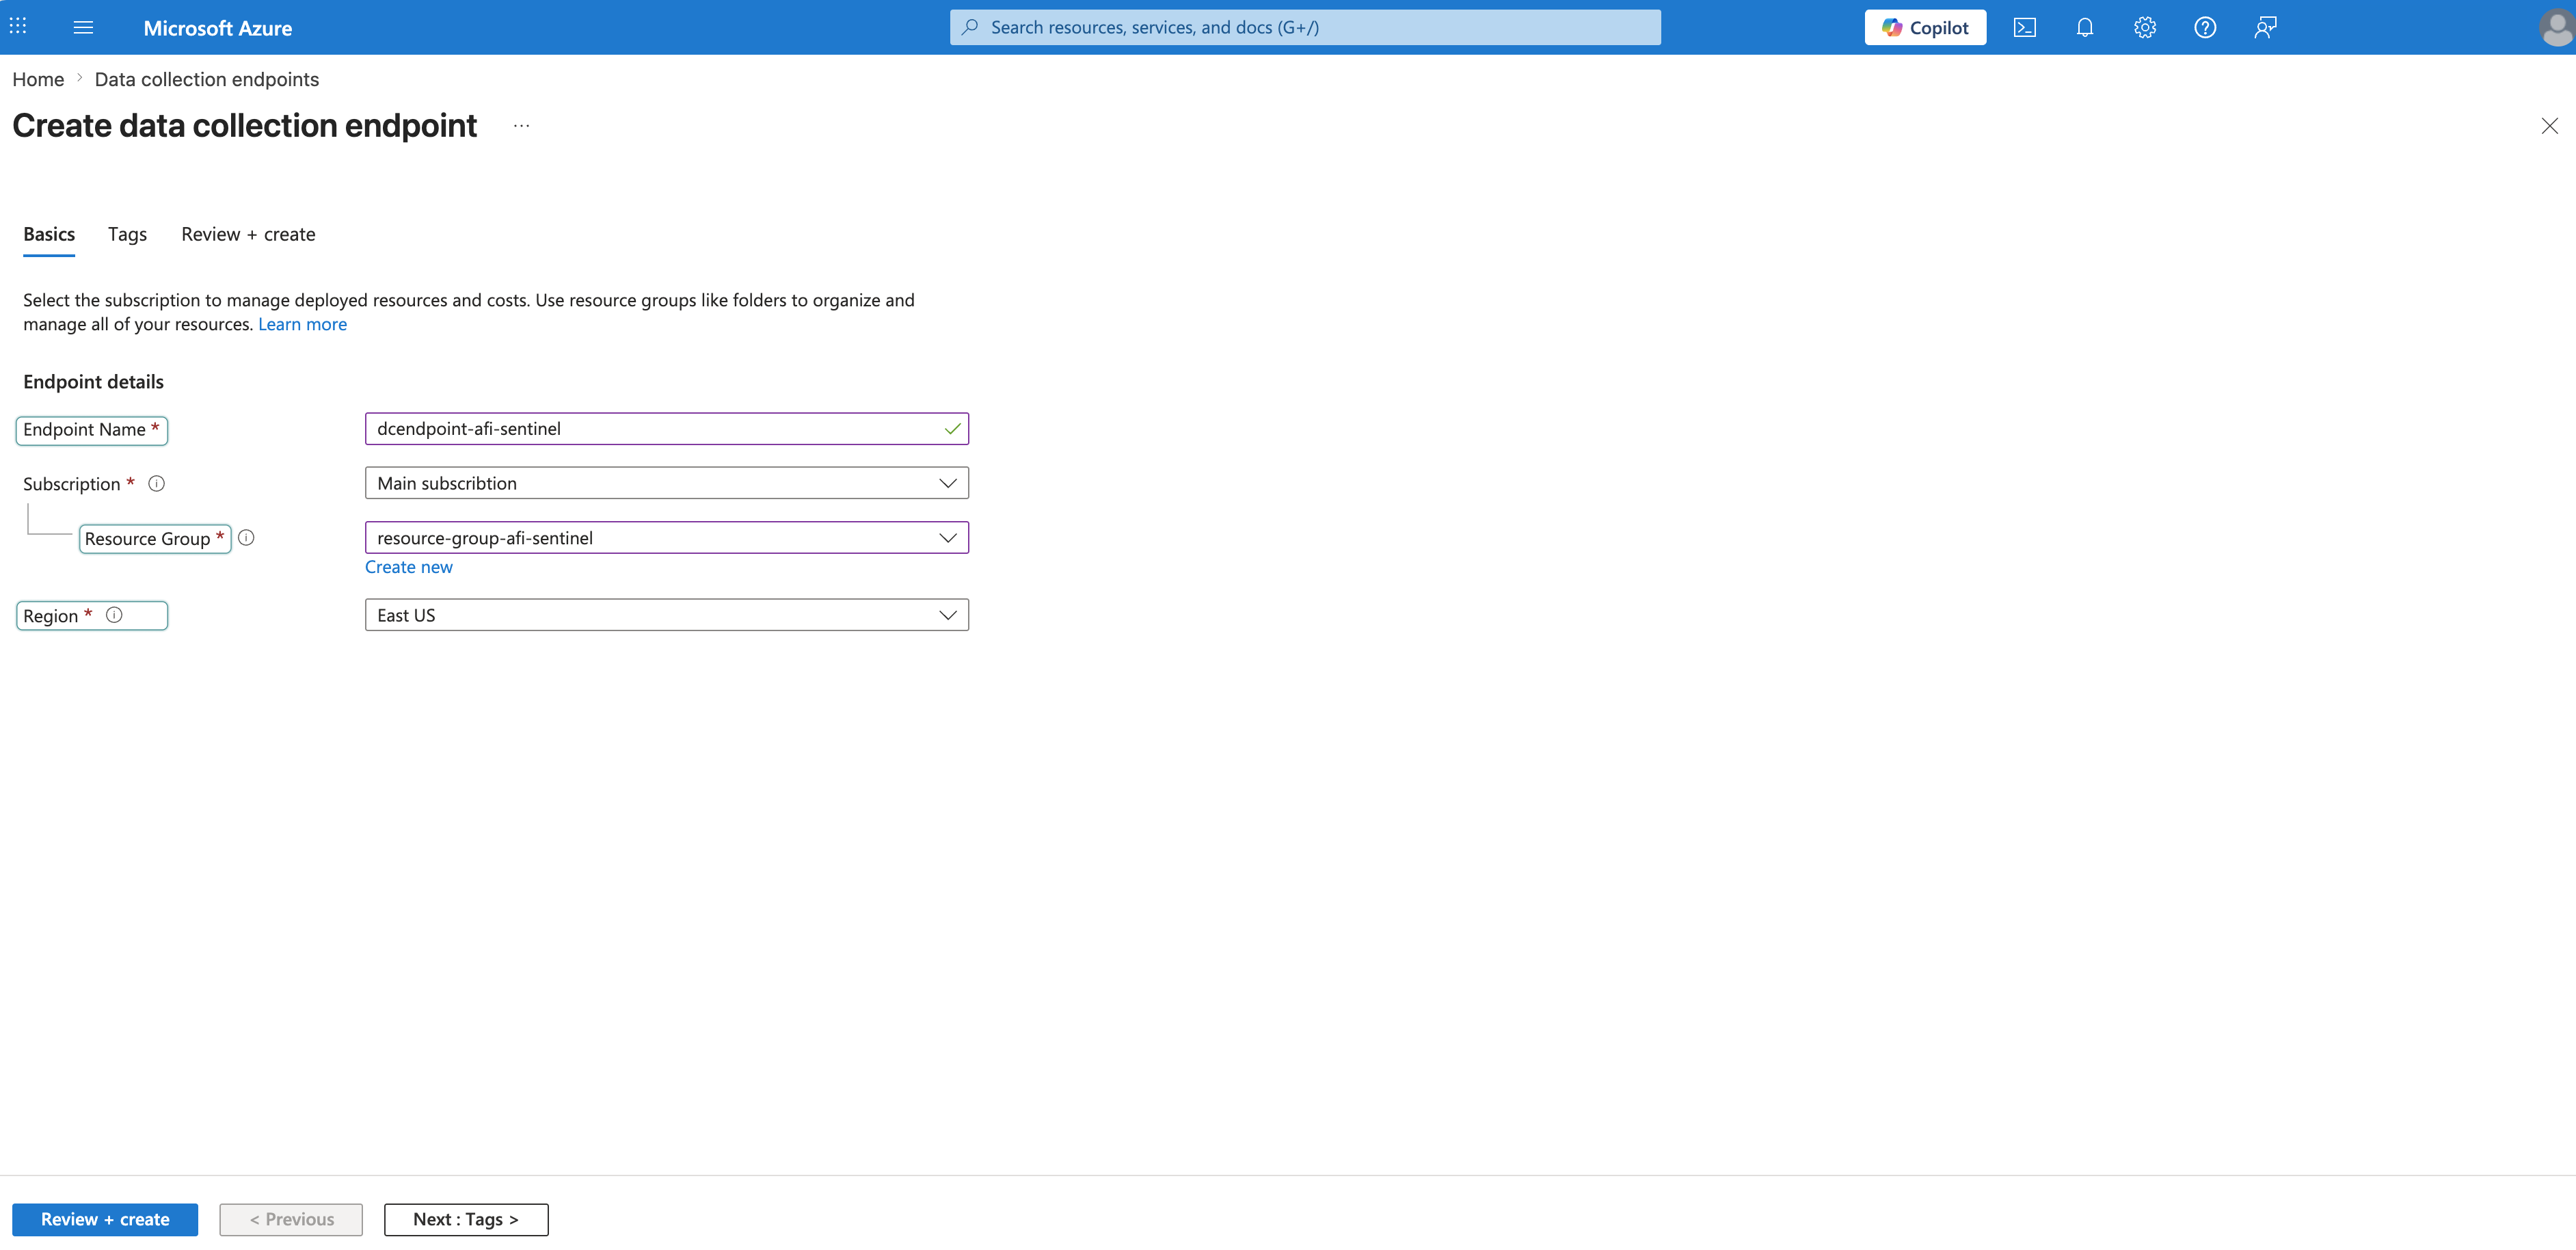
- Endpoint Name: Enter a name (e.g.,
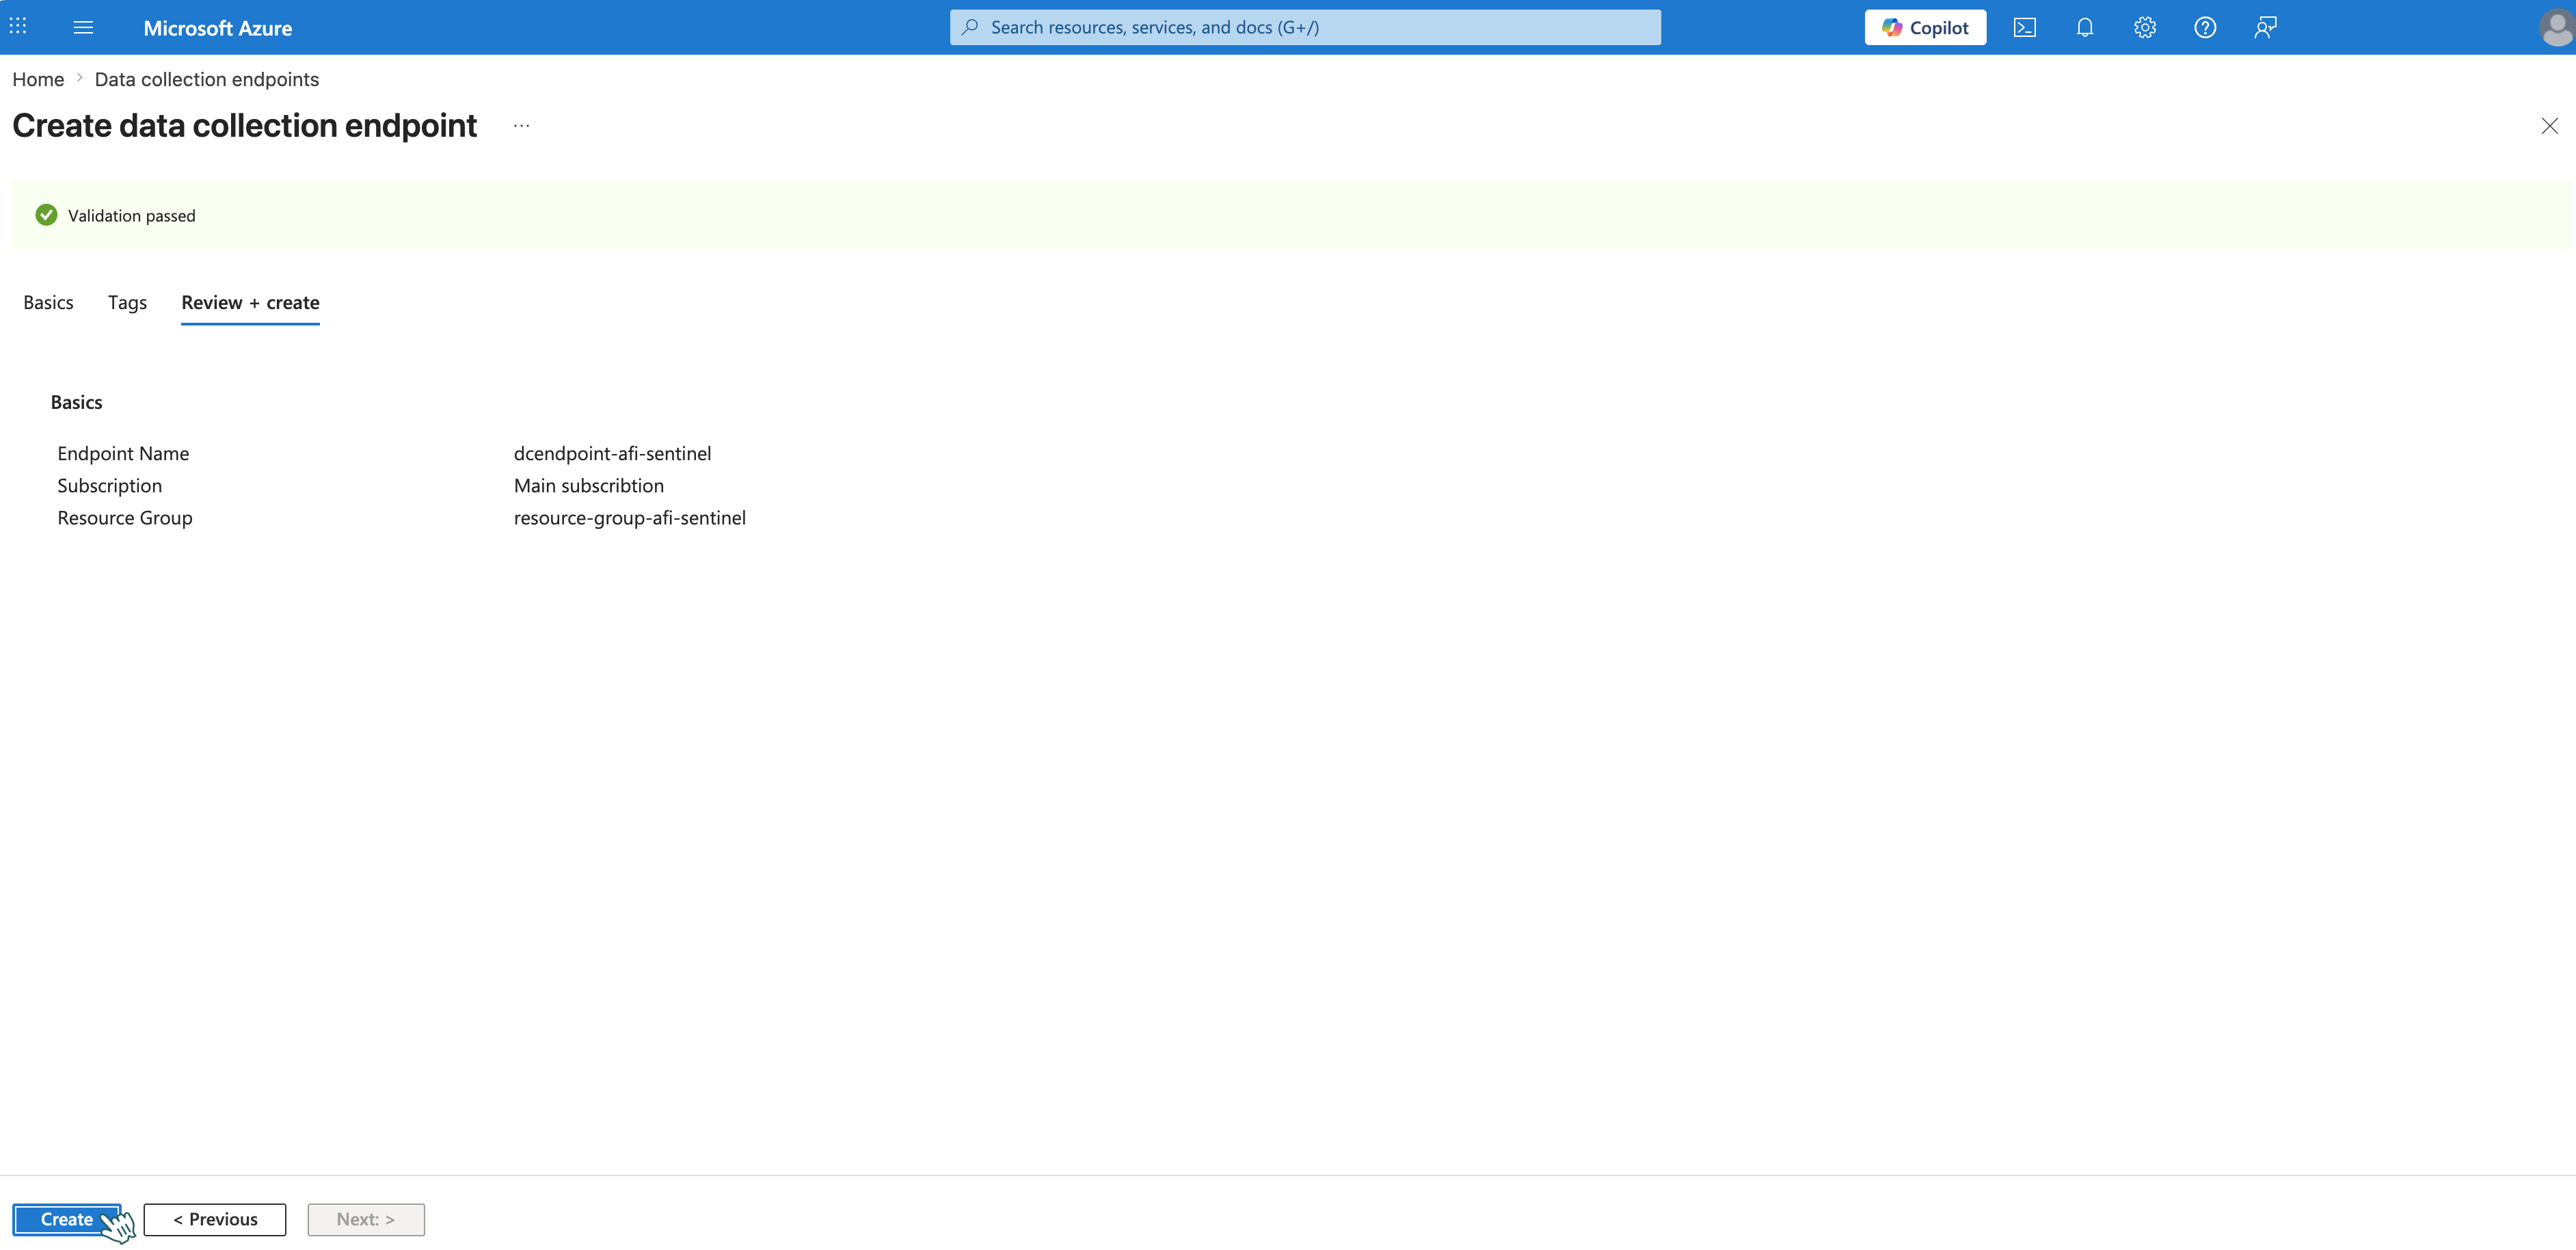
-
Click Review + Create → Create. The new endpoint will appear in the Data collection endpoints list.
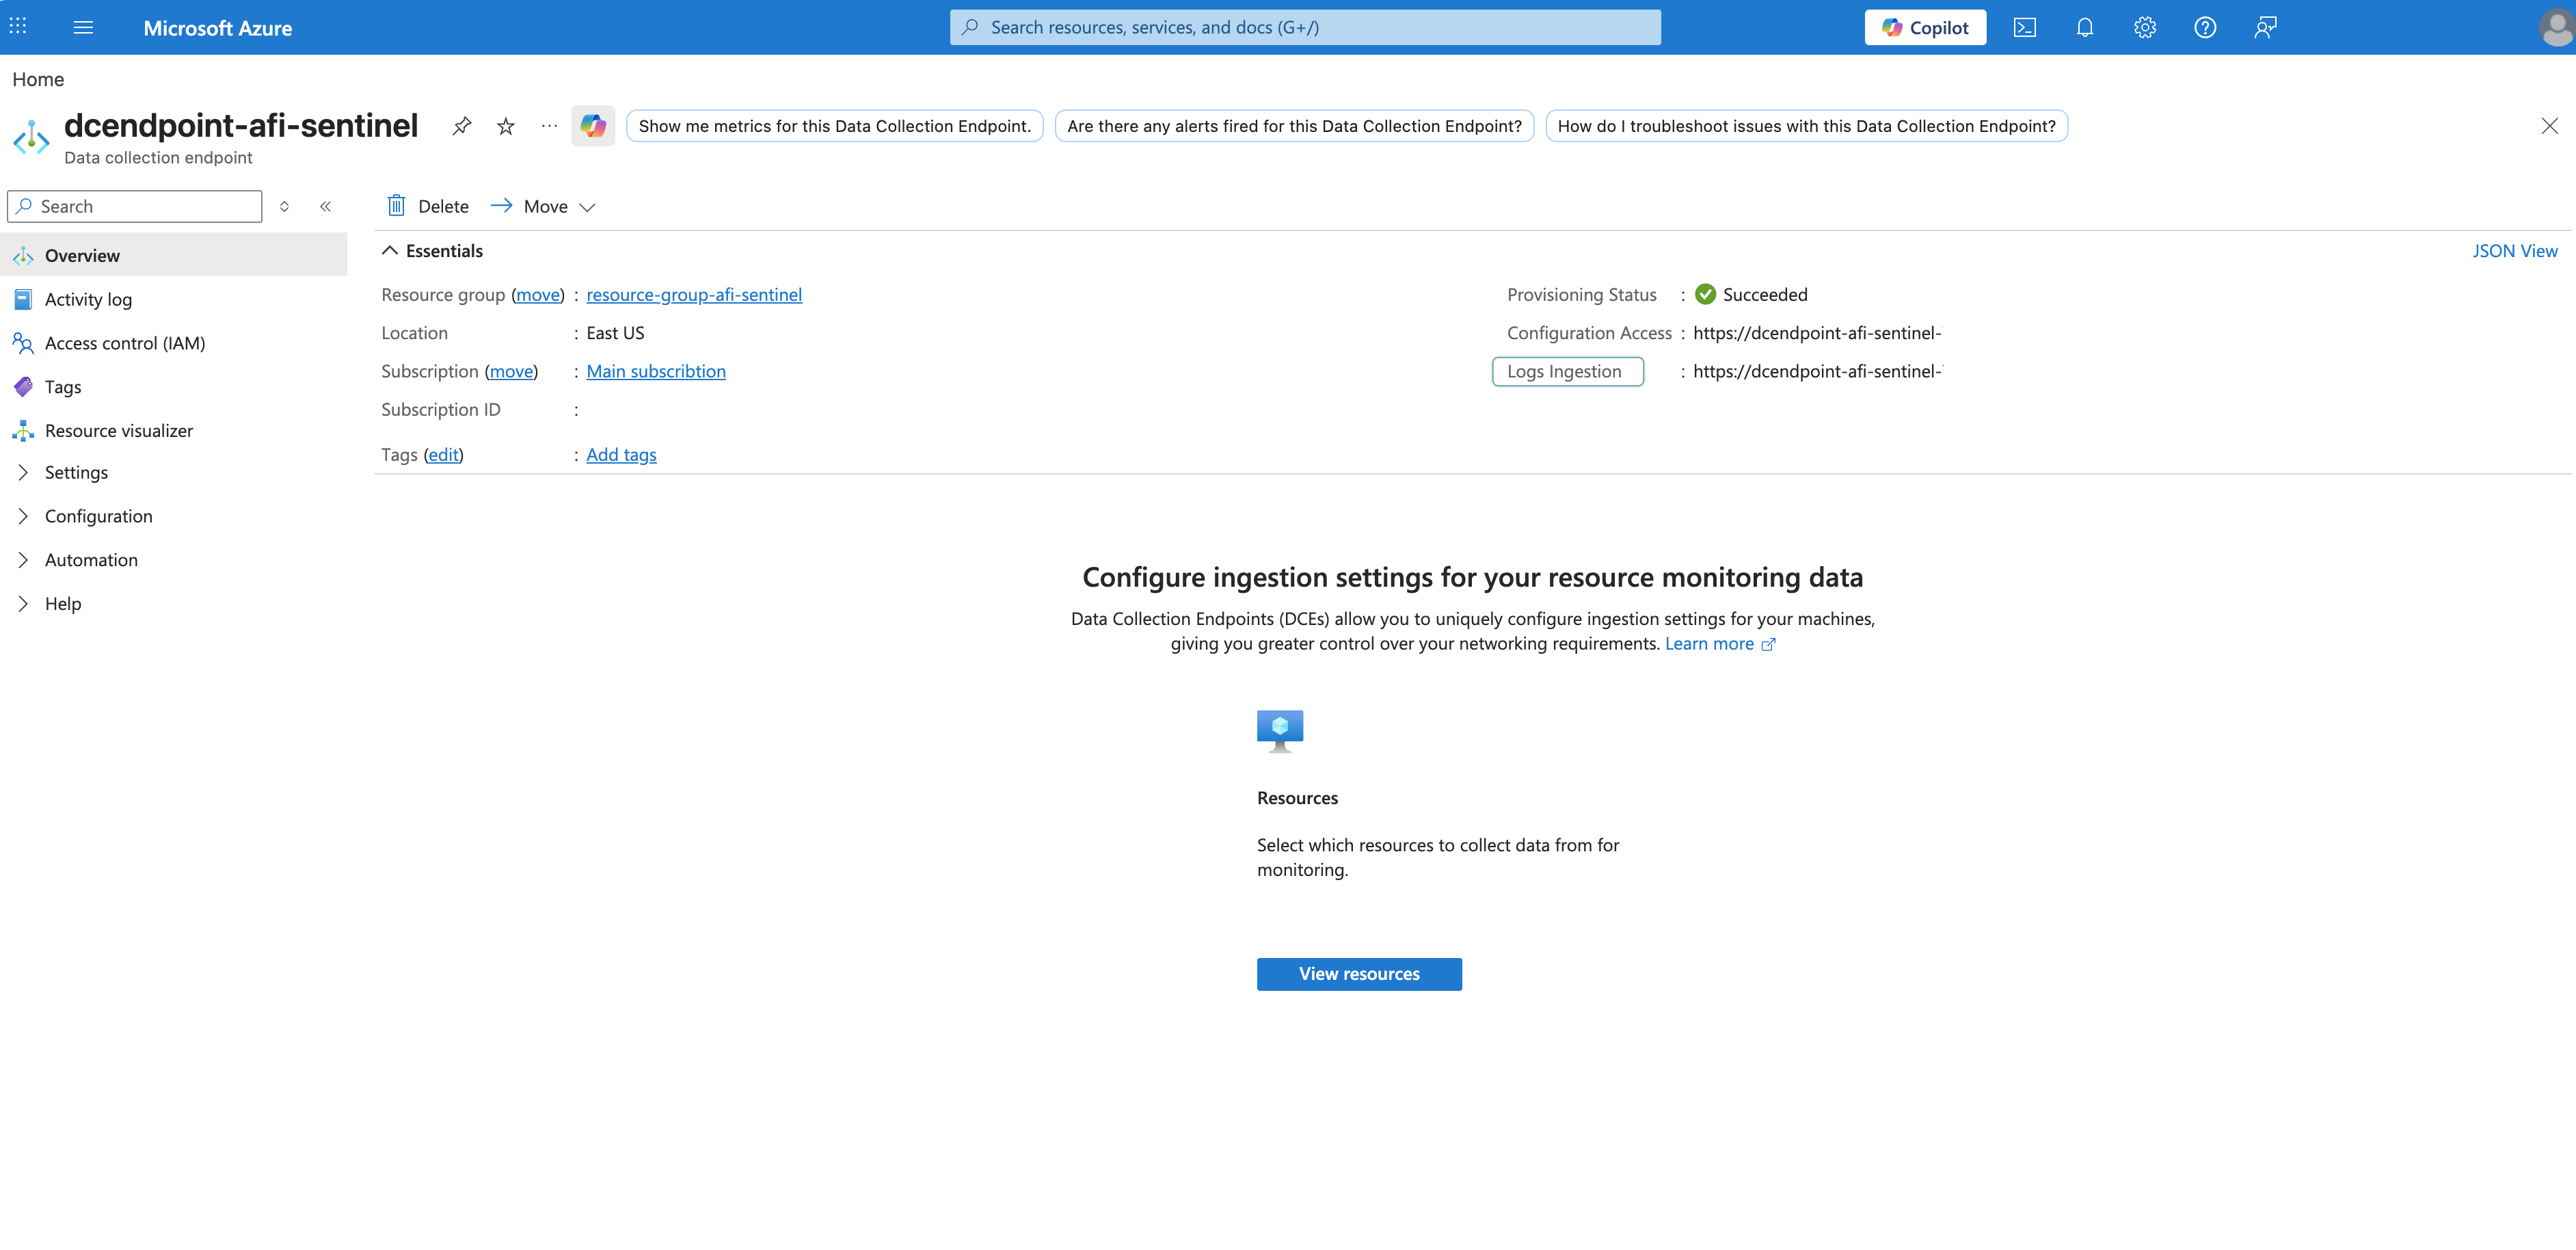
Step 2 - Get Data collection endpoint Logs Ingestion URI
- Open your endpoint (e.g.,
dcendpoint-afi-sentinel). - Go to Overview.
- Copy Logs Ingestion:
-
Save this for later — you'll need it to build the URI in the "HTTP" action step.
Part 3: Create Data collection rule and Custom Table
Step 1 - Create Data collection rule and define Custom Table
-
Go to Log Analytics workspaces and open your workspace (e.g.,
logaw-afi-sentinel).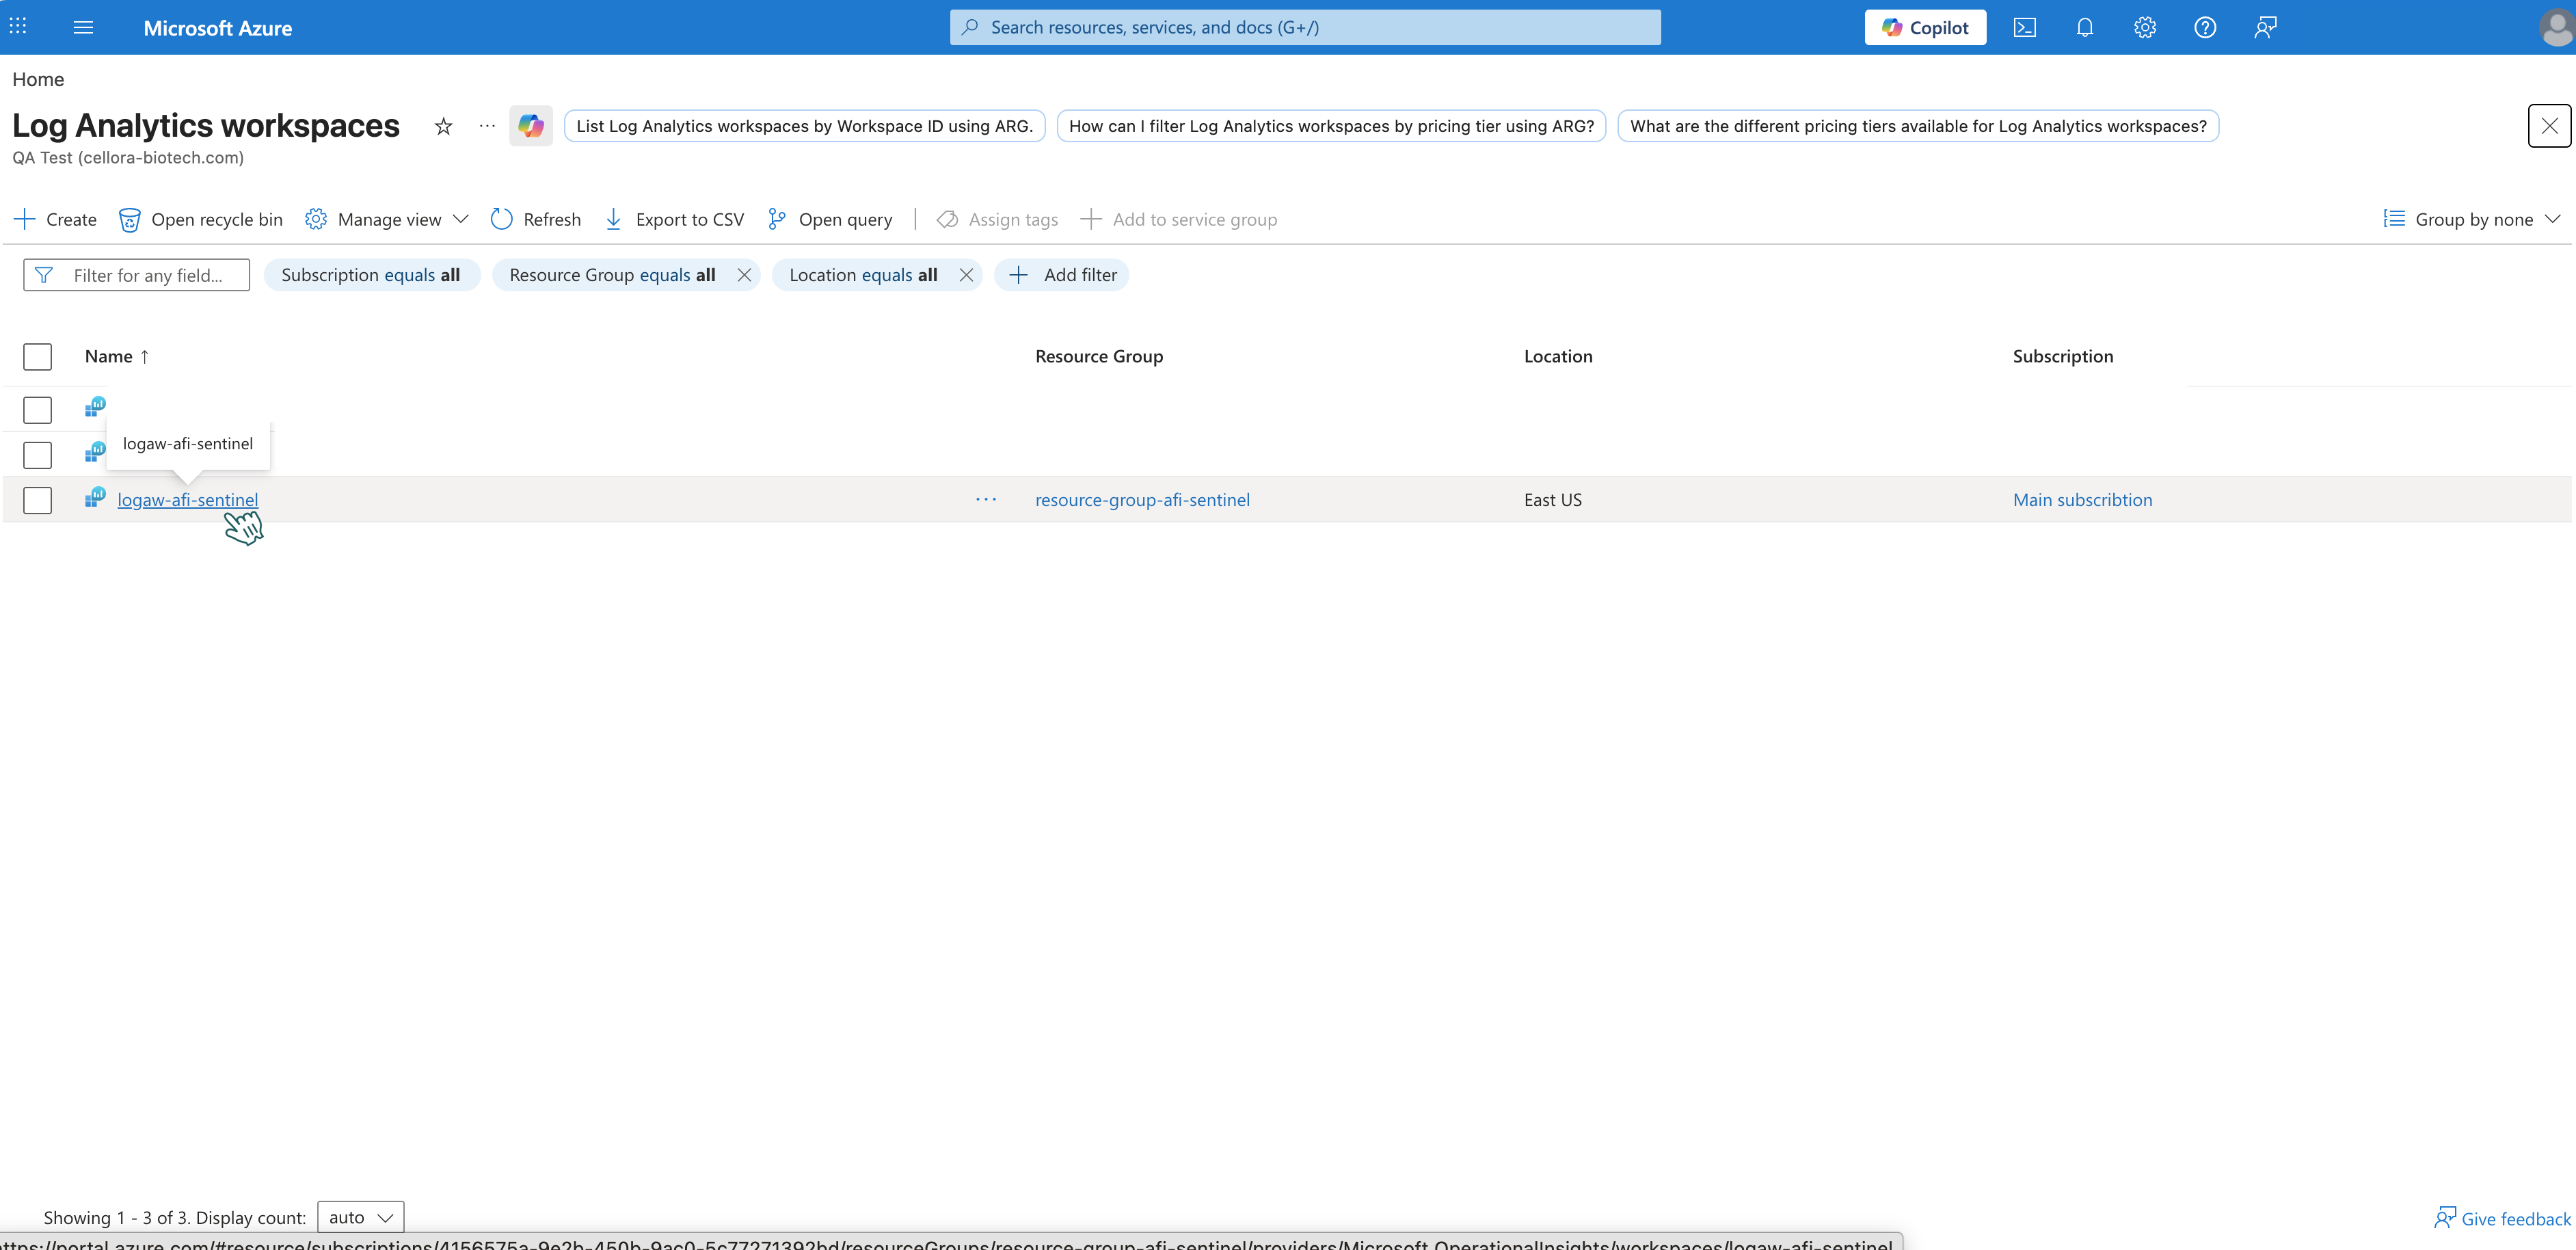
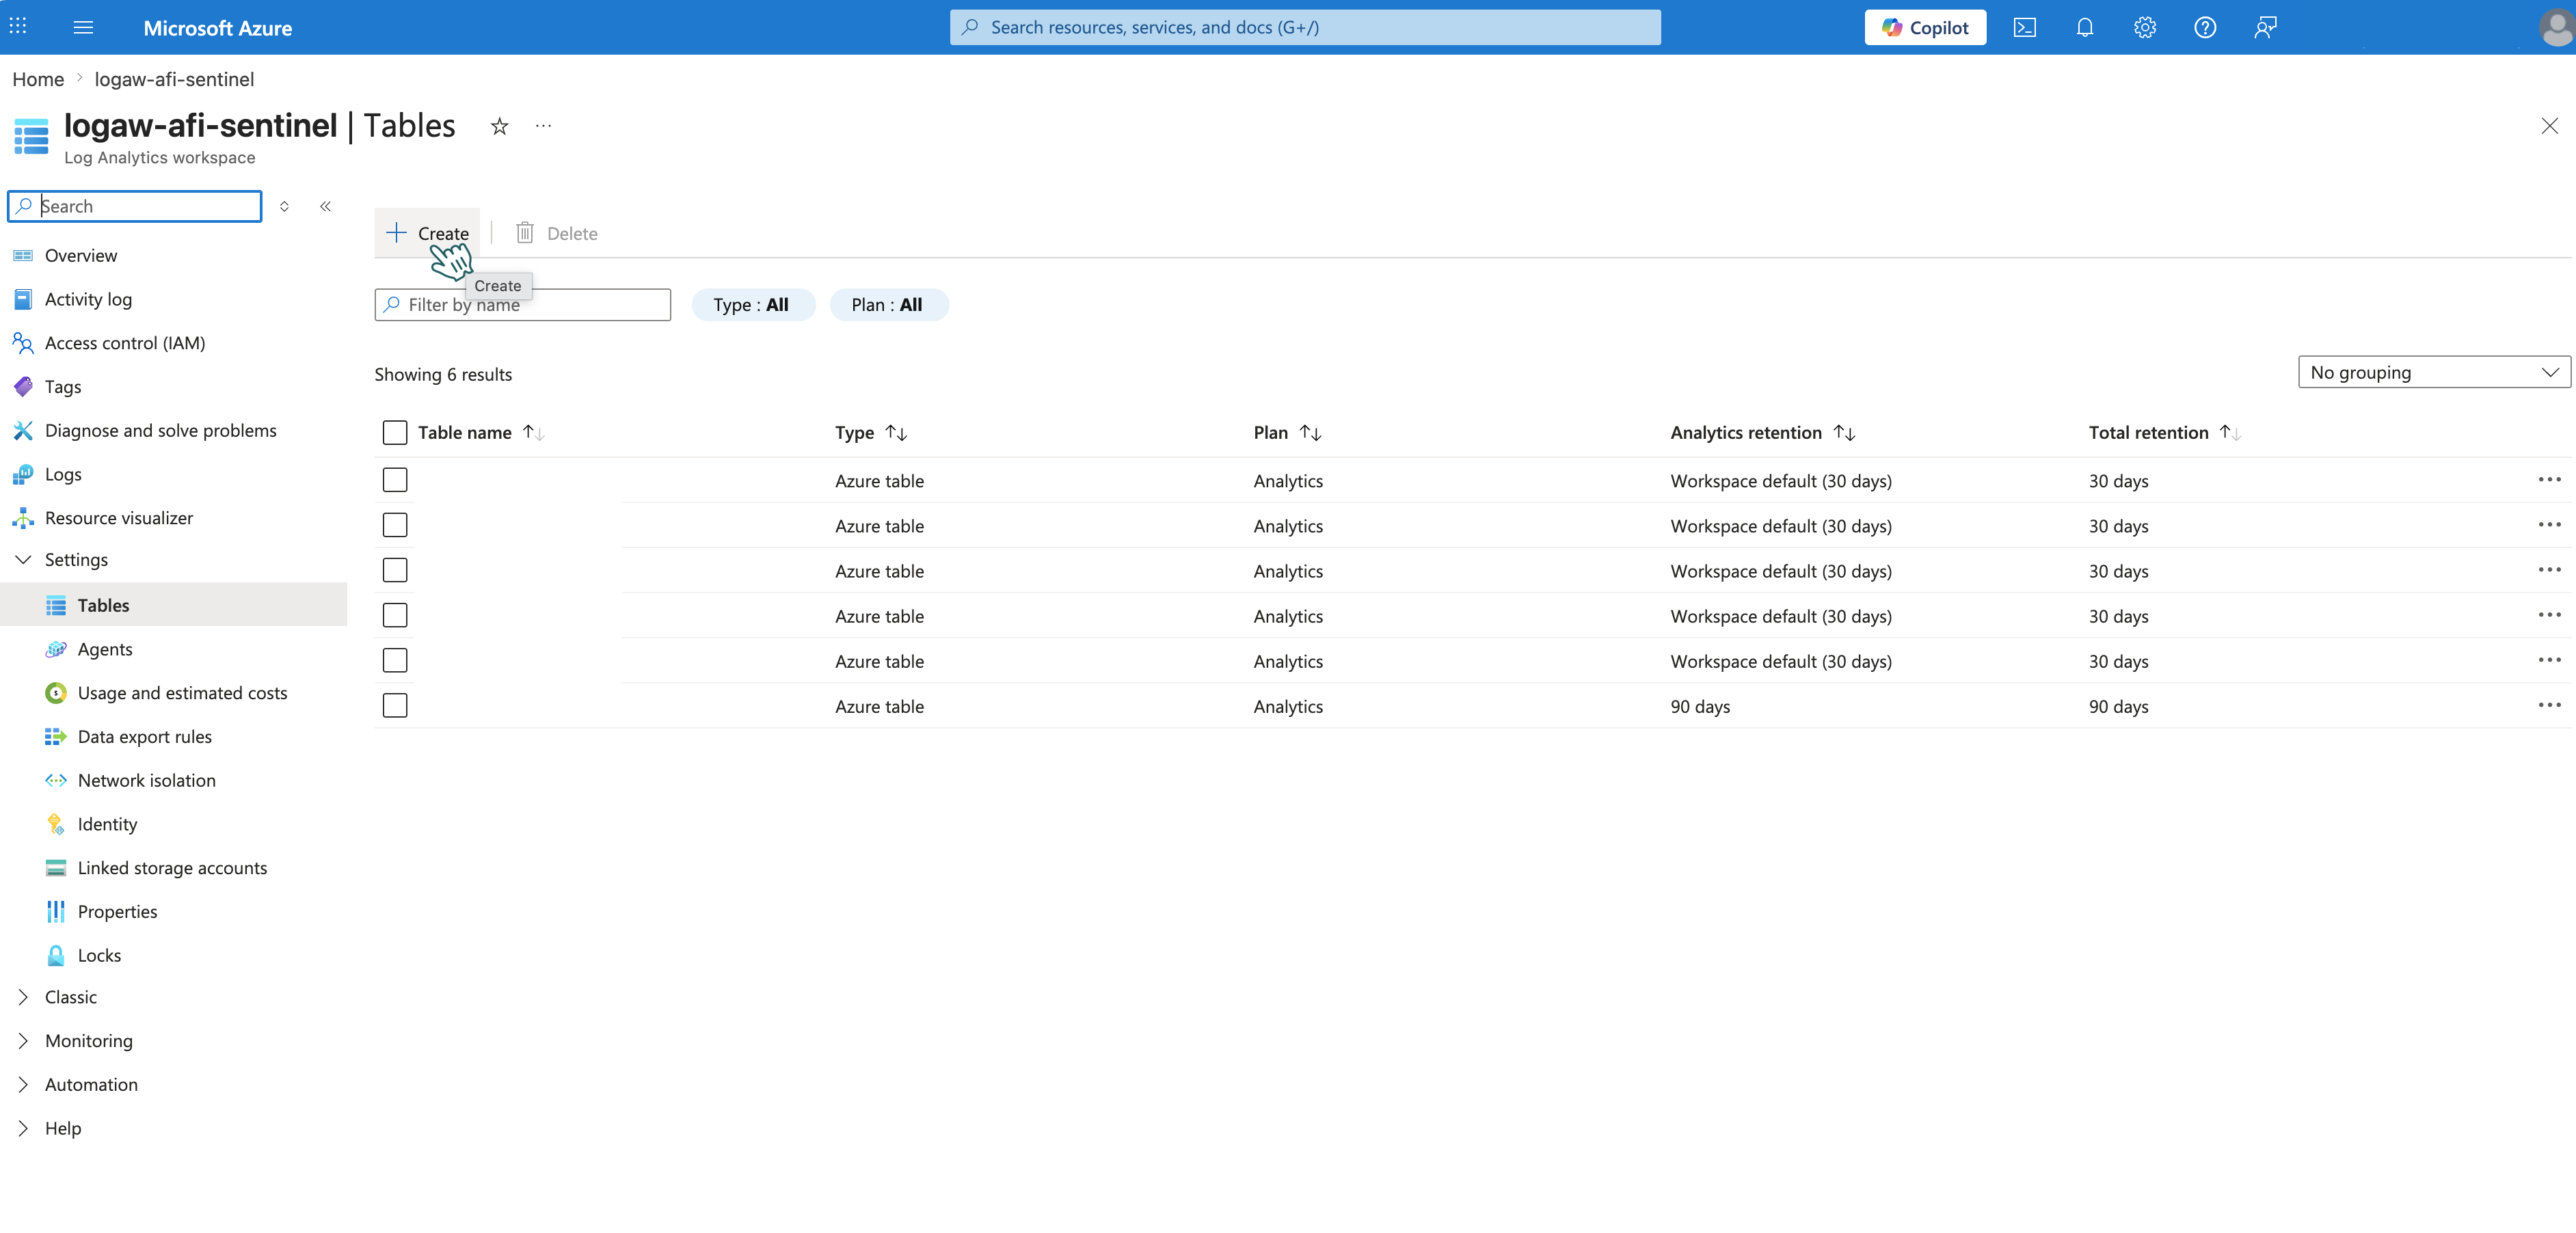
-
In the left menu, navigate to Settings → Tables.
-
Click + Create to open the creation wizard.
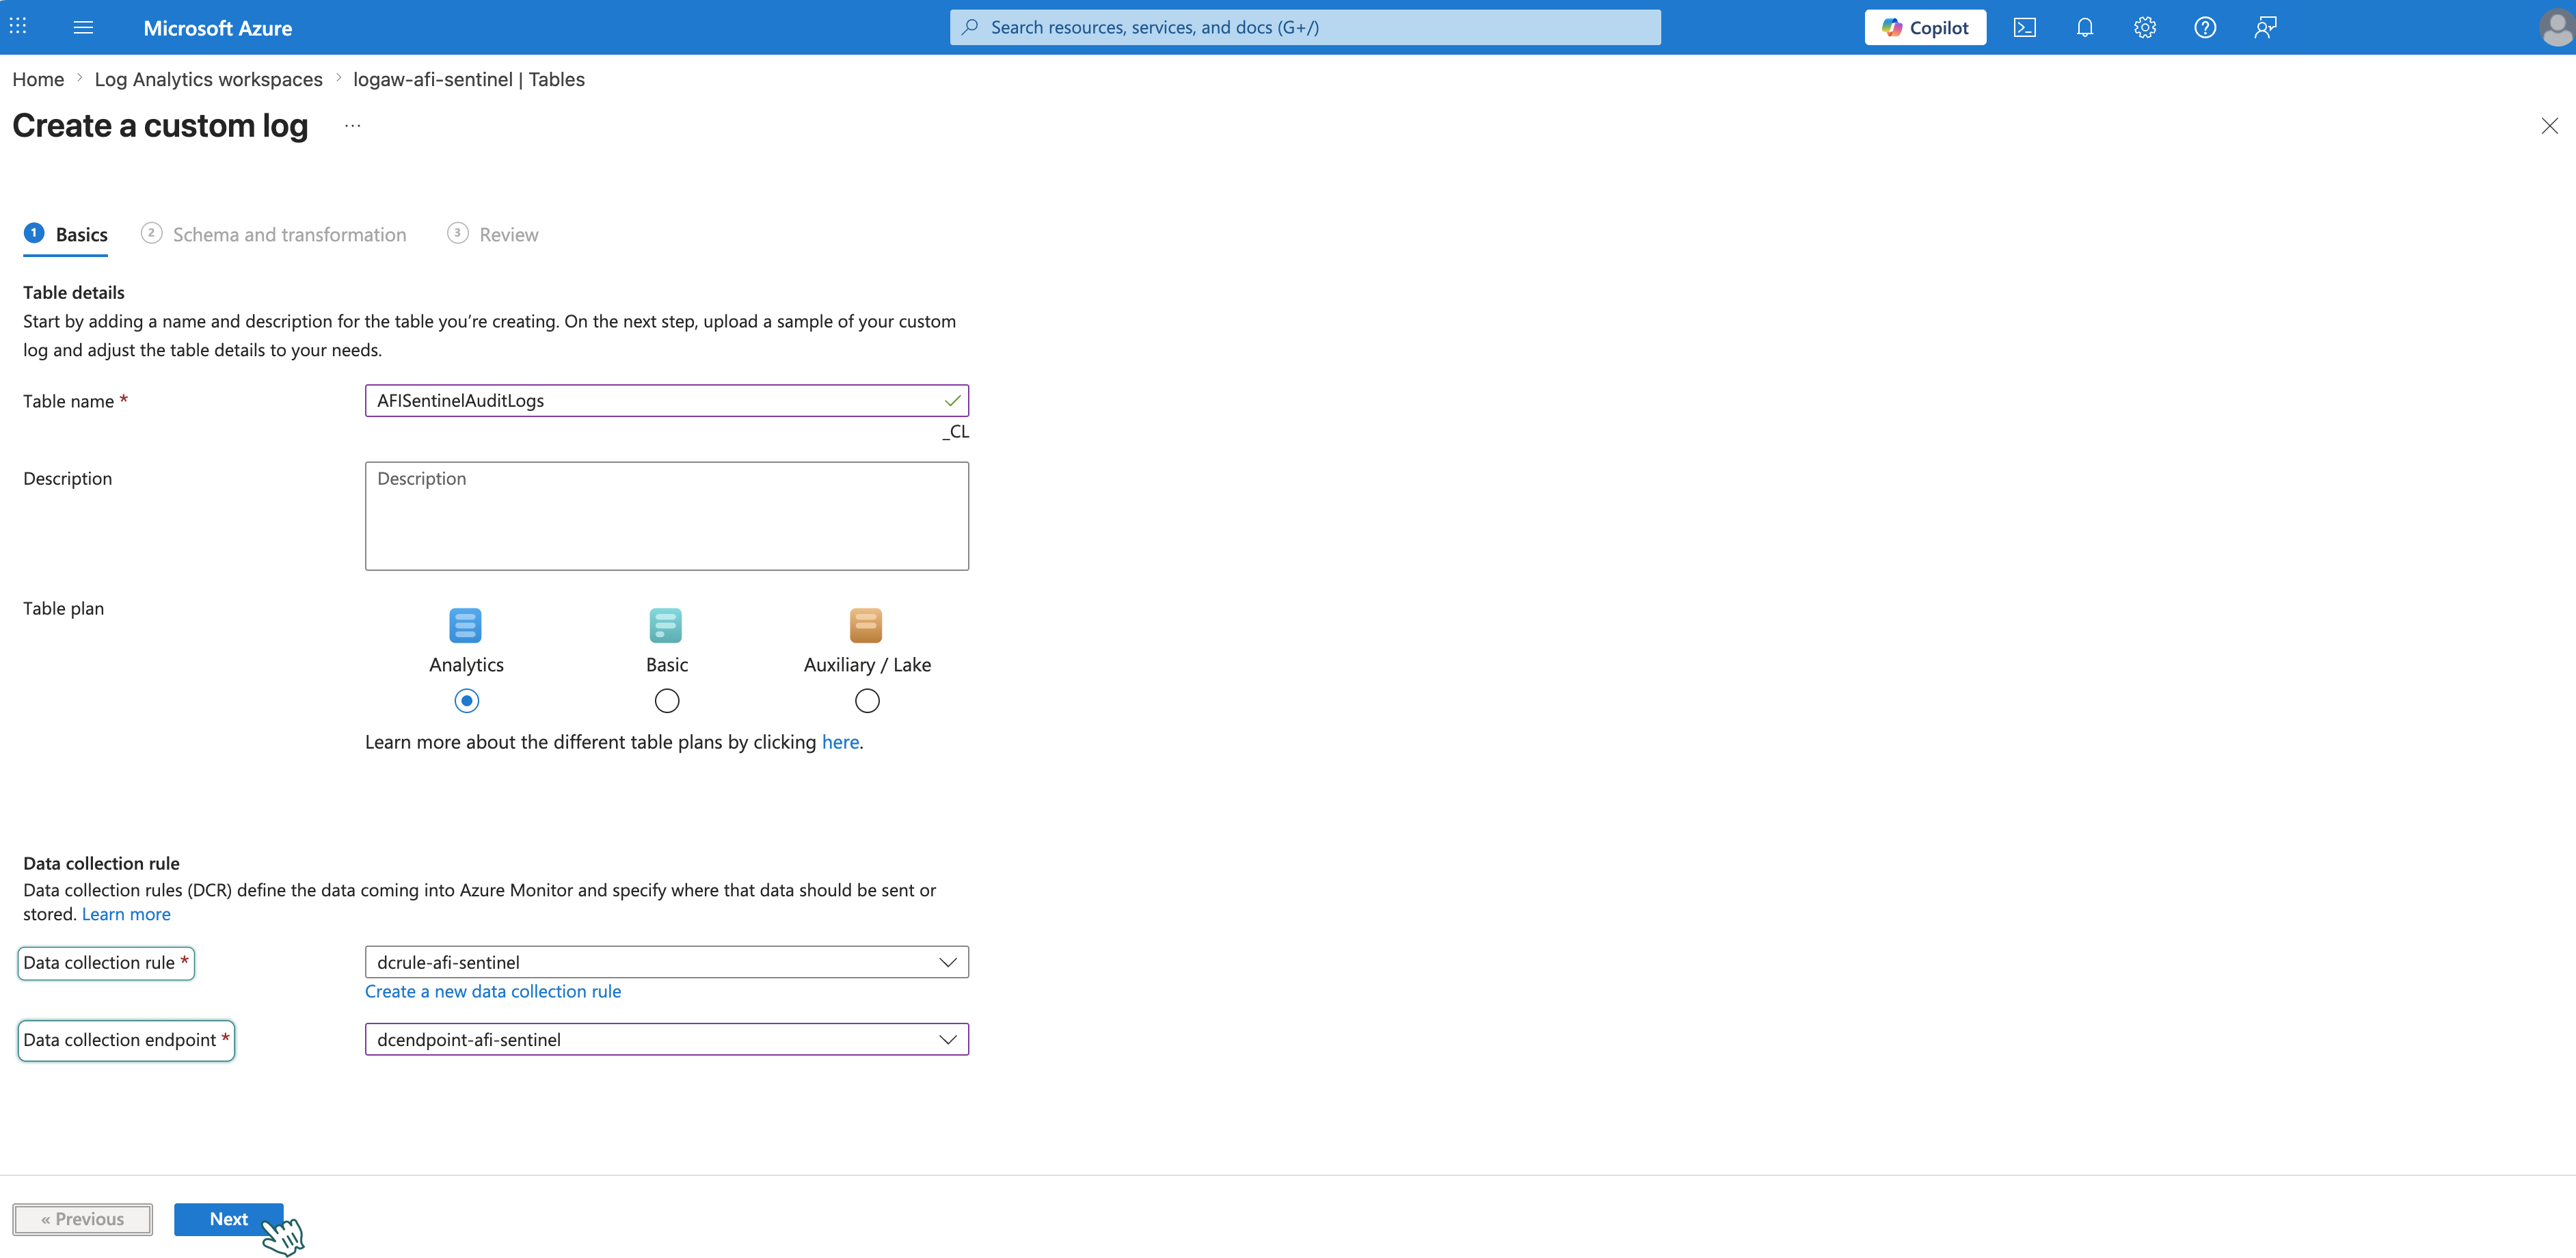
Basic Tab
-
Set Table name:
AfiSentinelAuditLogs.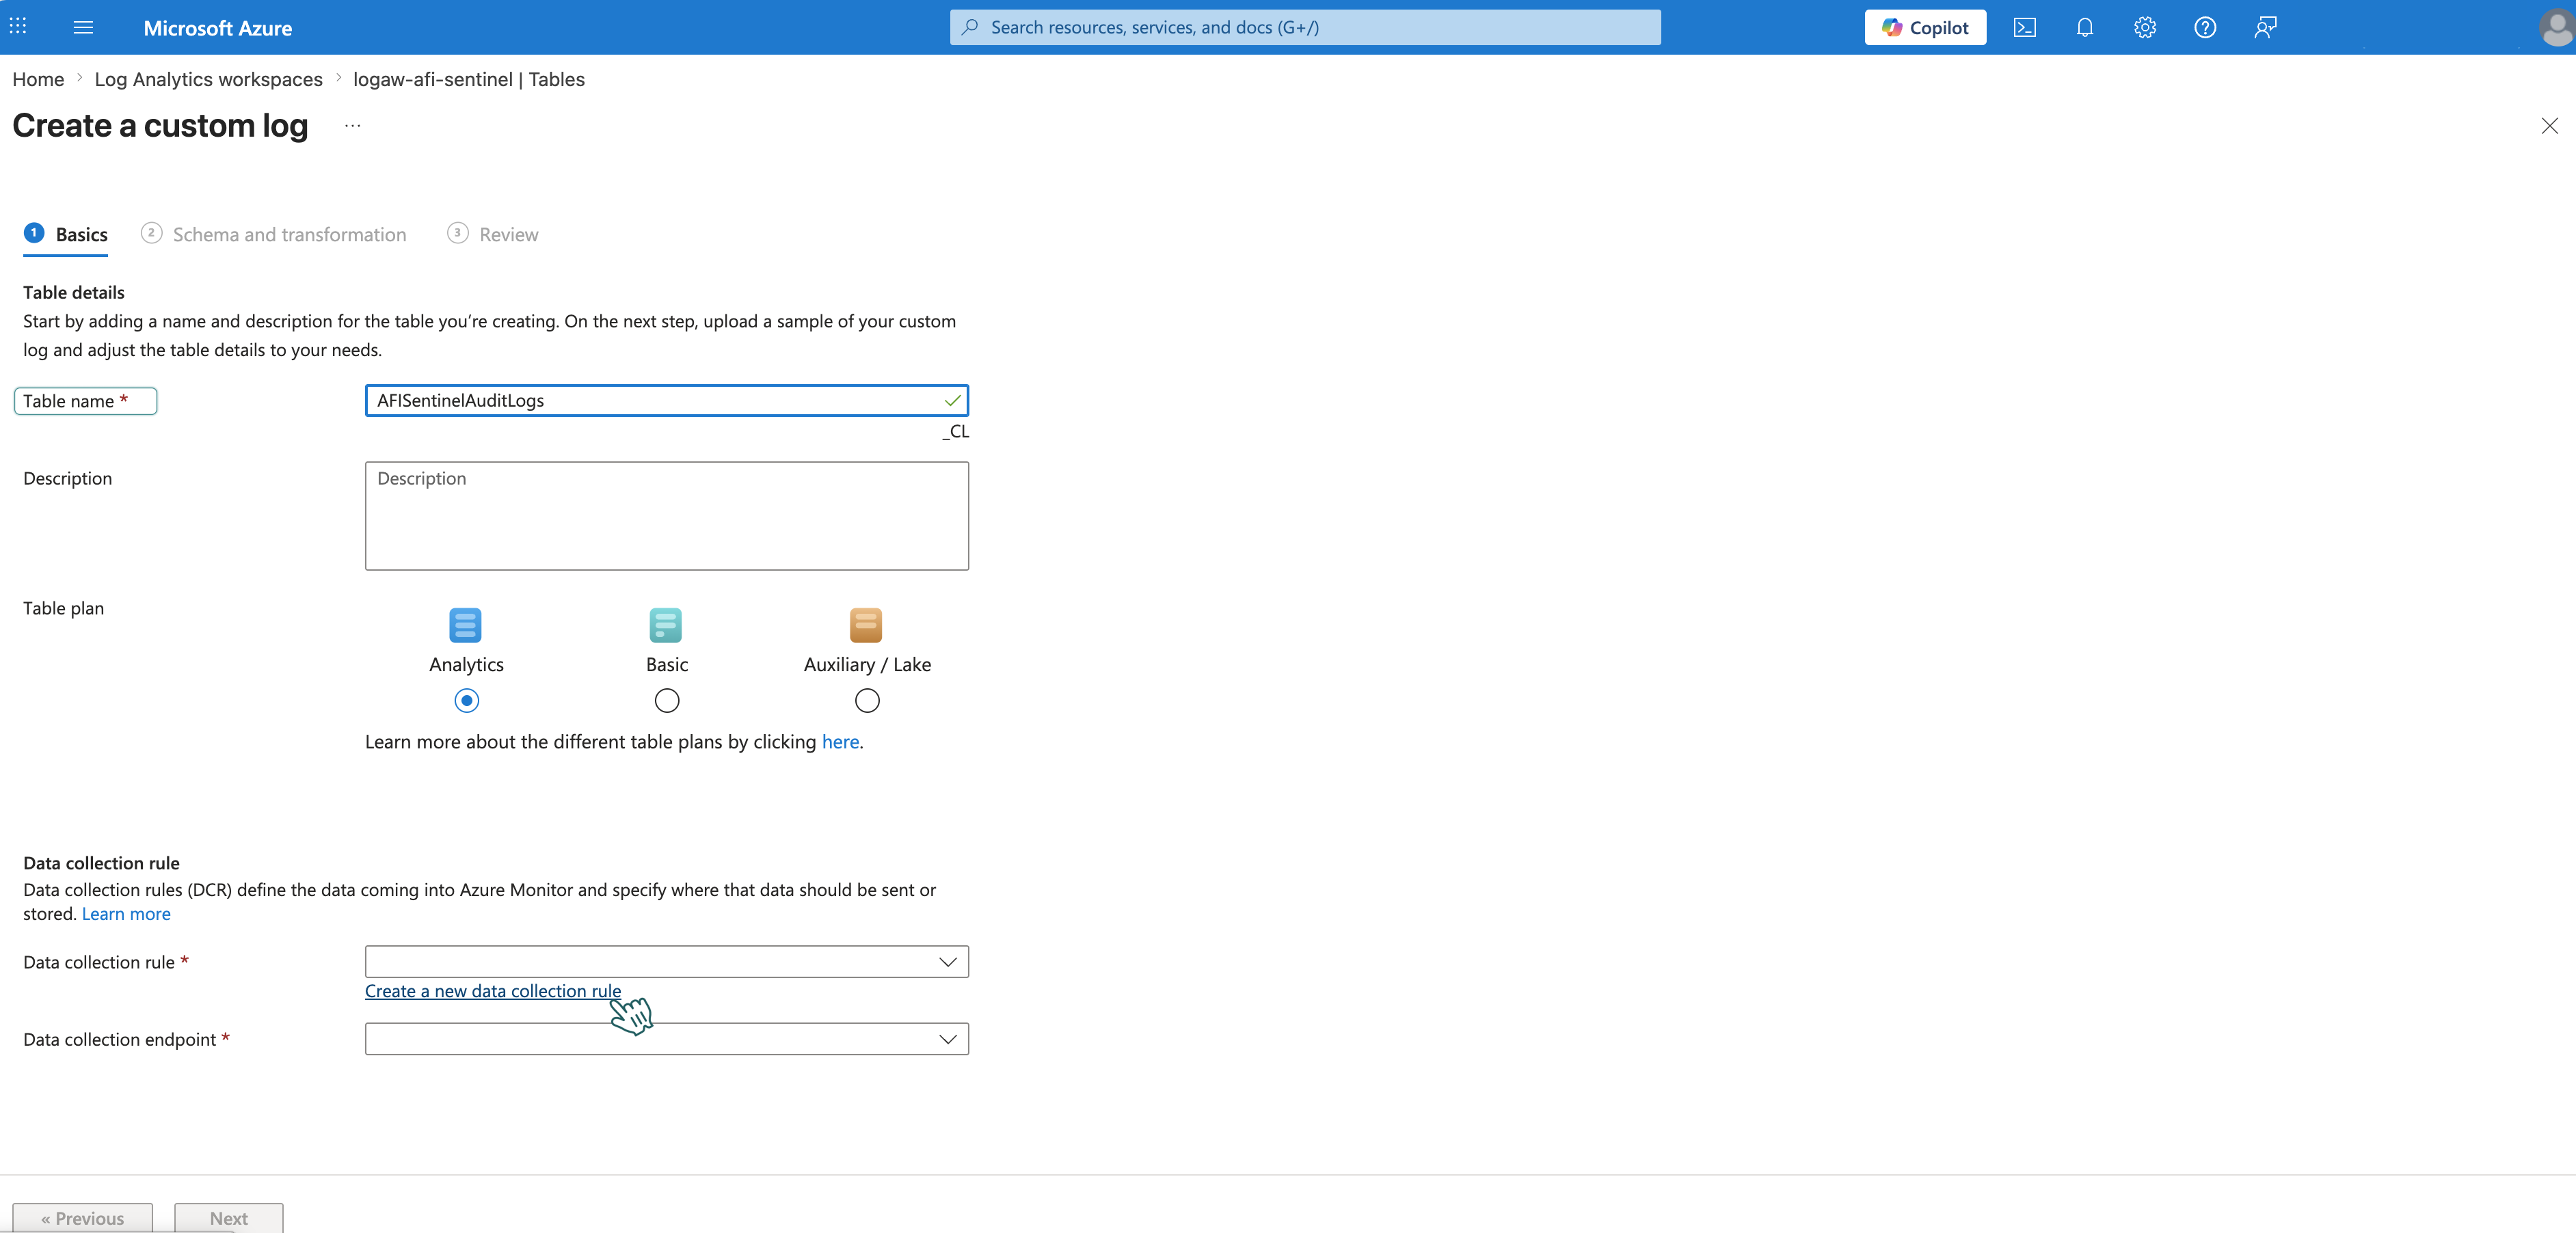
-
For Data collection rule, click Create a new data collection rule:
- Subscription: Your subscription
- Resource group:
resource-group-afi-sentinel - Region: Same as your Log Analytics workspace (e.g., East US)
- Name:
dcrule-afi-sentinel - Click Done.
- For Data collection endpoint, select
dcendpoint-afi-sentinel. -
Click Next.
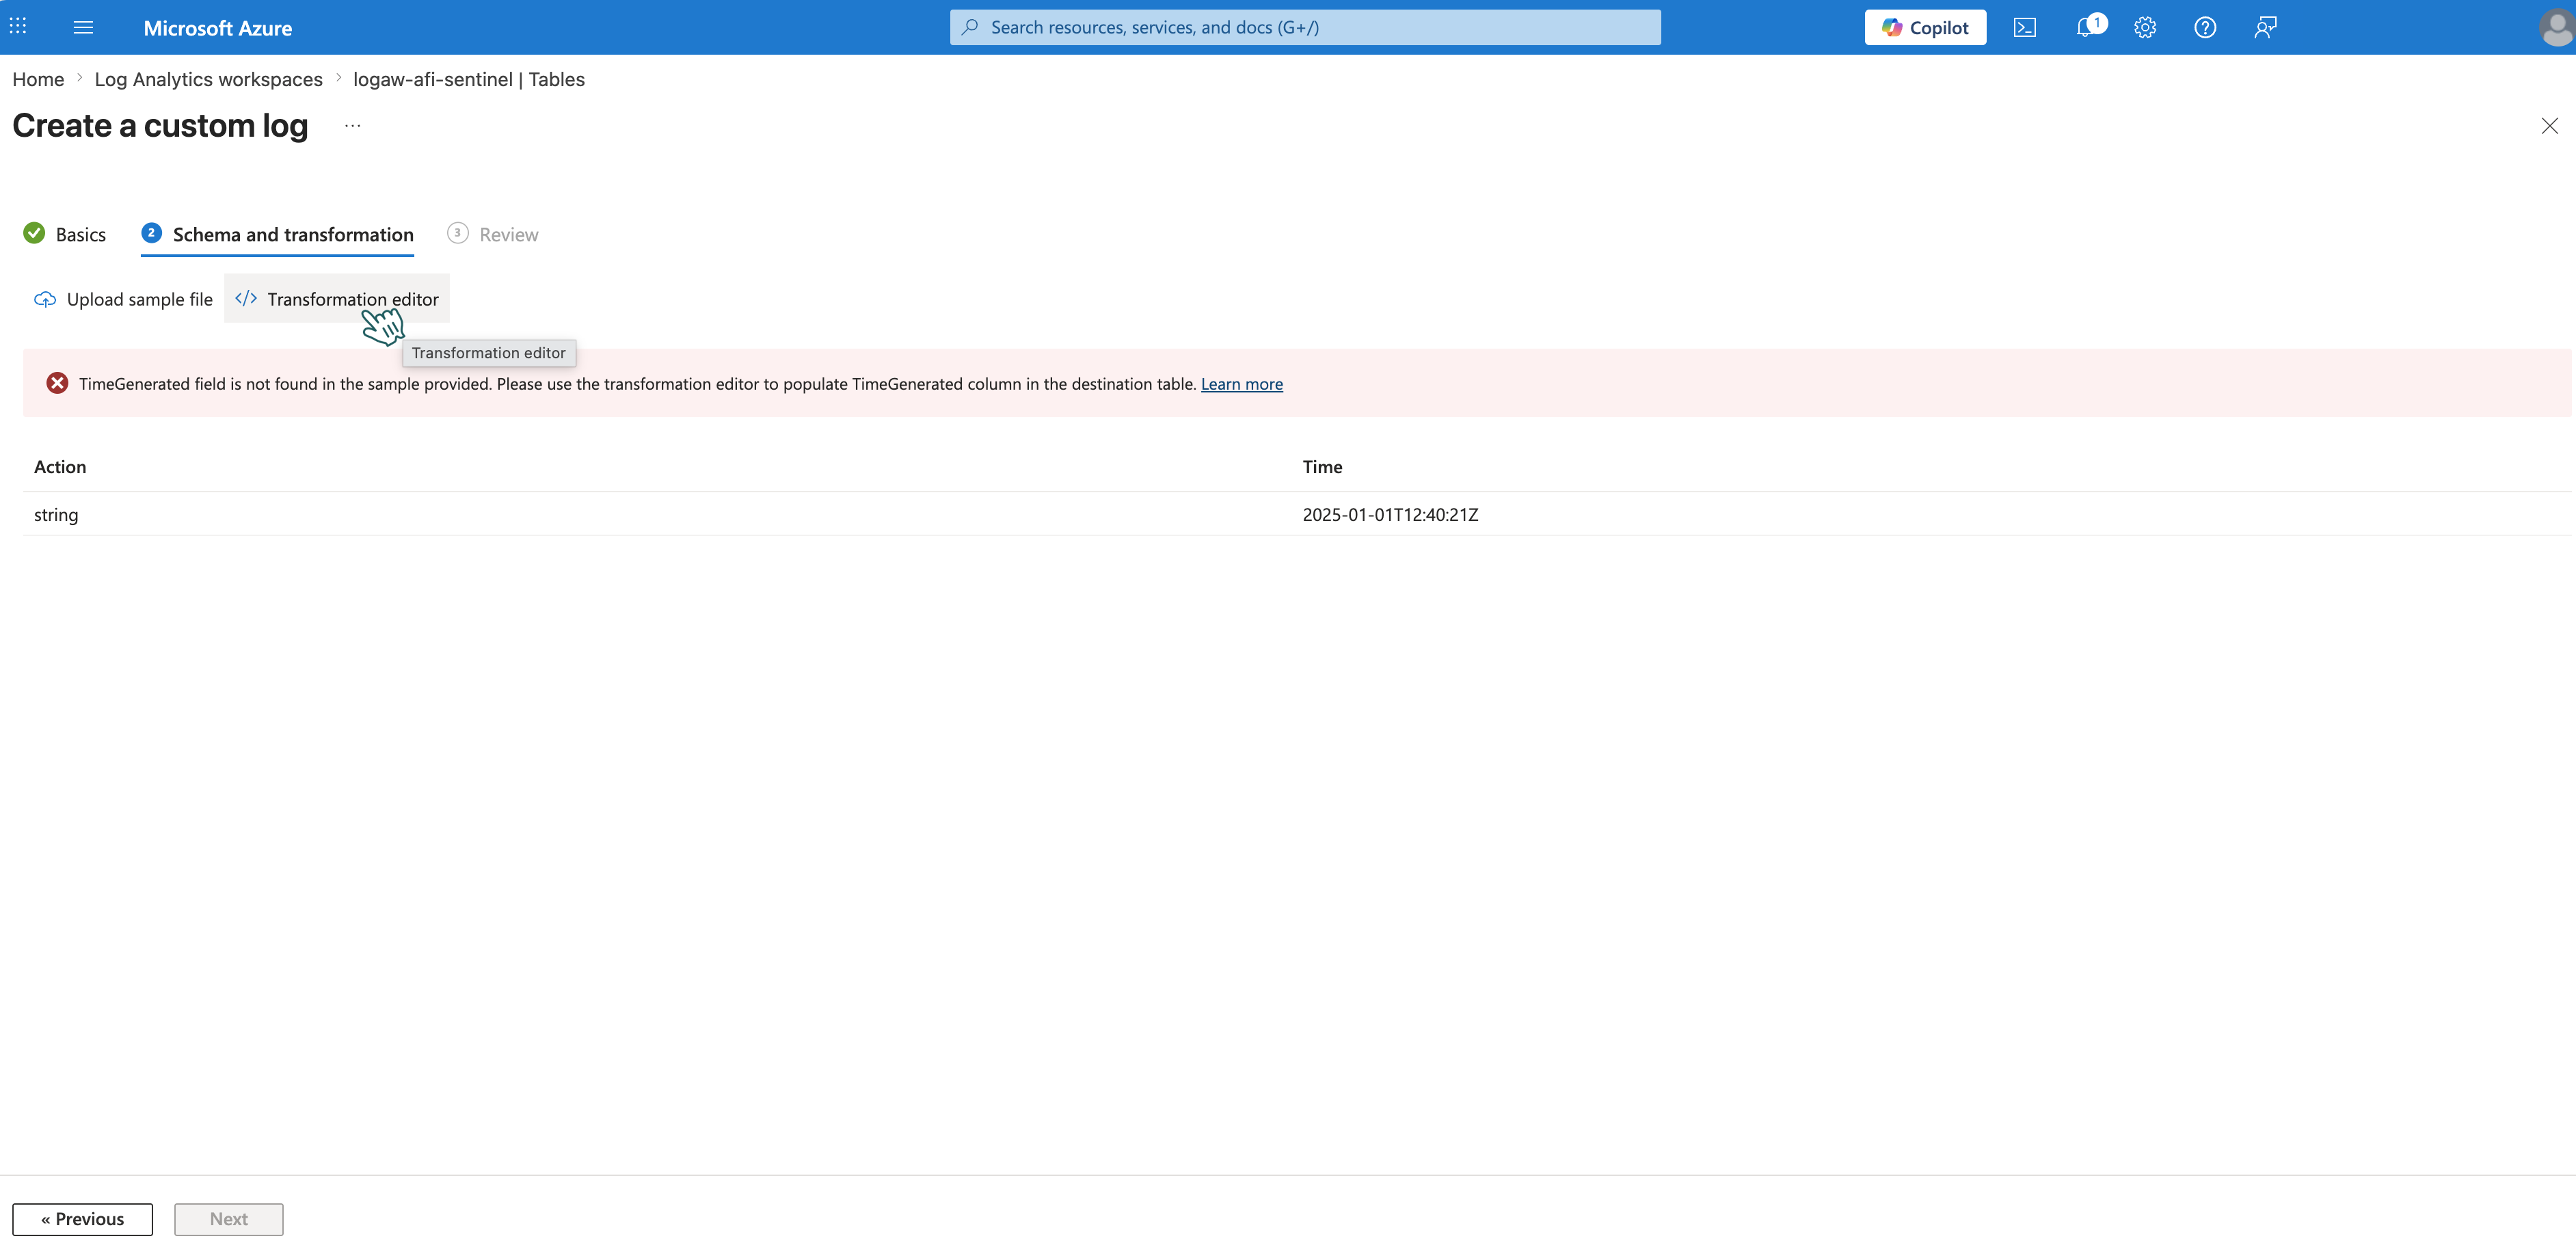
Schema Tab
-
Create a file
afi-sample.jsonwith the following content:{ "Action": "browse", "Actor": "JohnDoe", "ActorID": "JohnDoe", "ActorIP": "JohnDoe", "ActorName": "JohnDoe", "Details": { "content_preview": true }, "EventID": "JohnDoe", "Location": "JohnDoe", "Subject": "JohnDoe", "SubjectID": "JohnDoe", "SubjectKind": "JohnDoe", "TenantID": "JohnDoe", "TenantName": "JohnDoe", "Time": "2026-04-21T12:40:21Z" } -
Upload the file. Azure Monitor Logs will auto-detect the columns from your JSON sample. You'll see an error about the TimeGenerated field — this is expected. Click Transformation editor to fix it.
-
In the query editor, replace the default
sourcequery with: -
Click Run, then Apply.
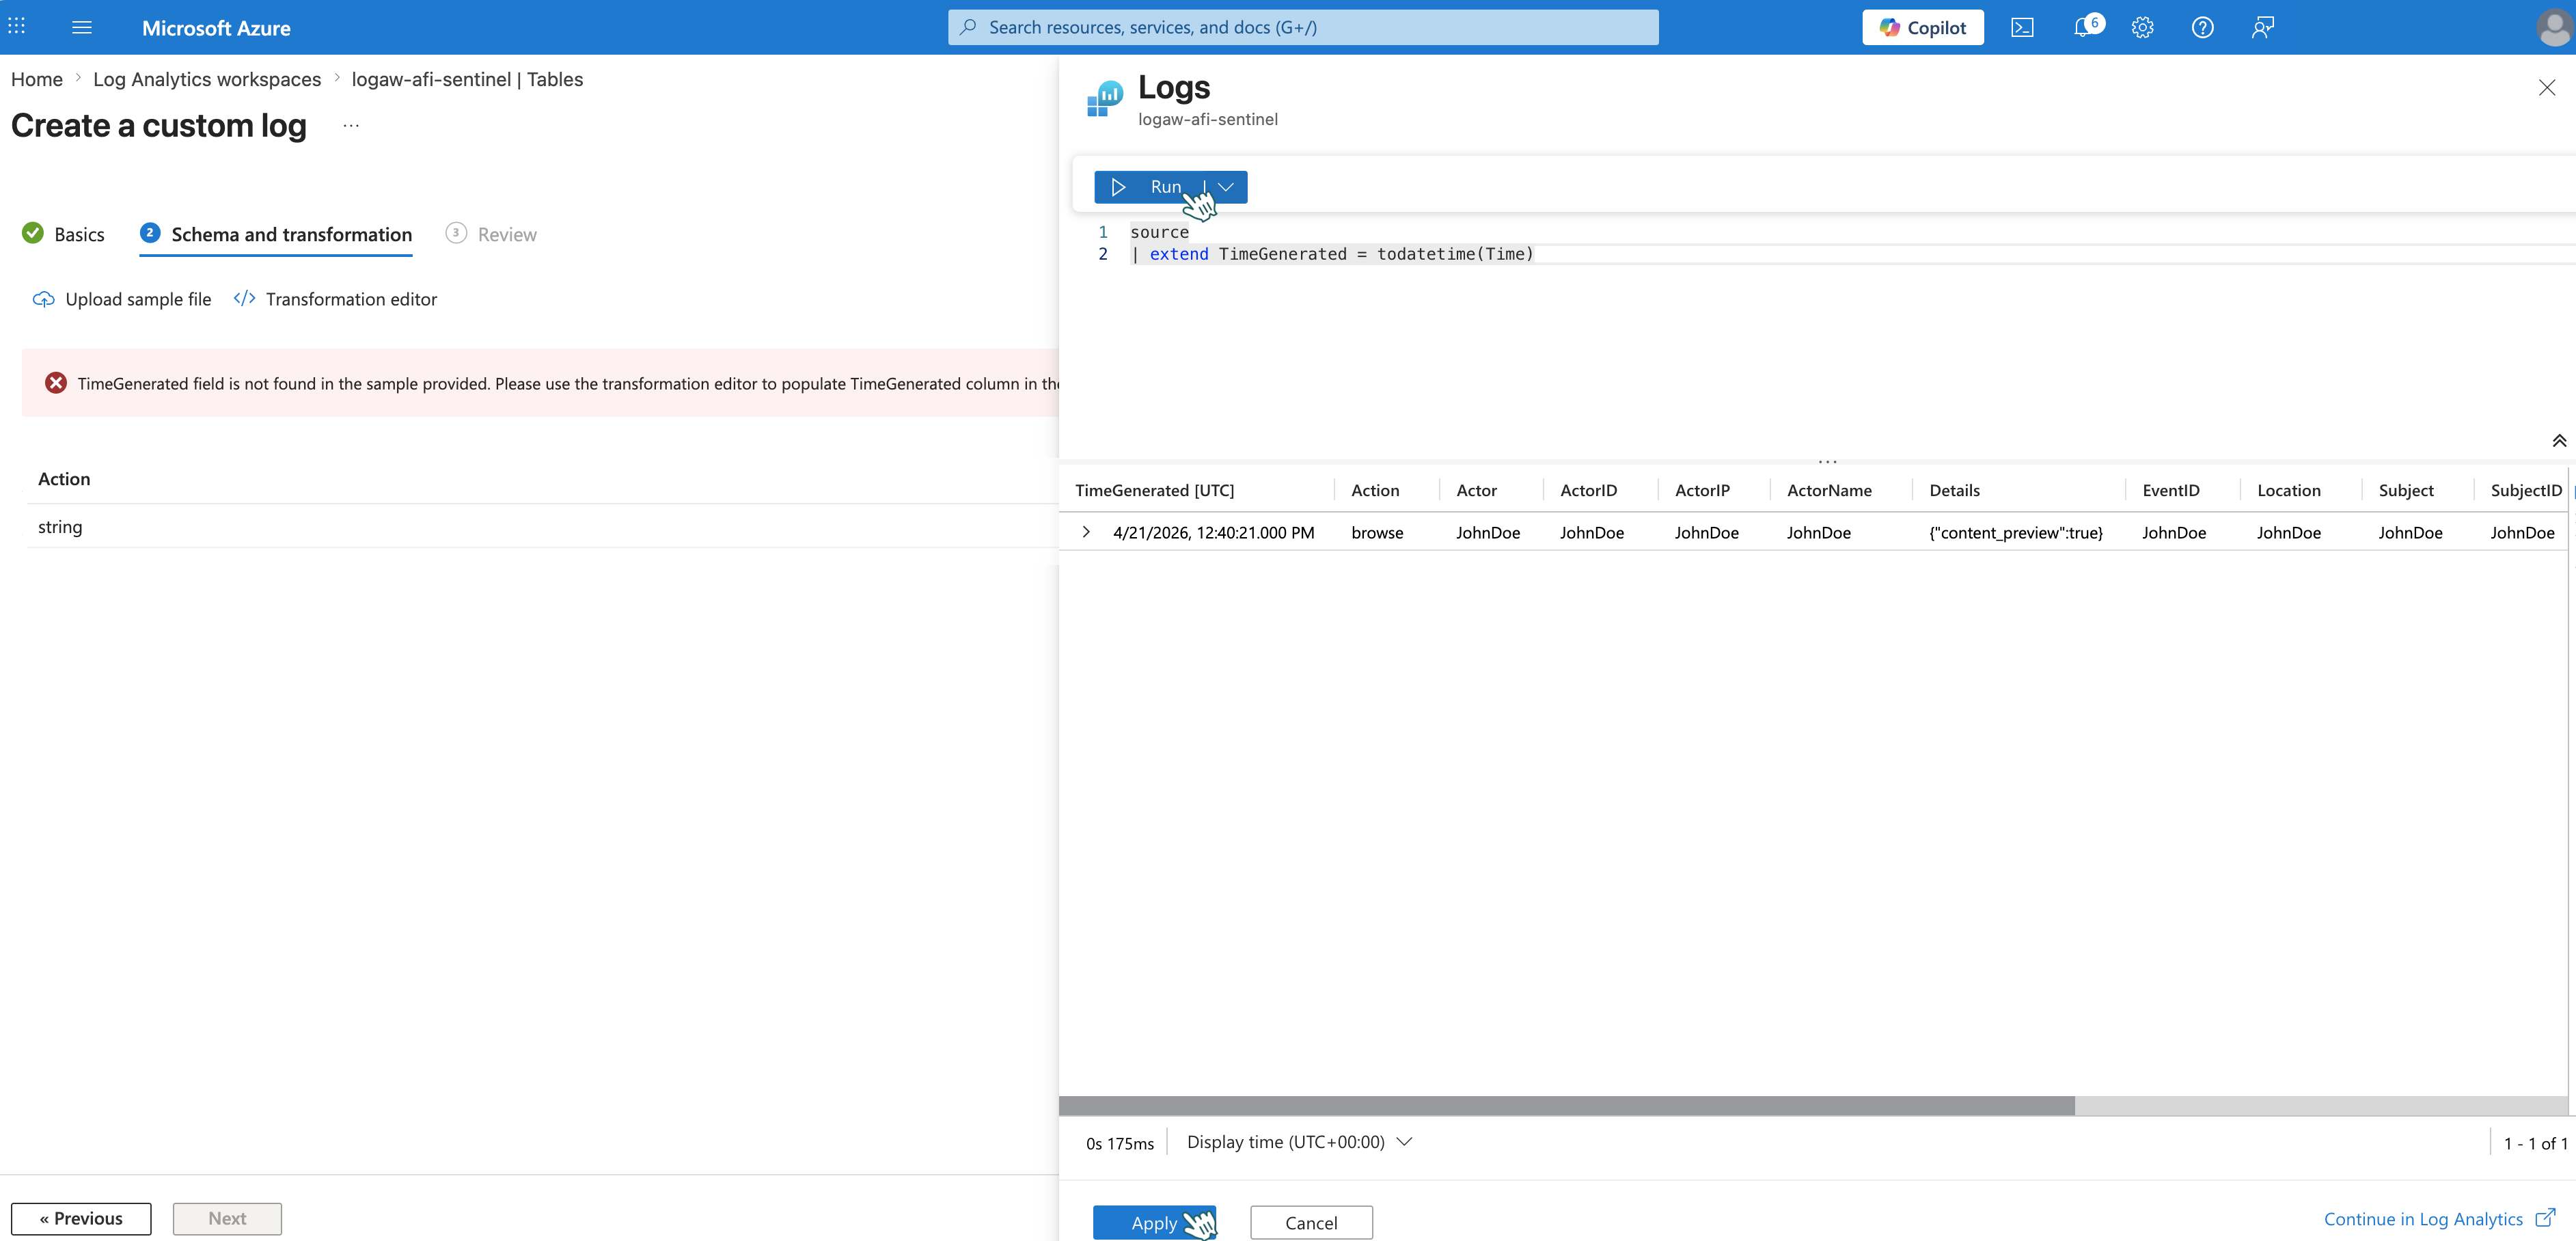
Info
Azure Monitor Logs uses the TimeGenerated field for time-based filtering and summarization. Include it to preserve accurate event timestamps.
-
Click Next → Create.
Step 2 - Get Data collection rule values
You'll need two values from the Data collection rule to configure the Logic App HTTP action.
- In Azure Portal, search for Data collection rules and open your rule (e.g.,
dcrule-afi-sentinel). -
Click JSON View in the top right corner to see the raw JSON configuration.
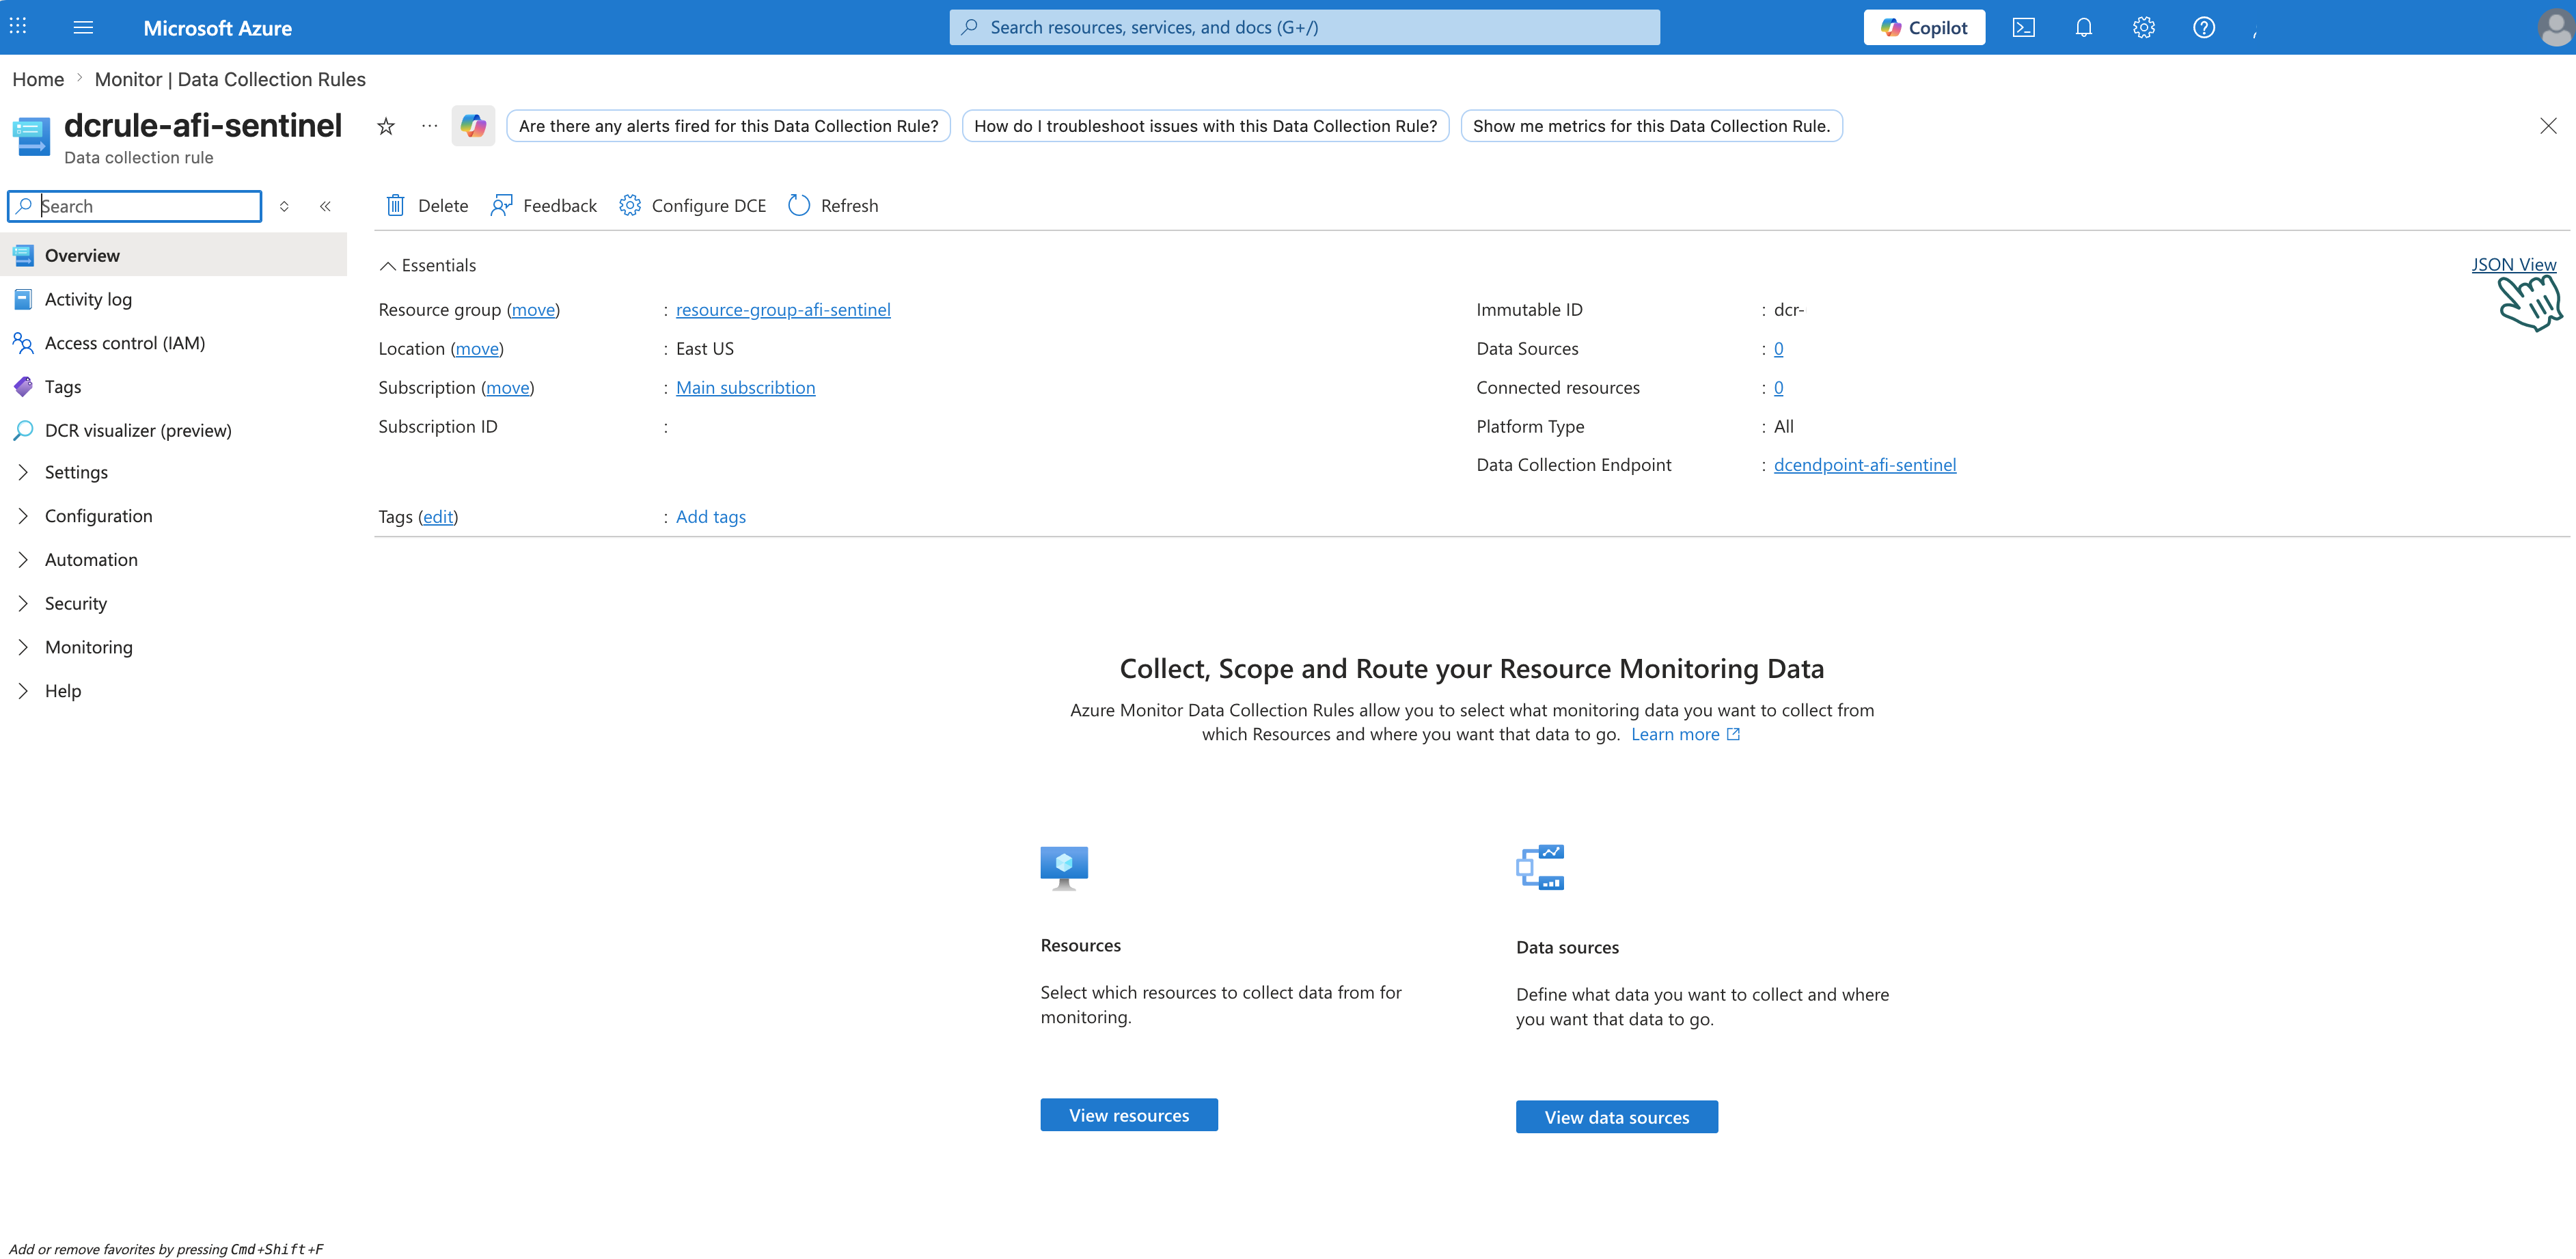
-
Search (Ctrl+F) for and save this for later — you'll need it to build the URI in the "HTTP" action step:
Property Example immutableId dcr-abc123def456...streams Custom-AfiSentinelAuditLogs_CLNote: Stream name is case-sensitive!
Part 4: Create Logic App
Step 1 - Create Logic App
-
In Azure Portal, click Create a resource.
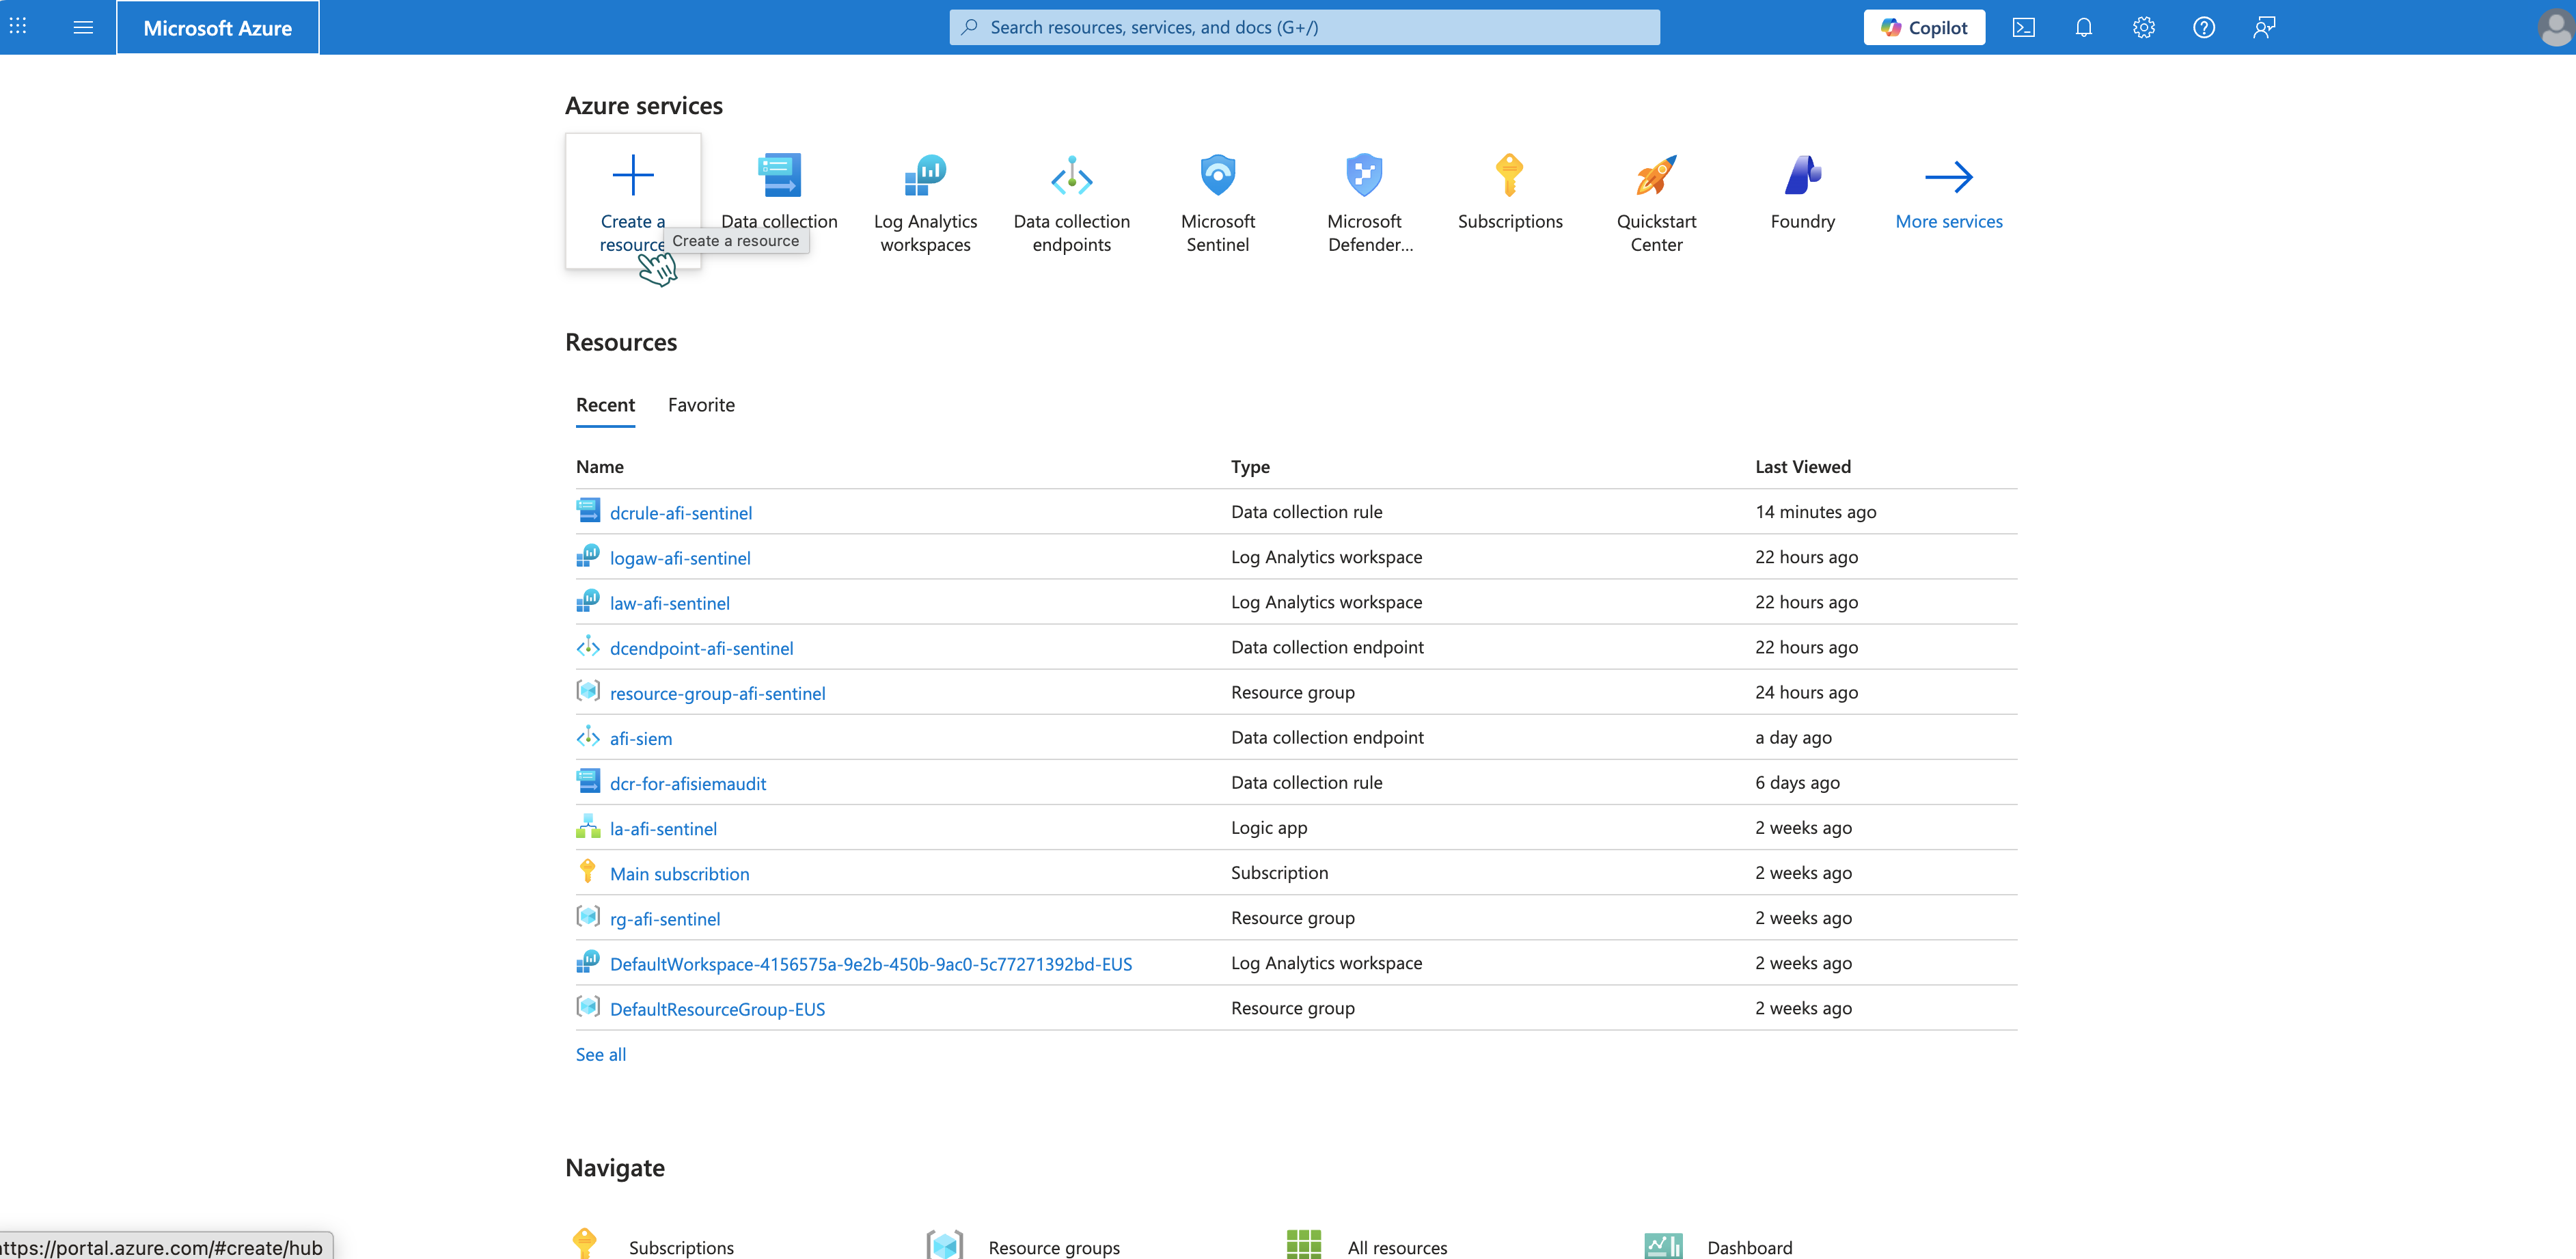
-
Search for Logic App and select it.
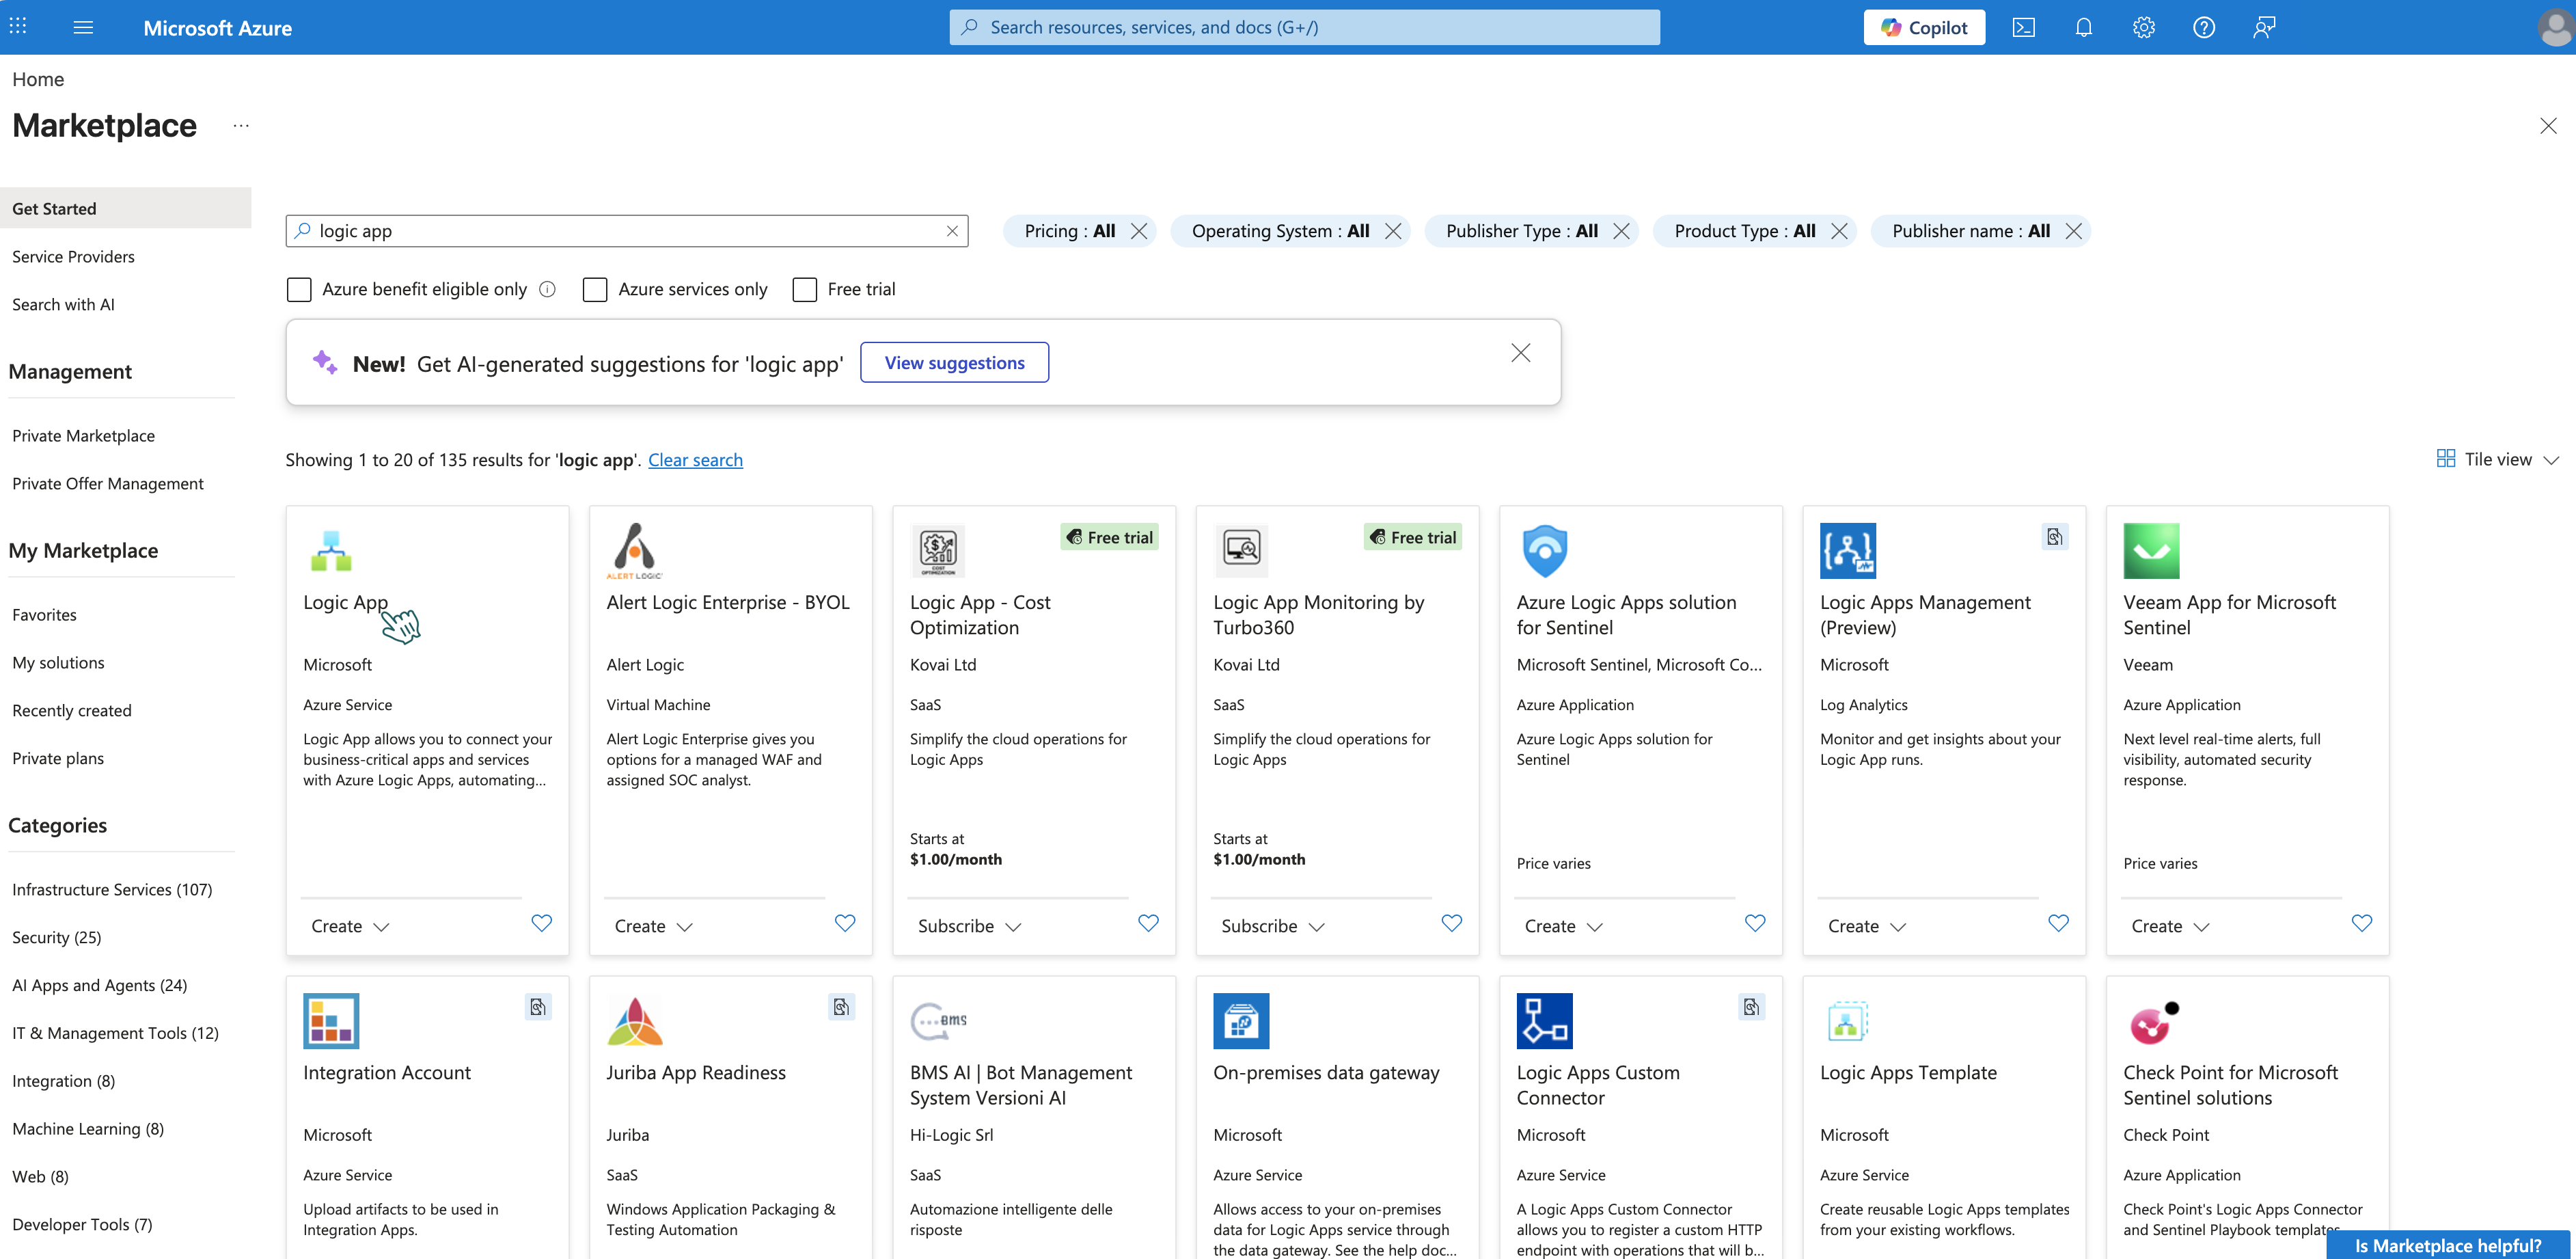
-
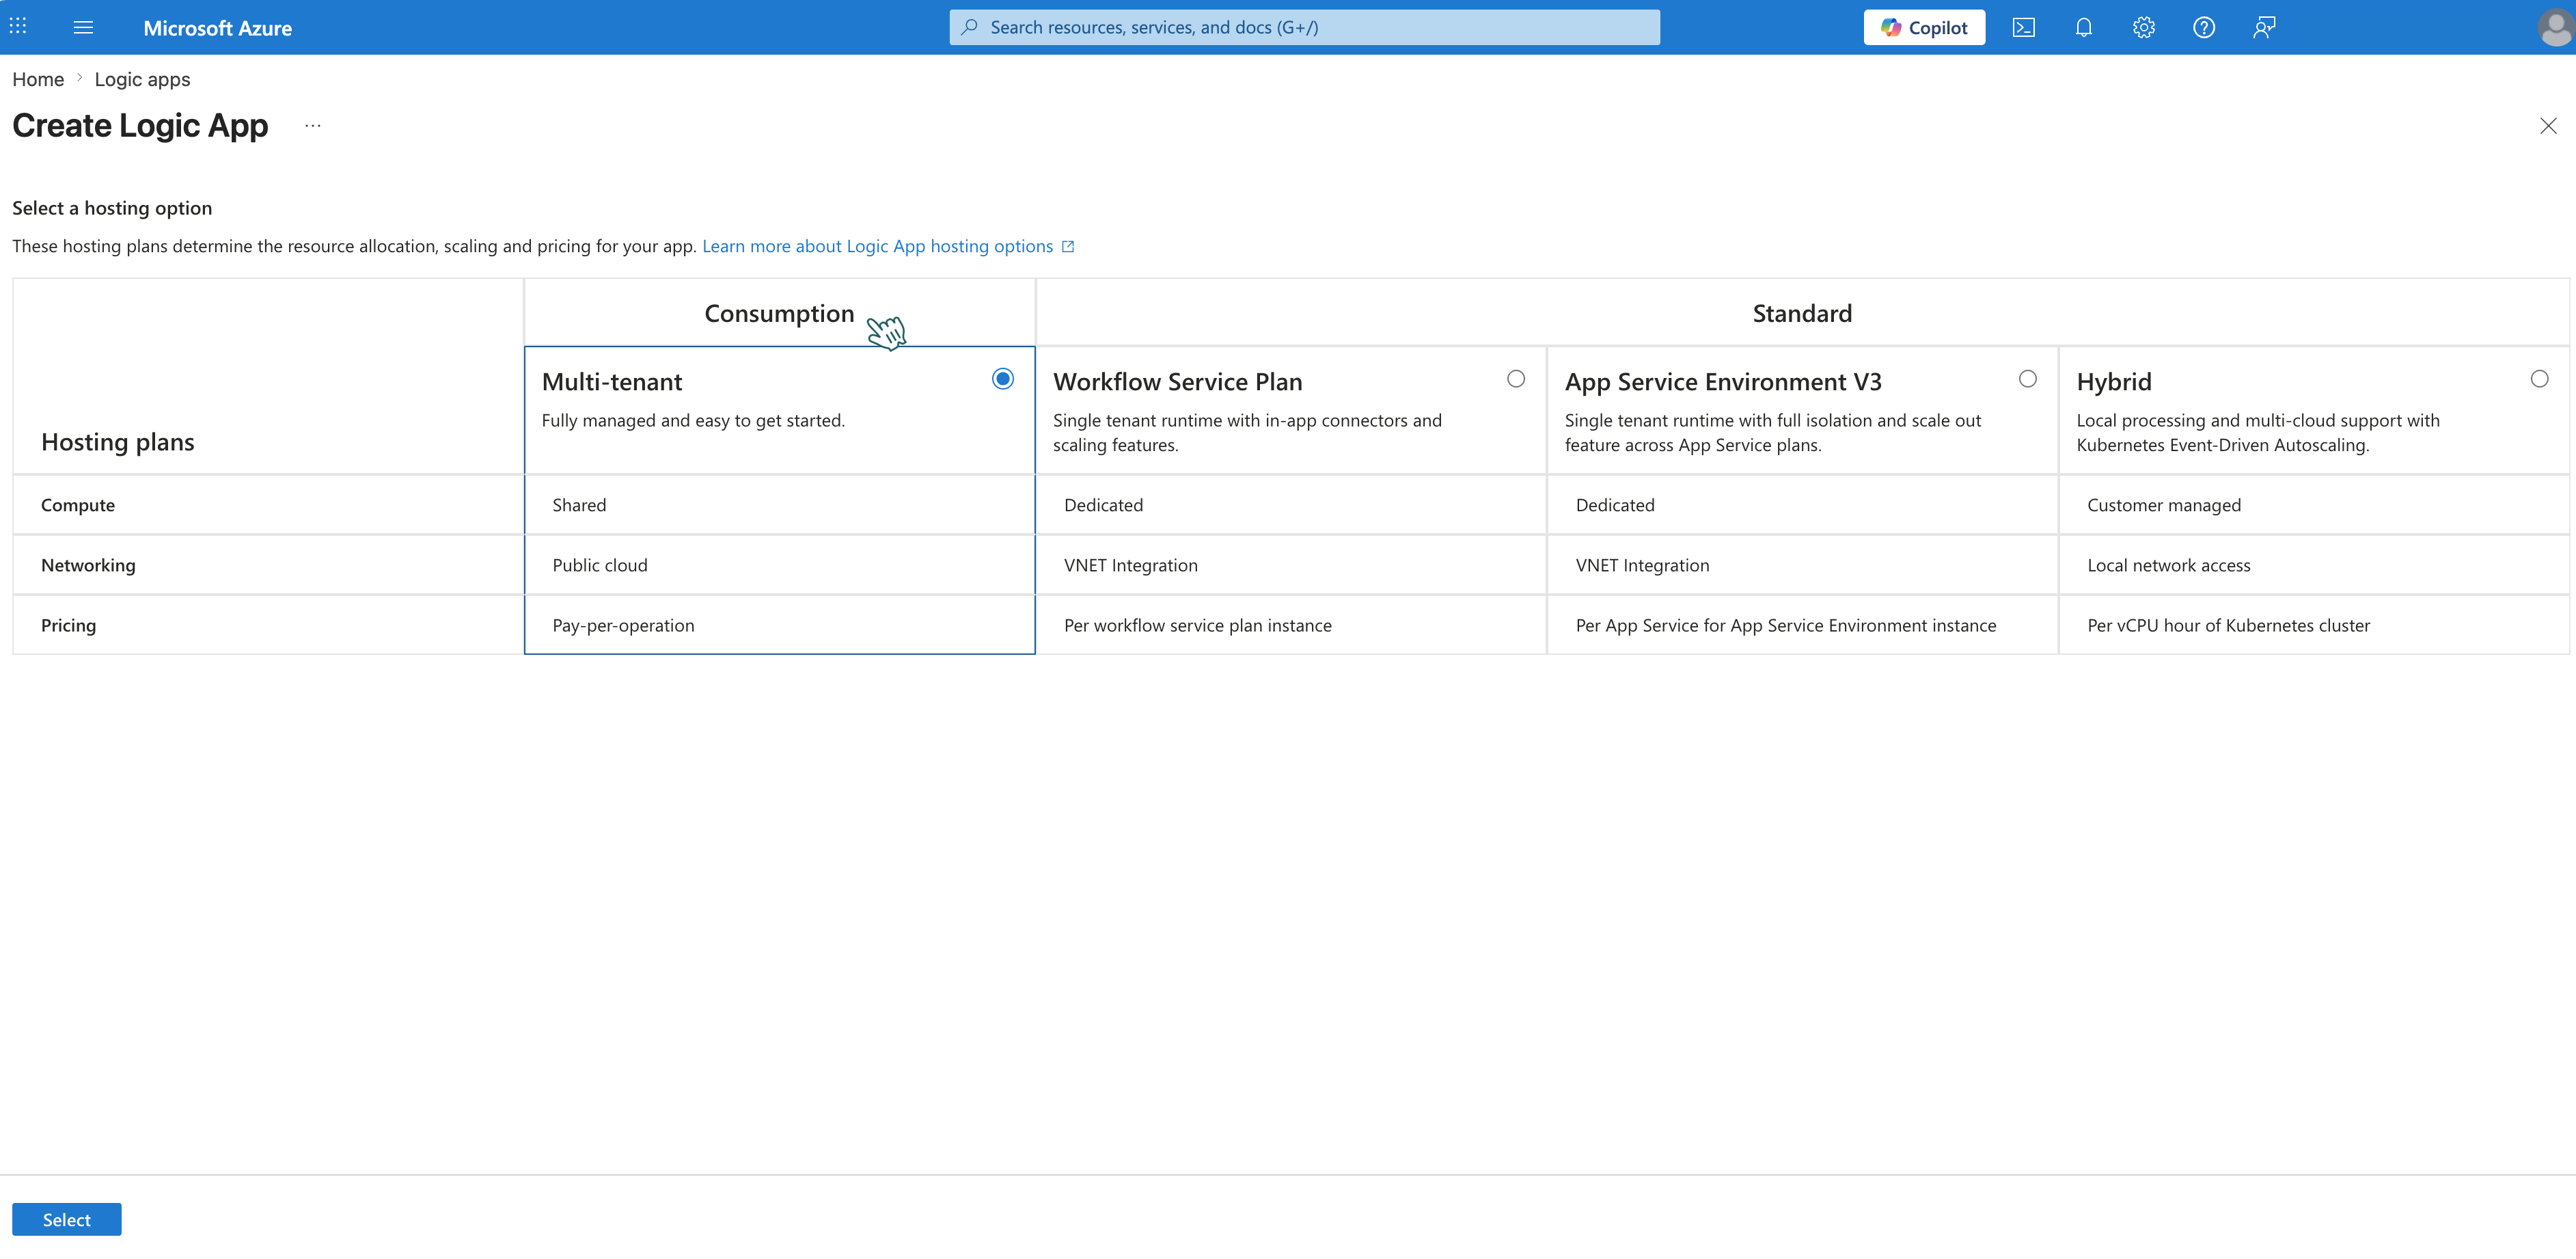
Click Create. For the hosting option, select Consumption (pay-per-execution, suitable for this integration).
-
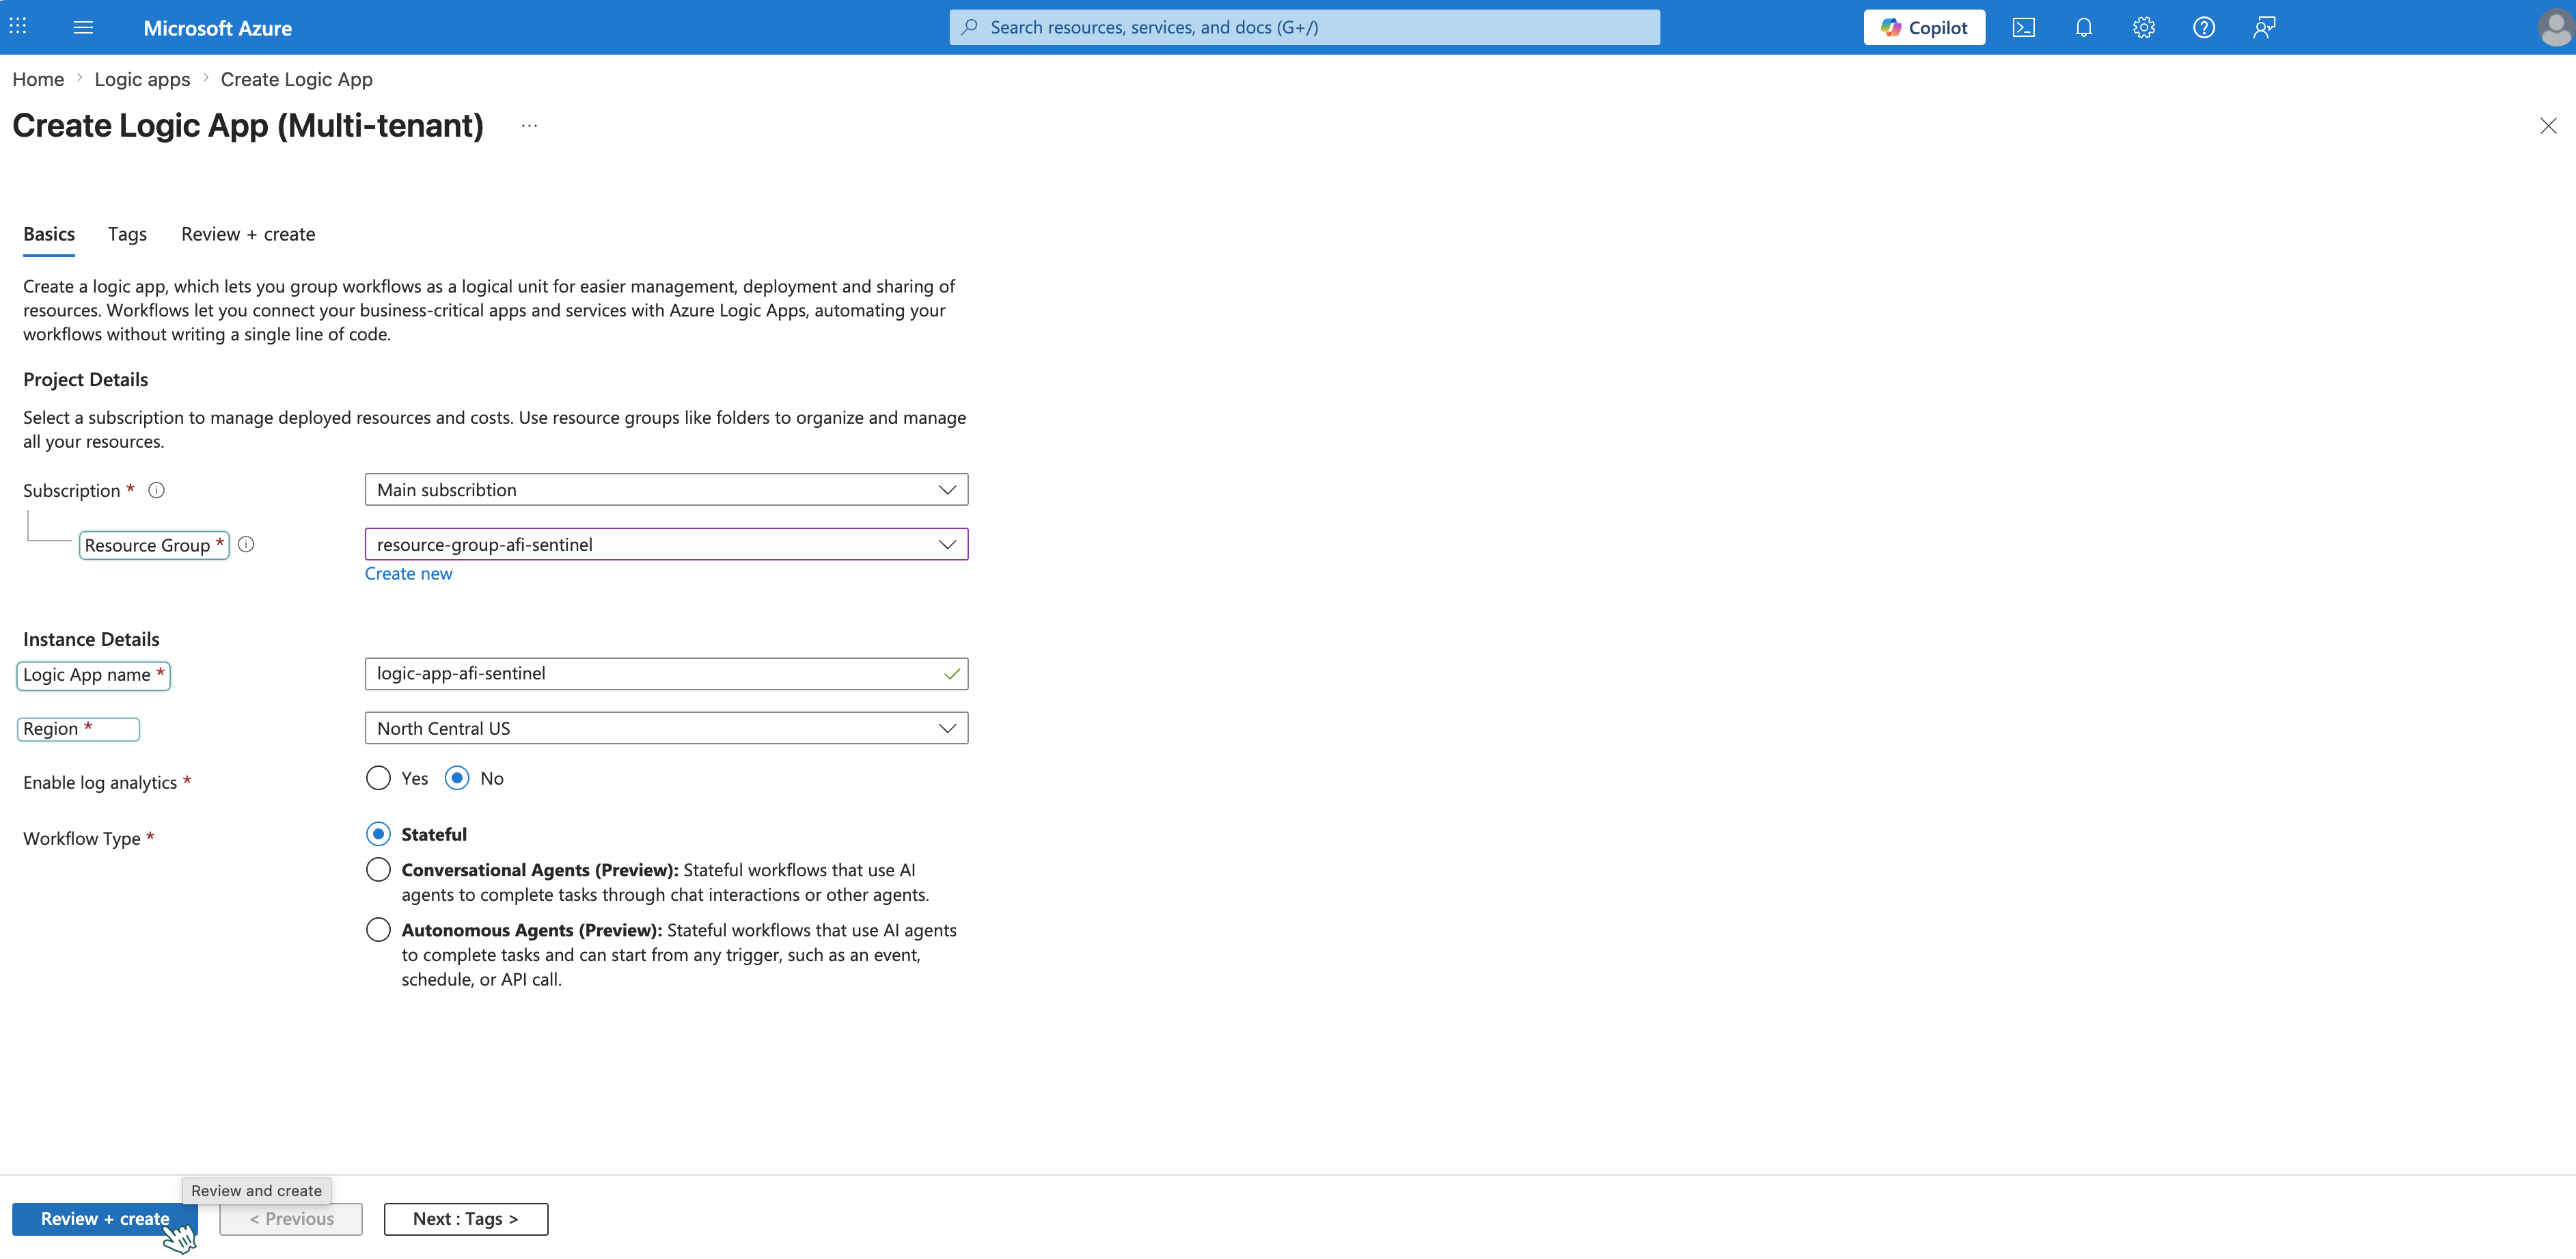
Fill in:
- Subscription: Your subscription
- Resource Group: Select your resource group (e.g.,
resource-group-afi-sentinel) - Name: Enter a name (e.g.,
logic-app-afi-sentinel) - Region: Same as your Log Analytics workspace (e.g., East US)
-
Click Review + Create → Create. Wait for deployment — you should see Your deployment is complete.
-
Click Go to resource to open the Logic App.
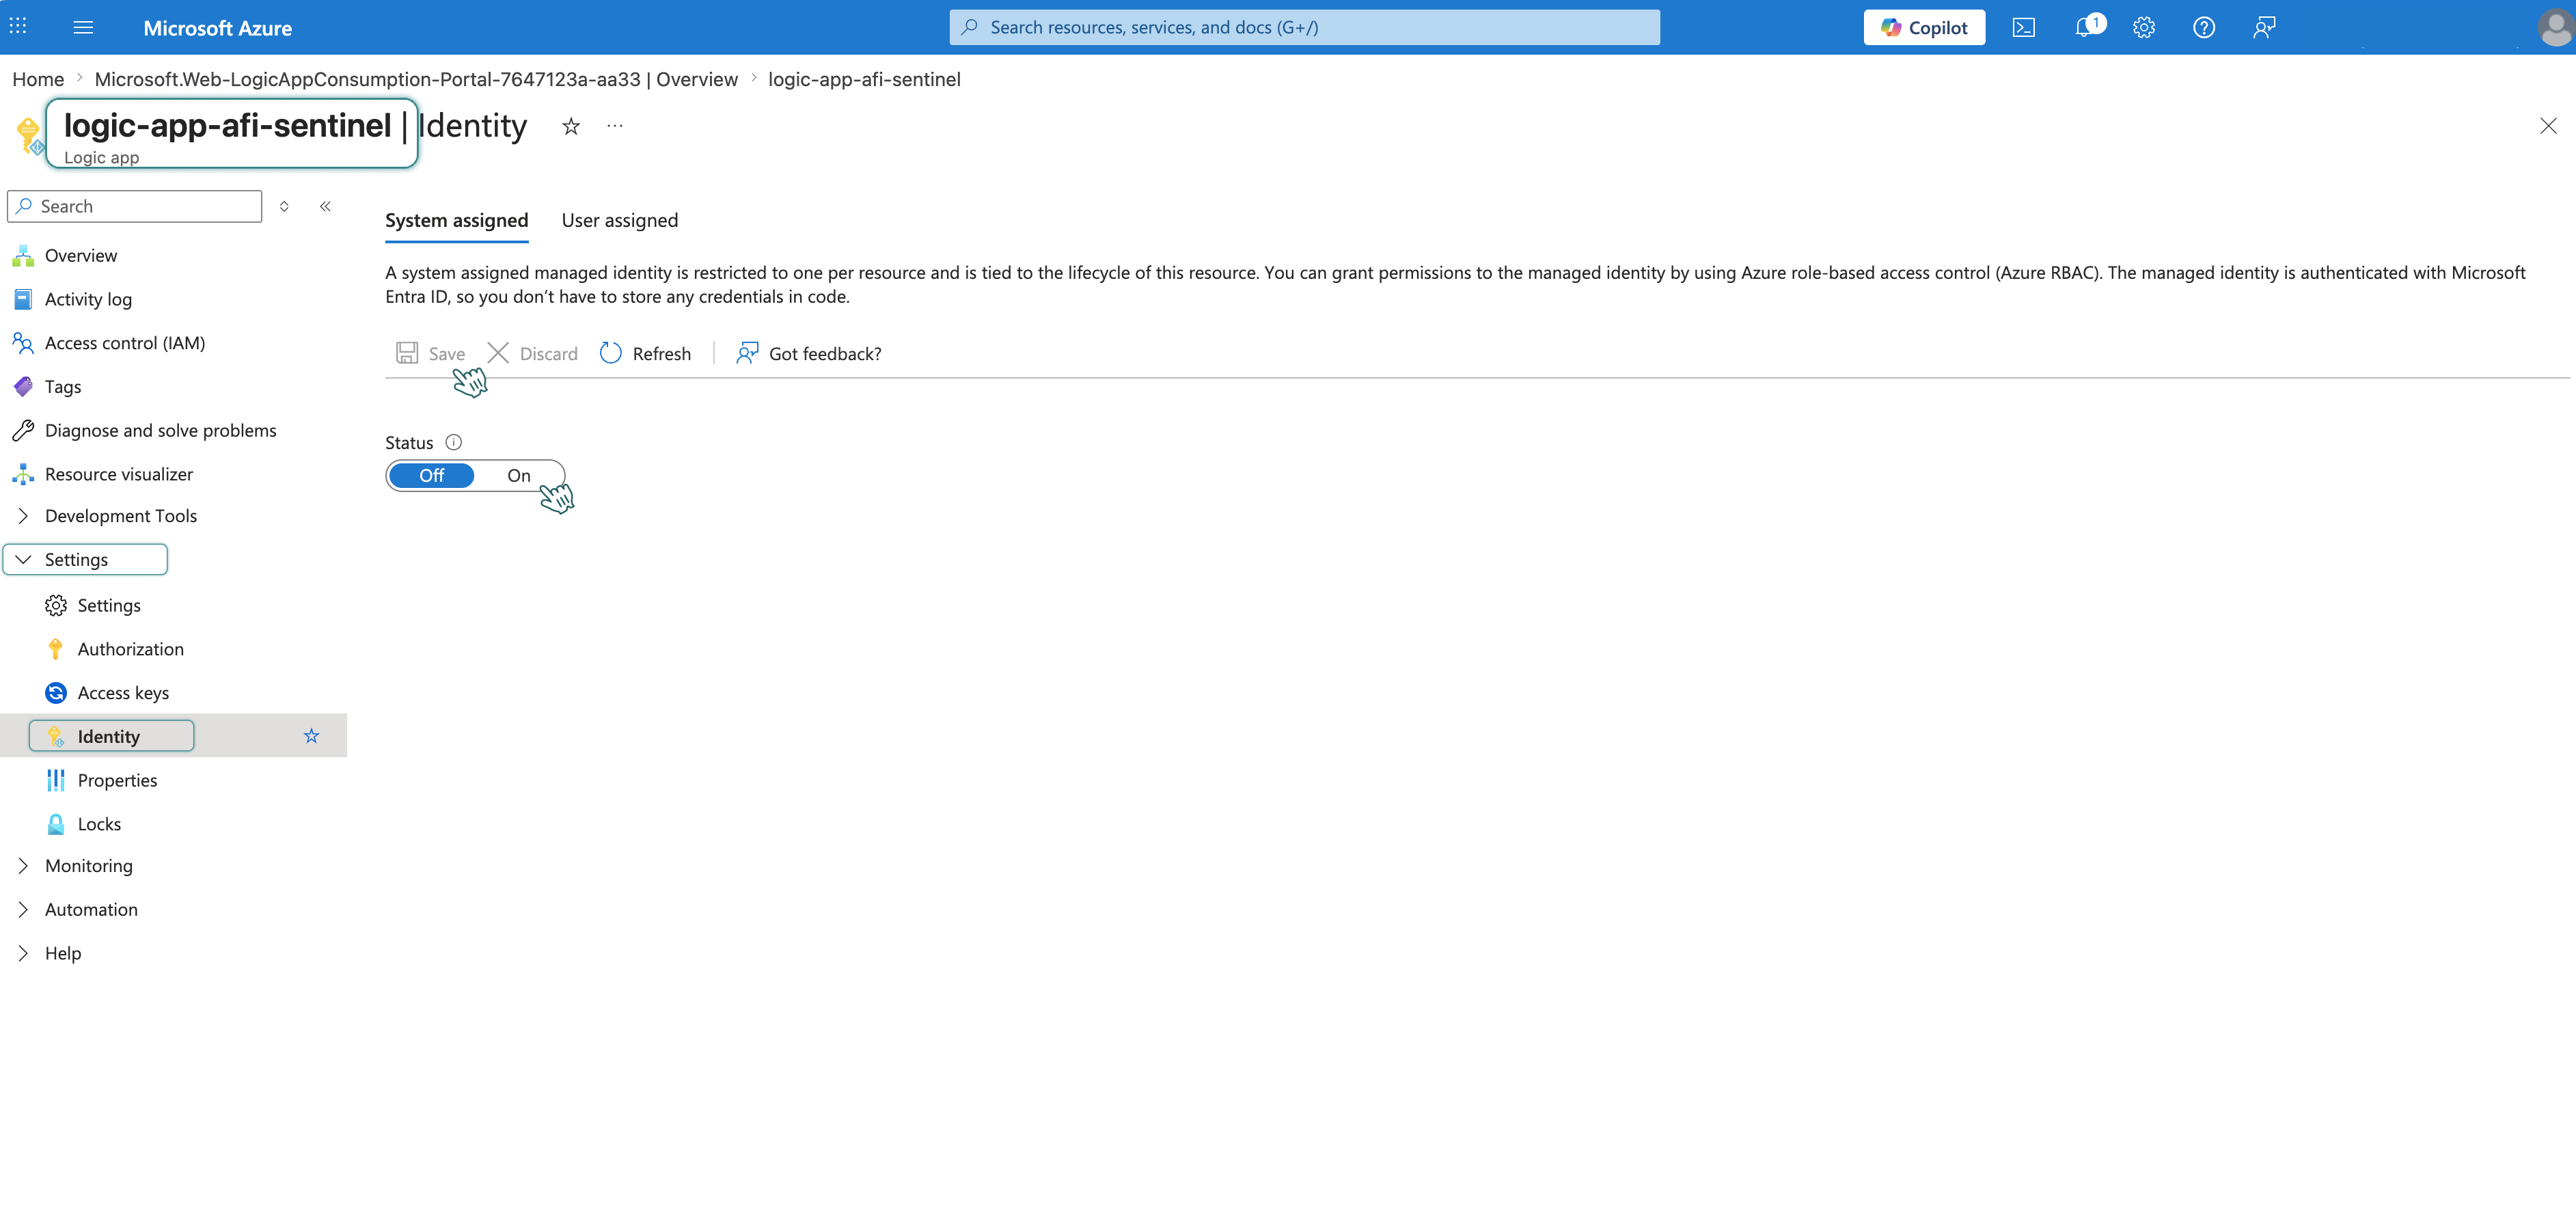
Step 2 - Enable Managed Identity in Logic App
- Go to Settings → Identity.
- Set System assigned status to On.
-
Click Save and confirm with Yes.
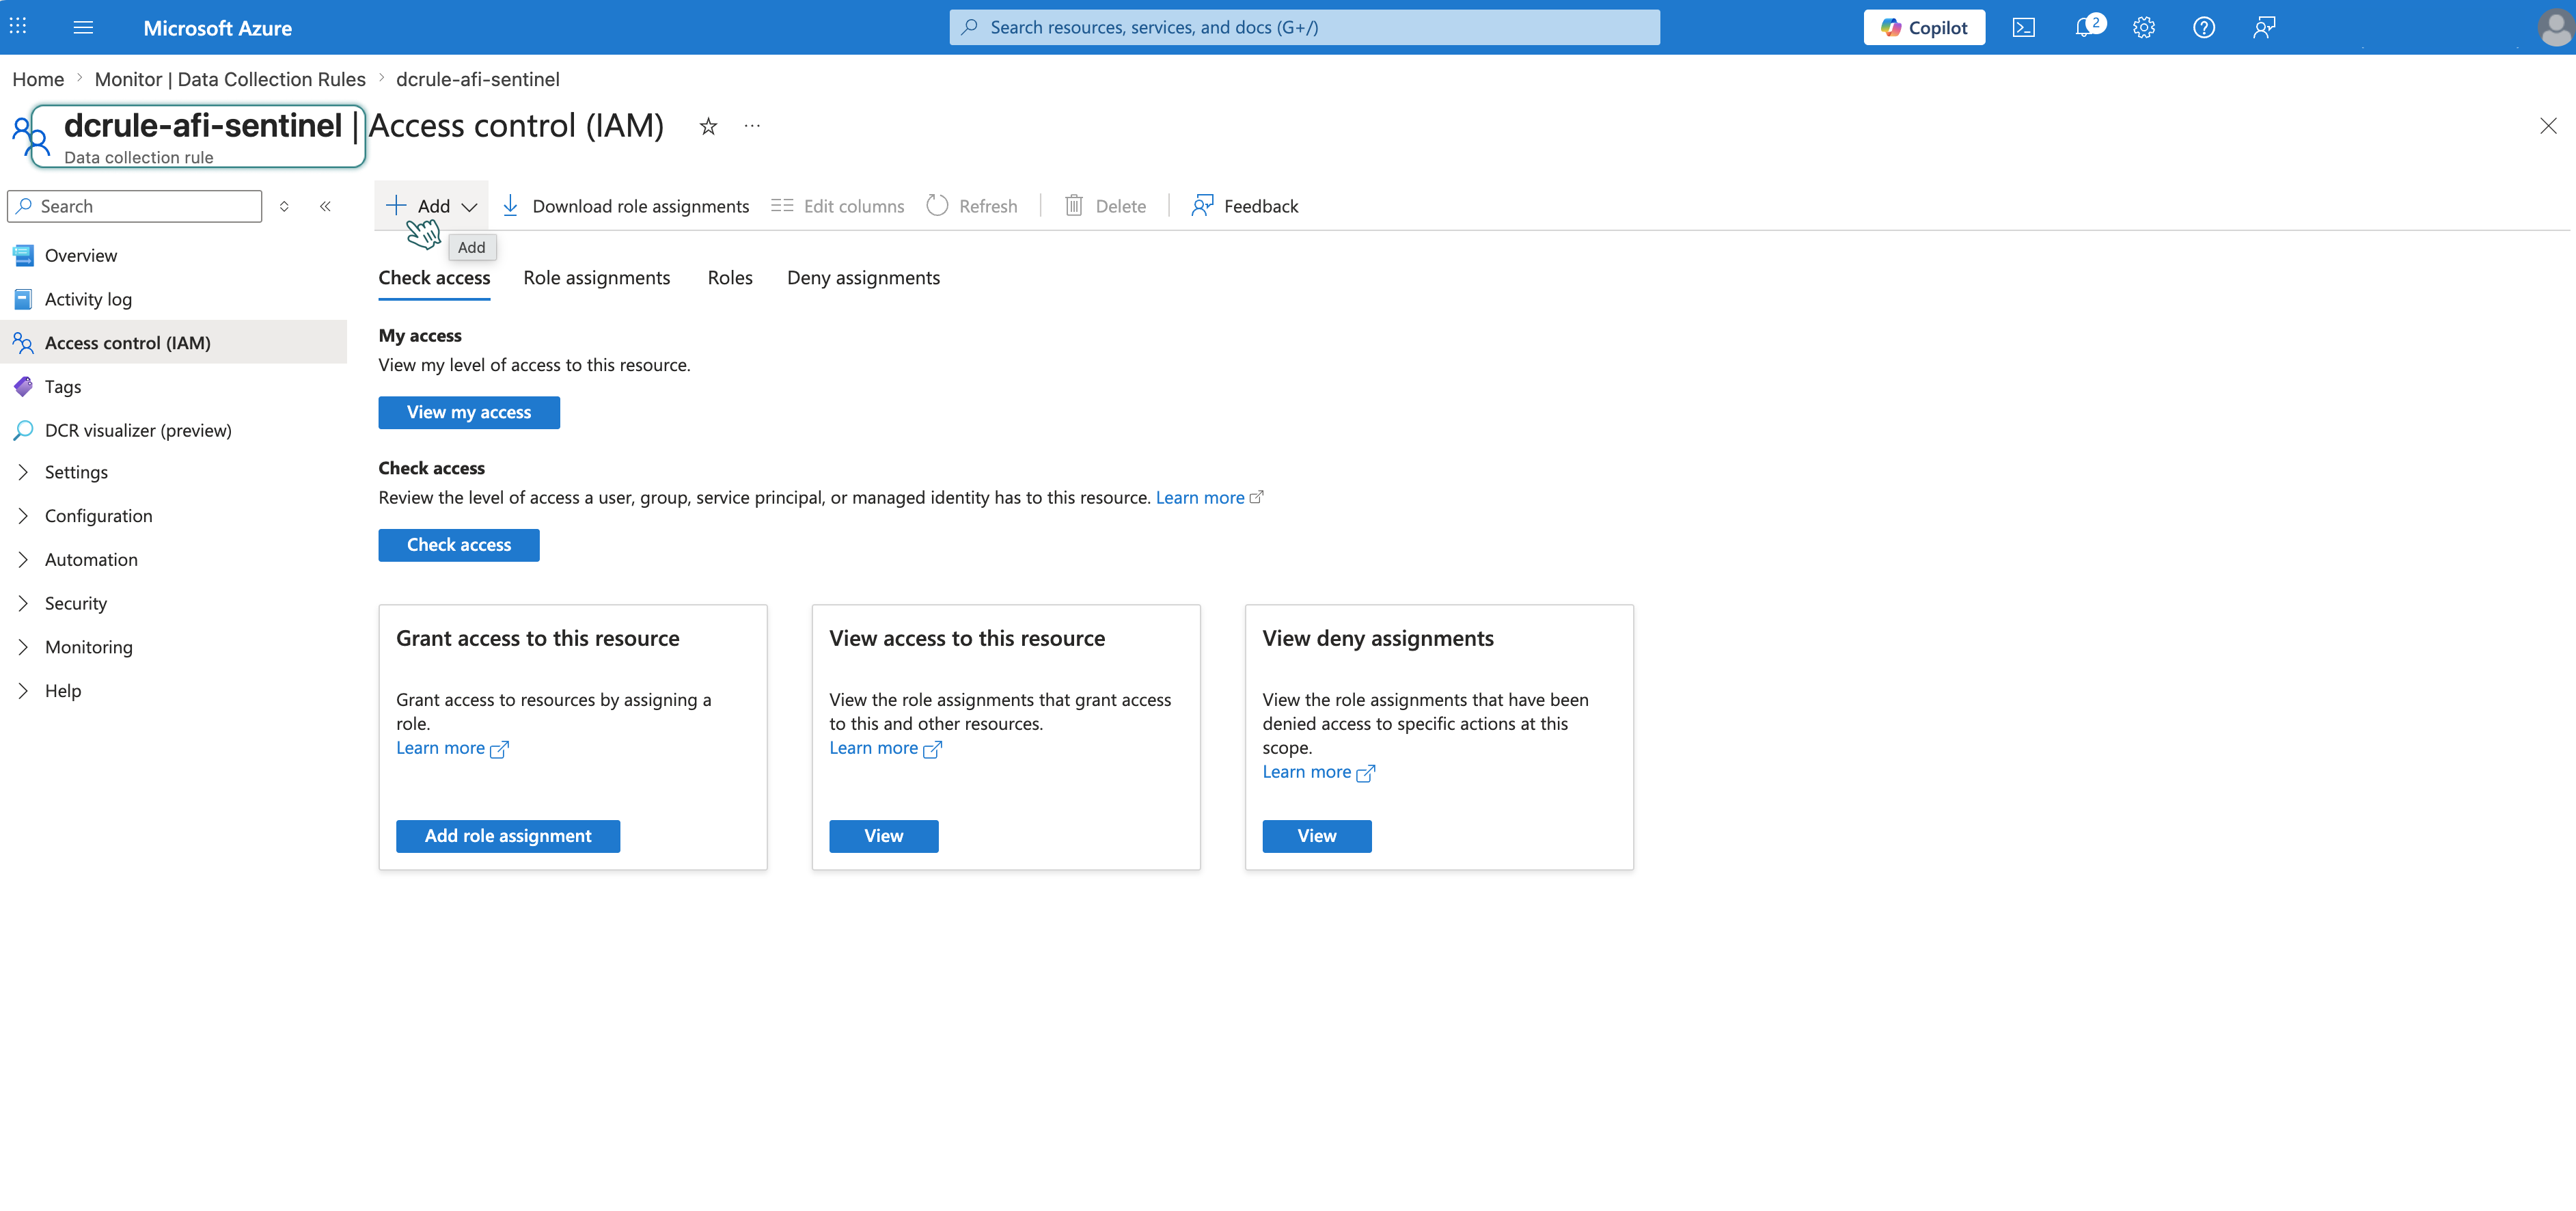
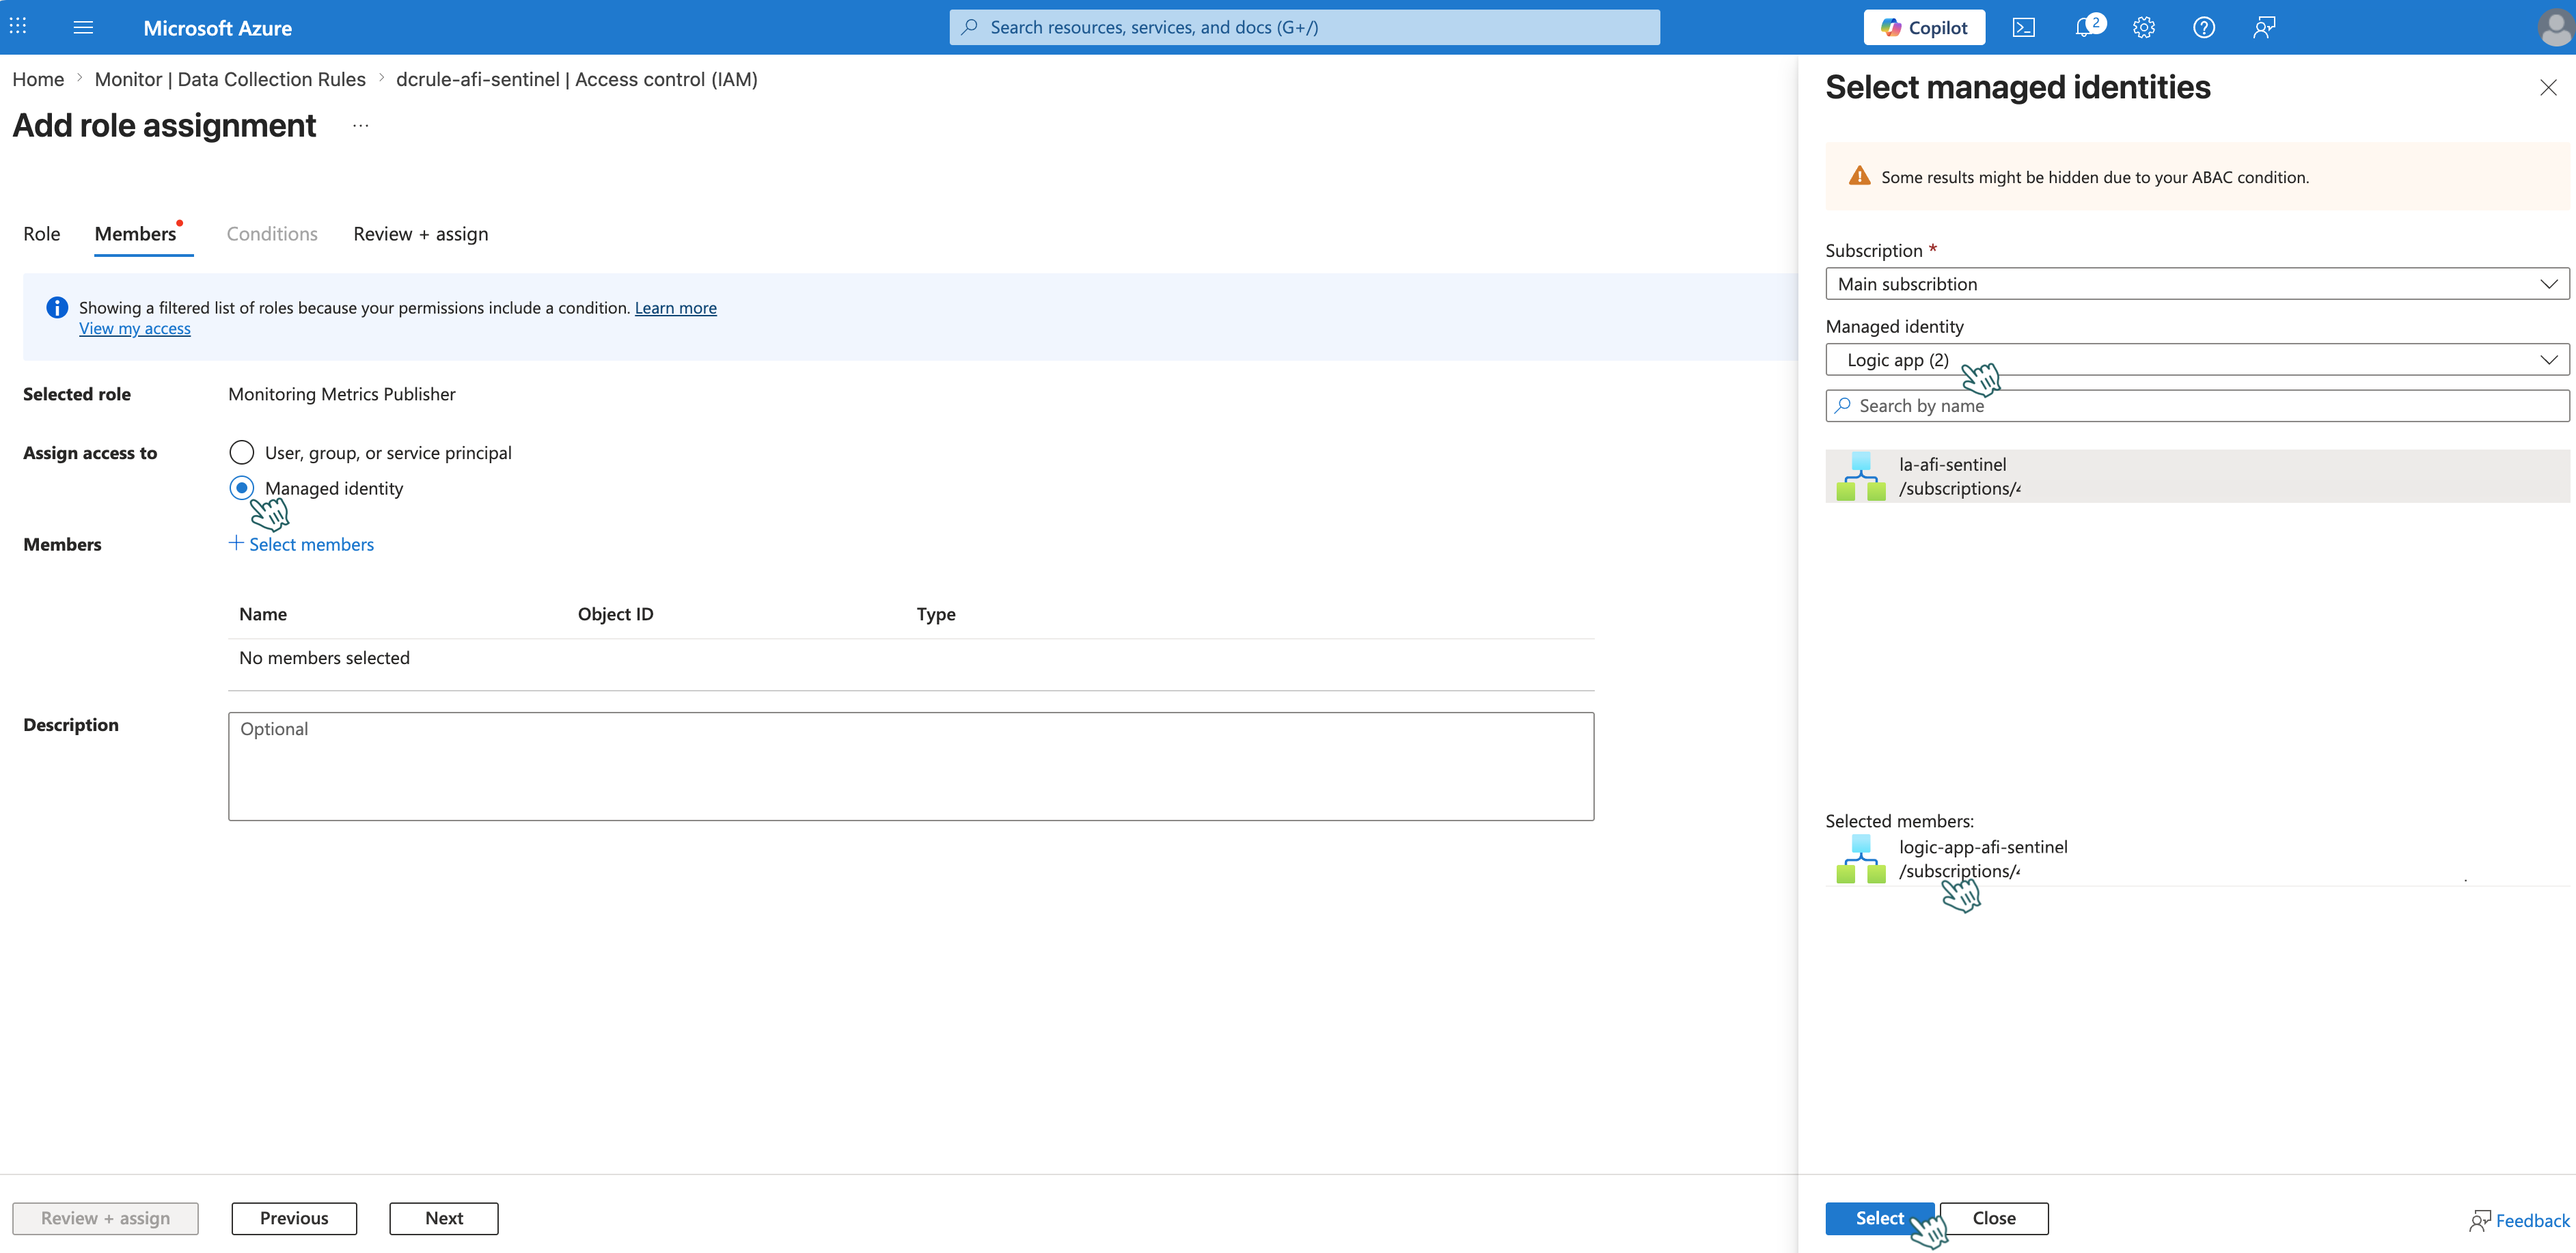
Step 3 - Assign Permissions (RBAC) to Logic App
Assign the Monitoring Metrics Publisher role to the Logic App on the Data collection rule to authorize data ingestion via managed identity without storing API keys.
- In Azure Portal, search for Data collection rules and open your rule (e.g.,
dcrule-afi-sentinel). -
In the left menu, go to Access control (IAM) → click + Add → Add role assignment.
-
In the Role tab, search for and select Monitoring Metrics Publisher, then click Next.
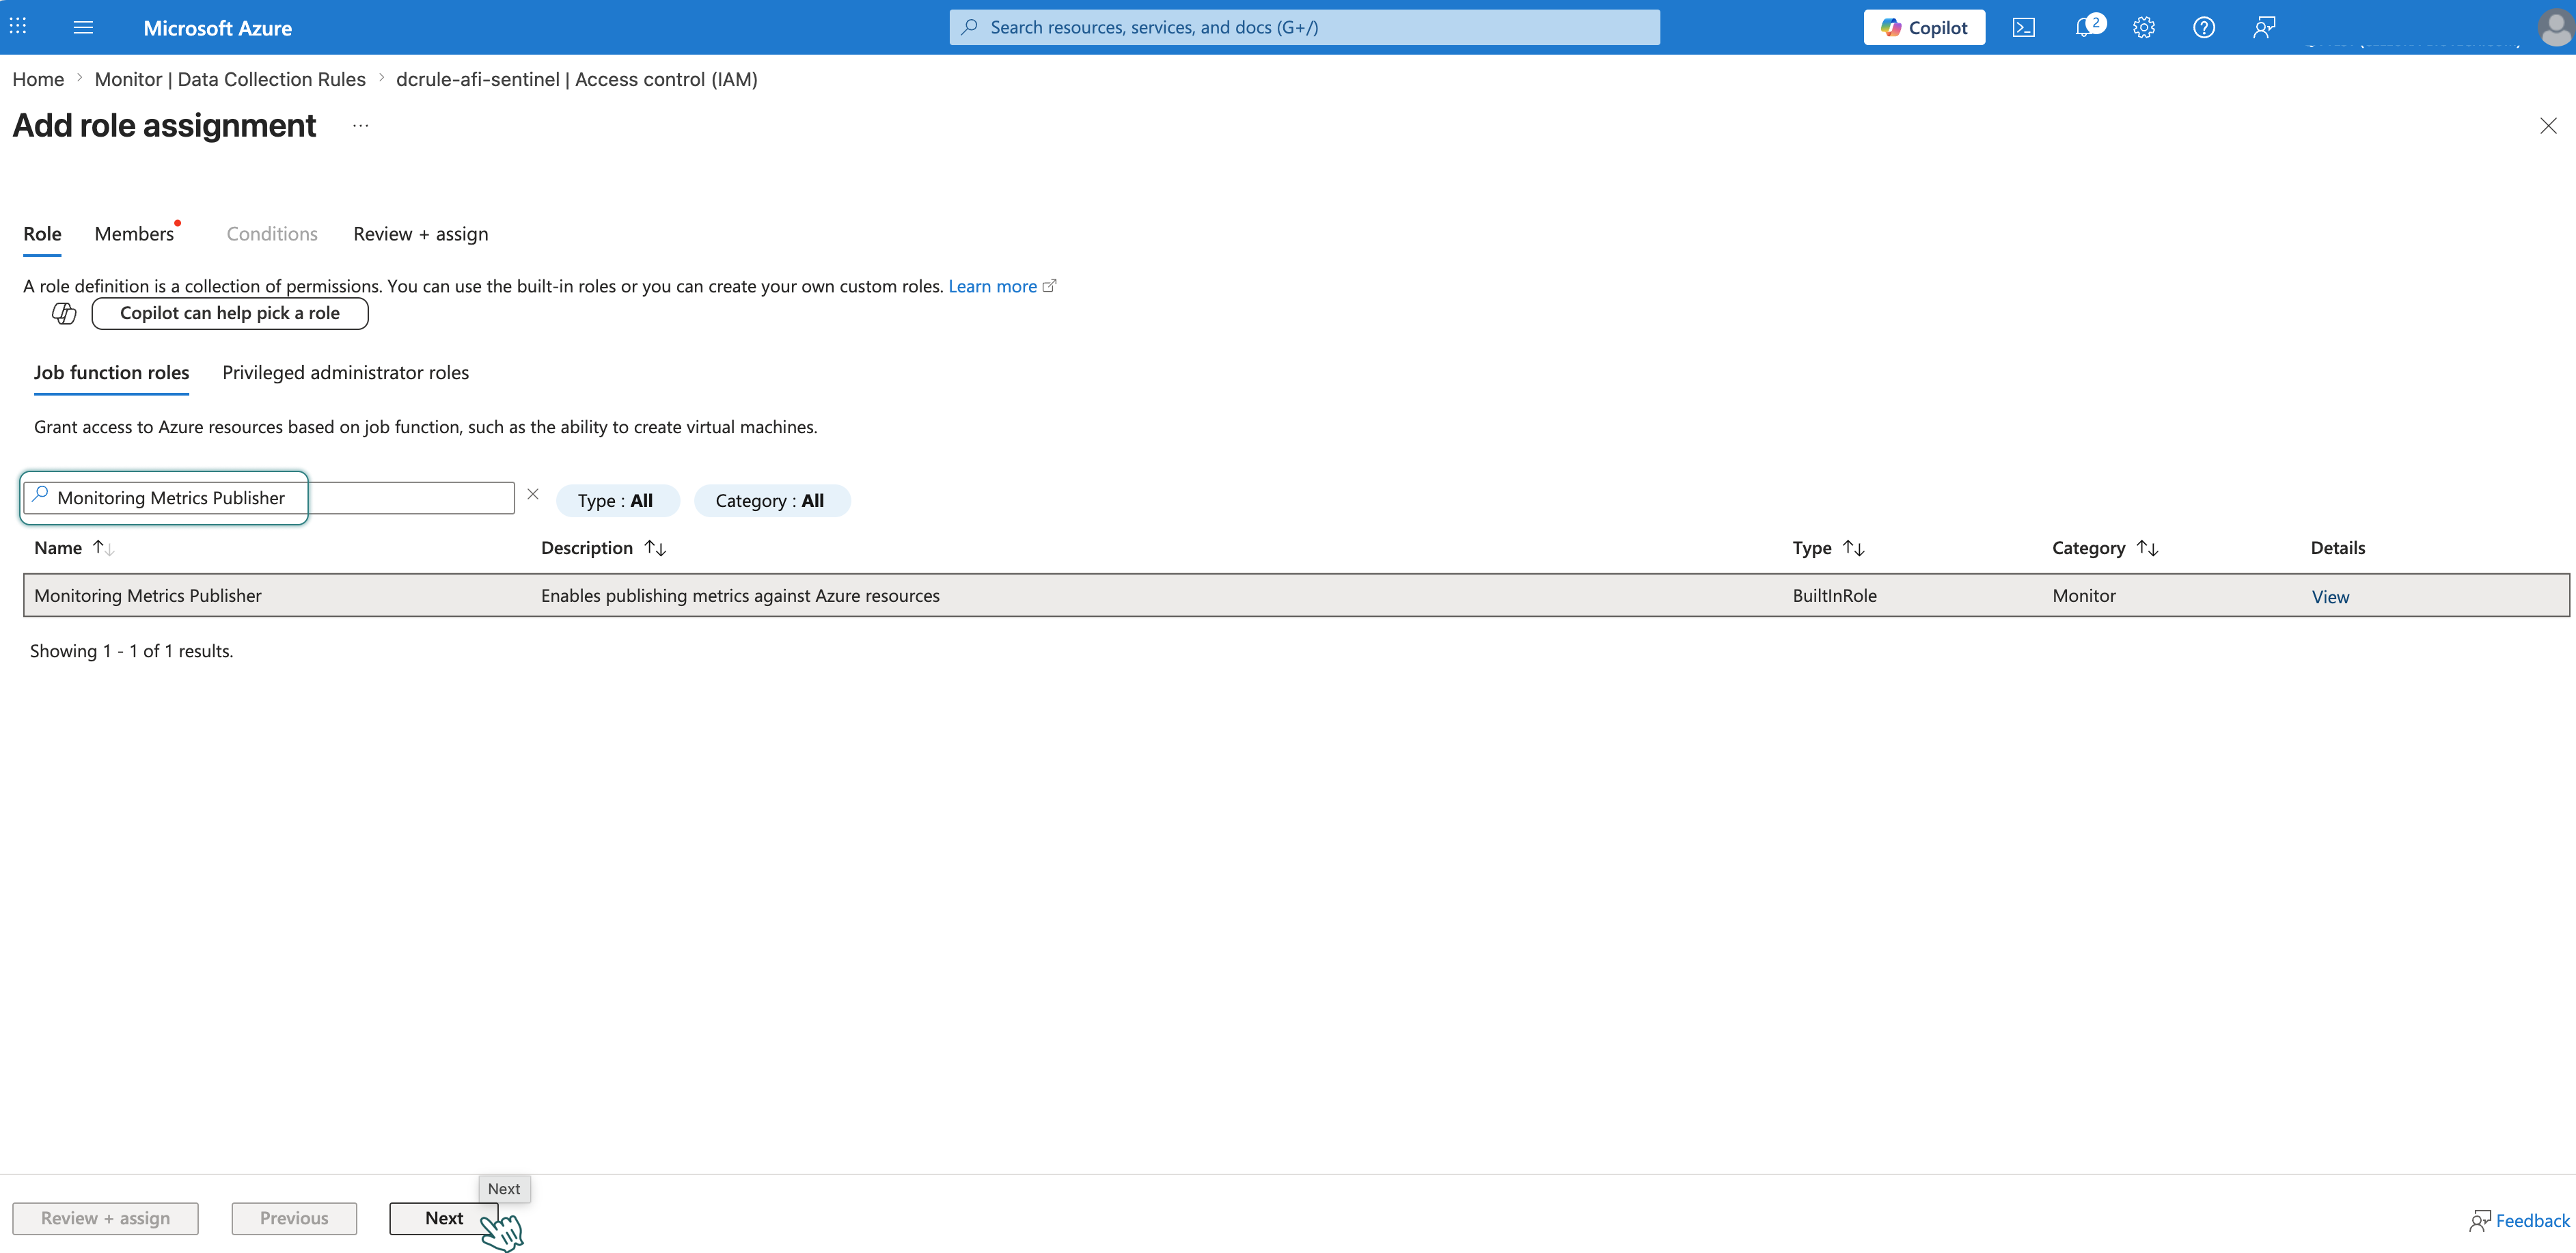
-
In the Members tab, configure:
- Assign access to: Managed identity
- Members: Click + Select members and choose:
- Managed identity: Logic App
- Select: Your Logic App (e.g.,
logic-app-afi-sentinel)
-
Click Review + assign twice to complete the assignment.
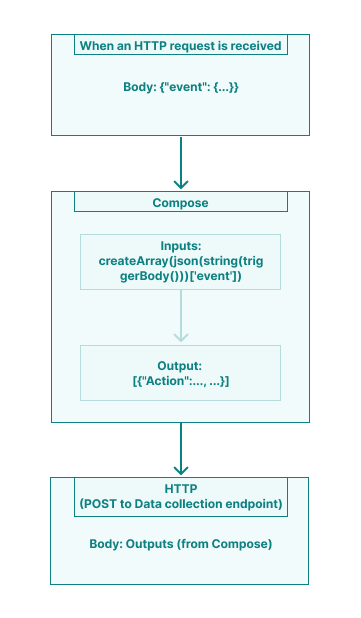
Part 5: Configure Logic App Workflow
Logic App Workflow
| Component | Role |
|---|---|
| Trigger (When HTTP request is received) | Receives audit events from Afi |
| Compose | Wraps the event data in an array for the Logs Ingestion API |
| HTTP | Sends data to the Data collection endpoint |
- Open your Logic App (e.g.,
logic-app-afi-sentinel). -
In the left menu, go to Development Tools → Logic App Designer. This opens the visual workflow editor.

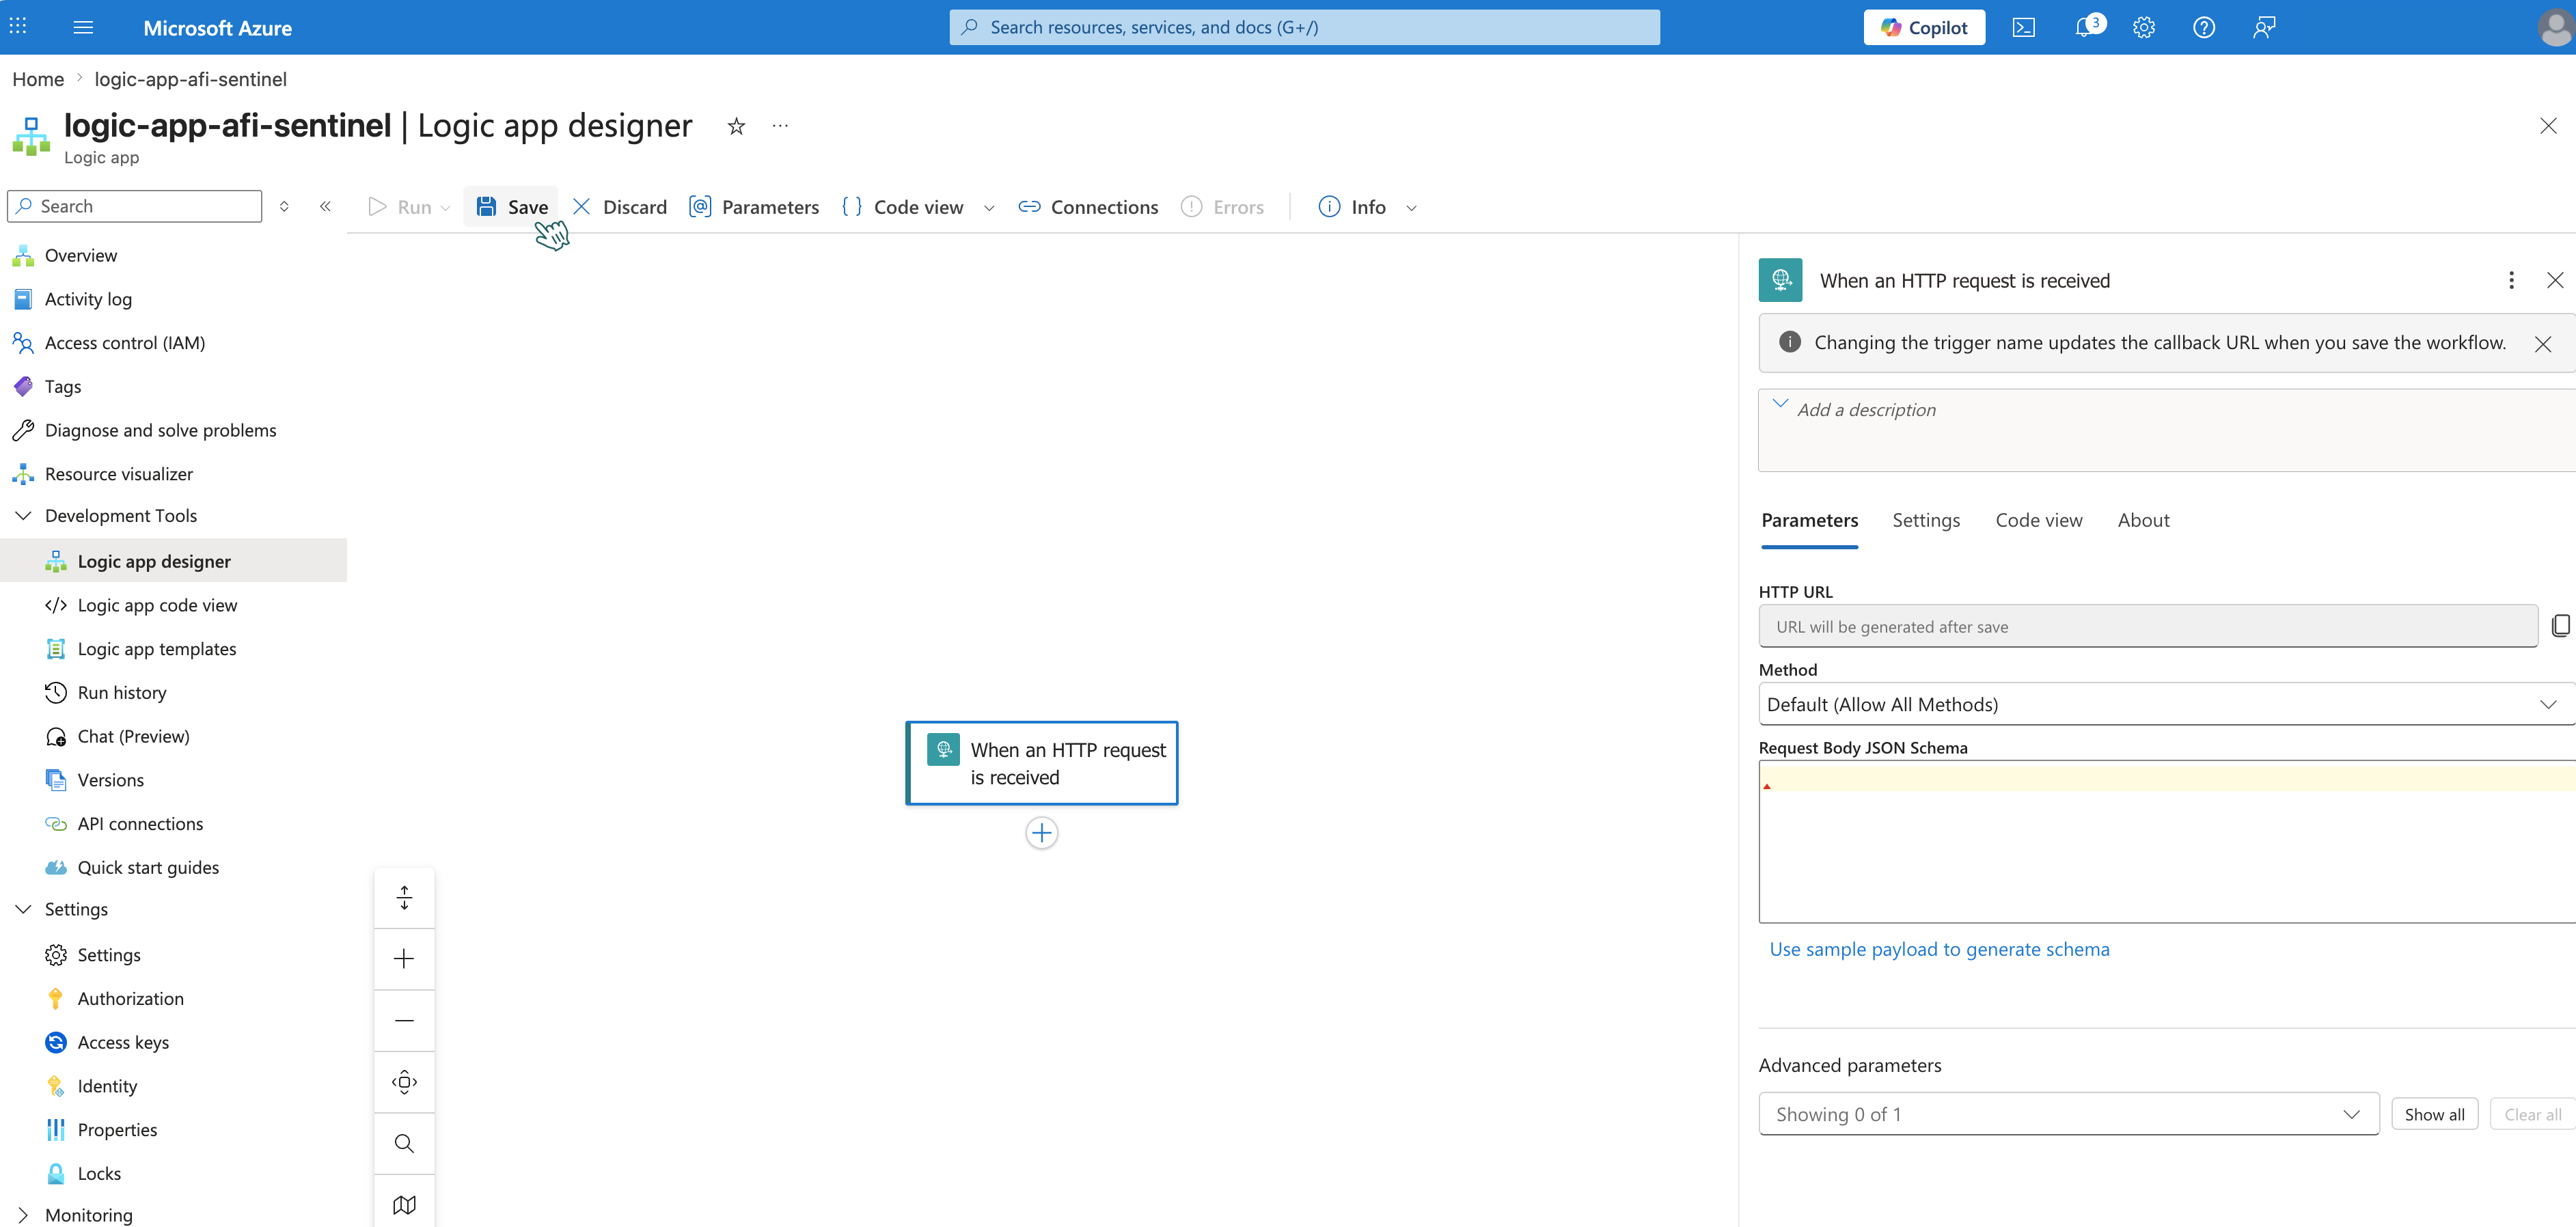
Step 1 - Create trigger When an HTTP request is received
This trigger creates a webhook URL that receives audit events from Afi.
- In the workflow editor click Add a trigger.
- Search for Request and select When an HTTP request is received.
-
Leave the default settings and click Save.
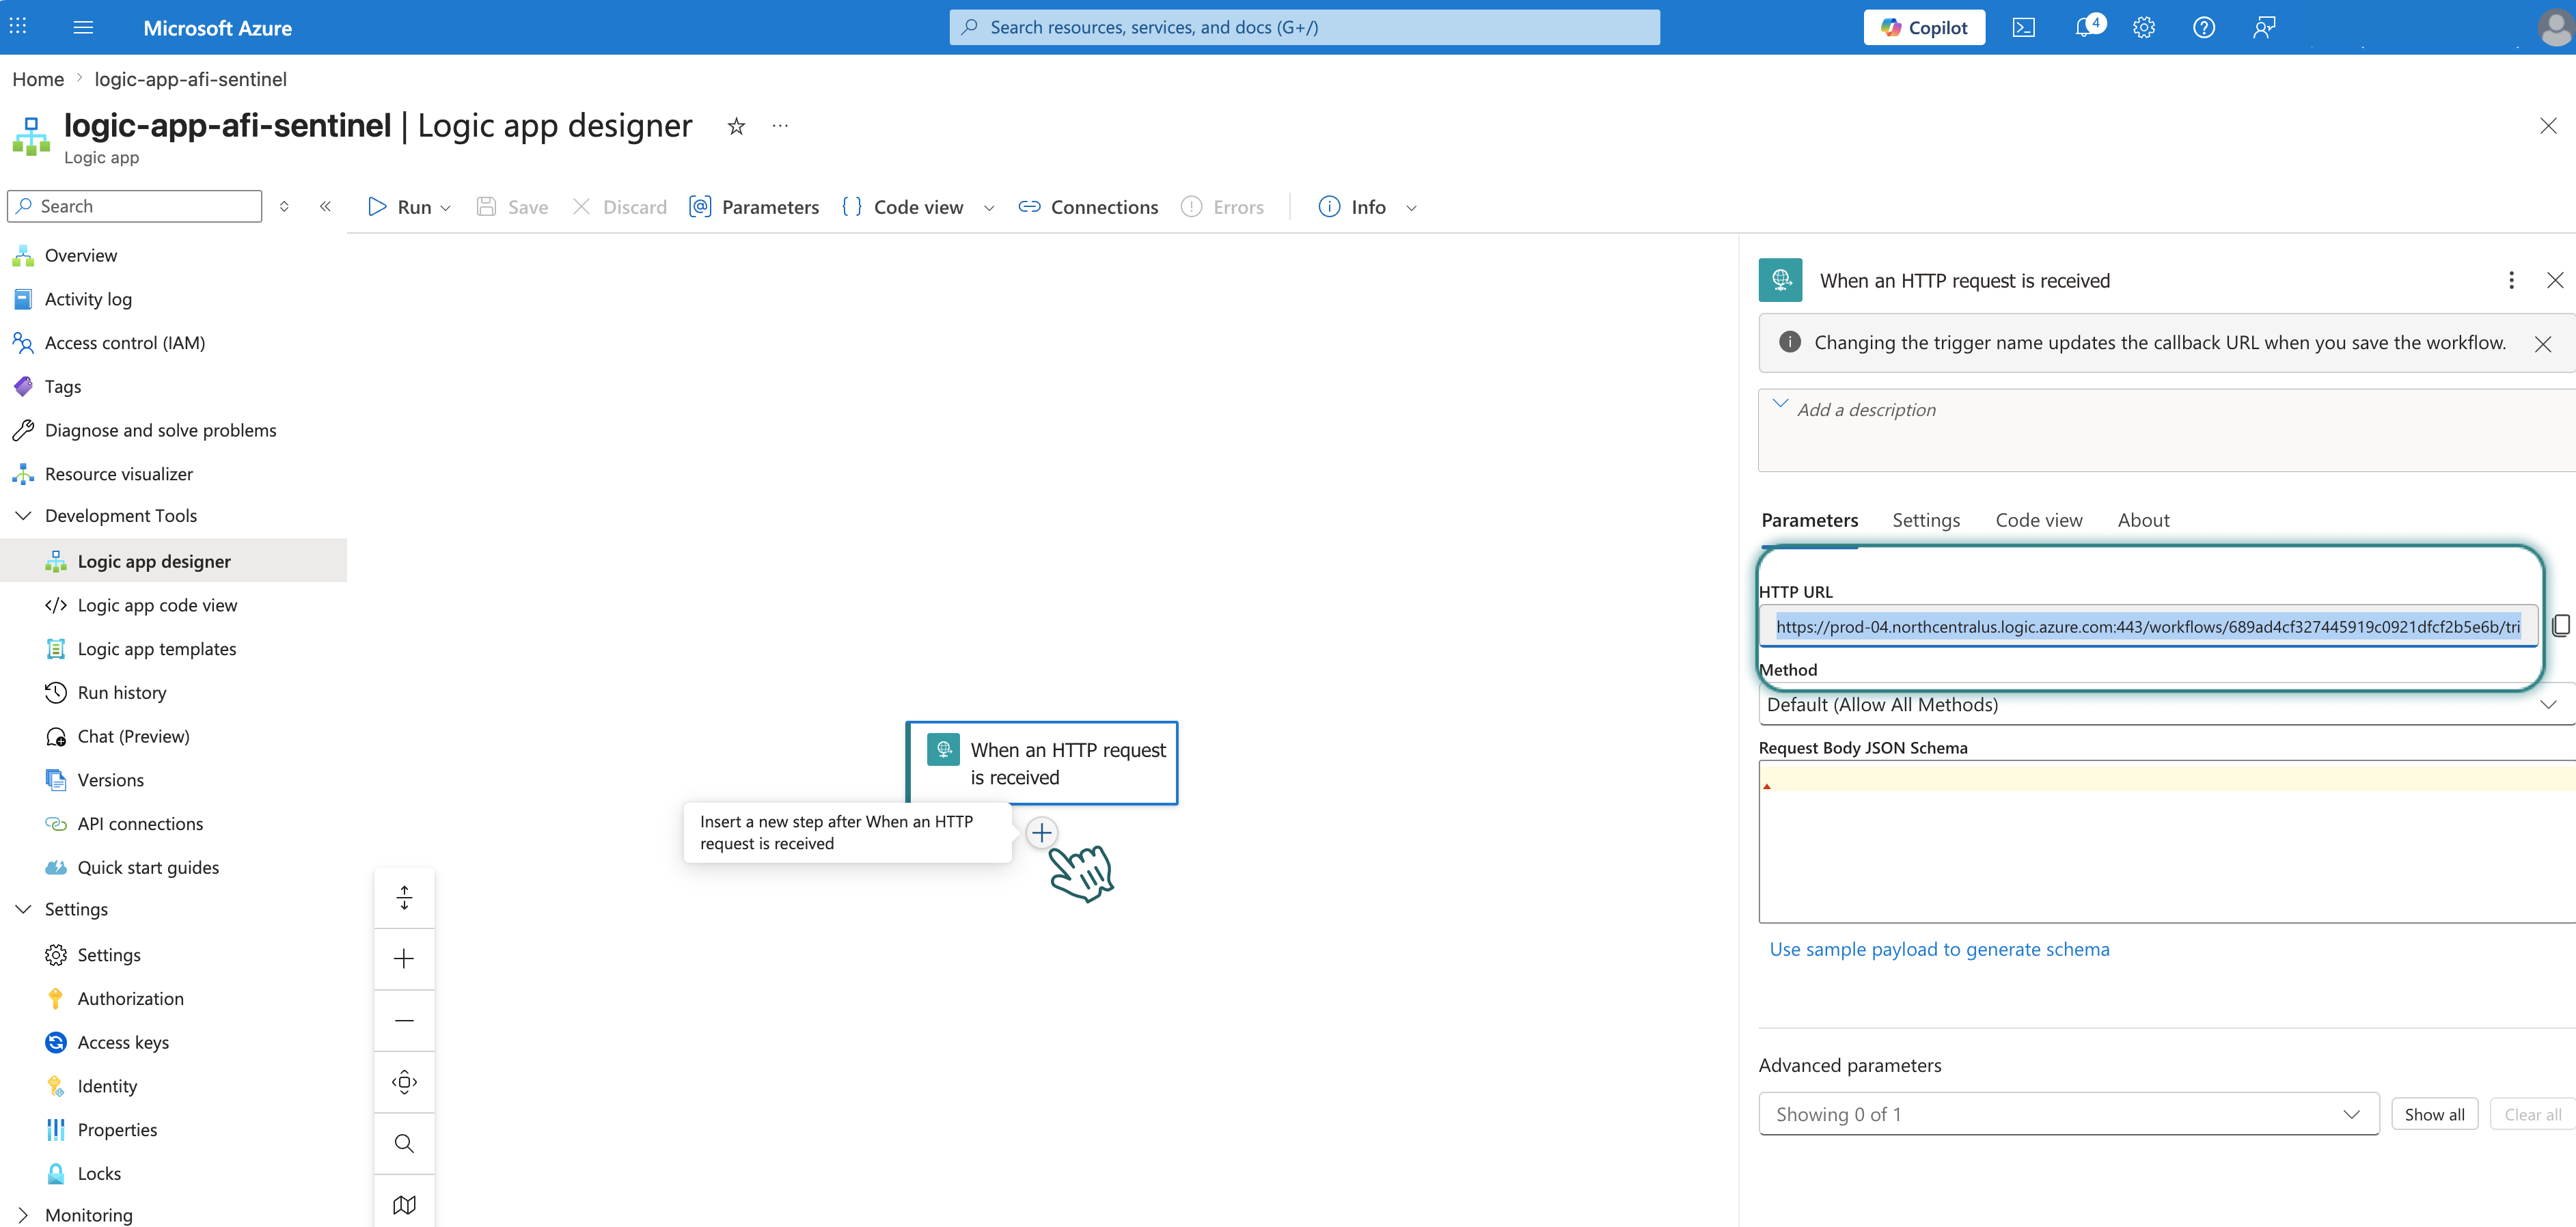
-
After saving, an HTTP URL is generated. Save this URL for later — you'll need it to configure the webhook on the Afi side.
Step 2 - Create action Compose
- Below the trigger in the workflow editor, click + → Add an Action.
-
Search for Compose and select it.
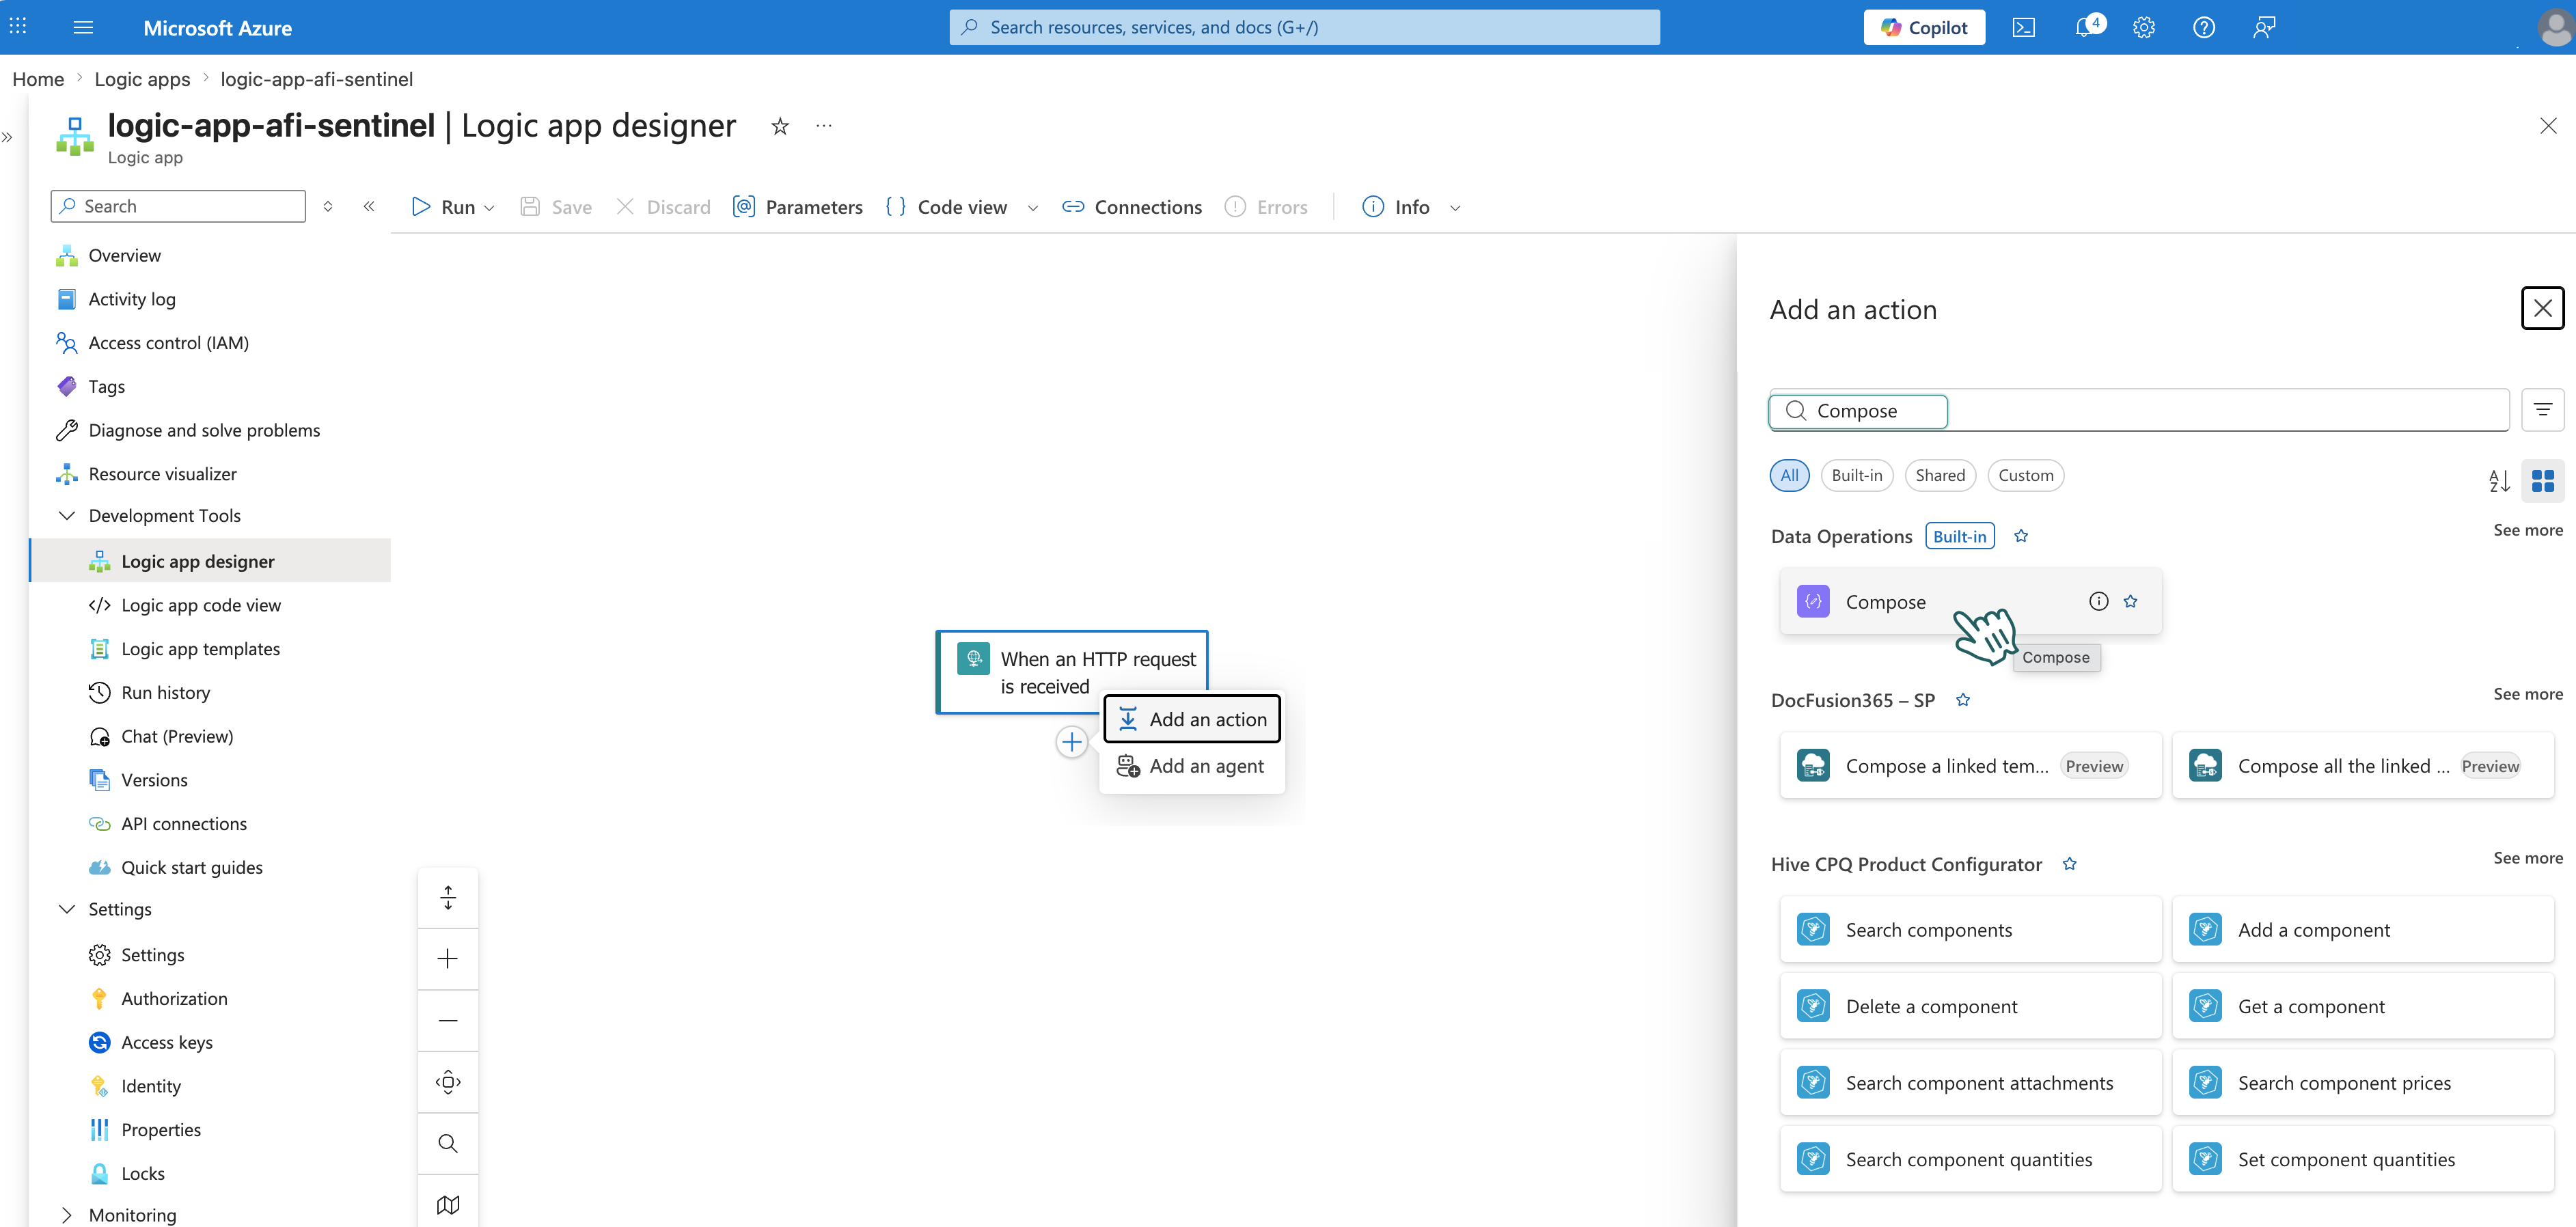
-
Click the input field → click ⚡️ icon and choose Insert expression.
- Paste the following function:
-
Click Add, then Save.
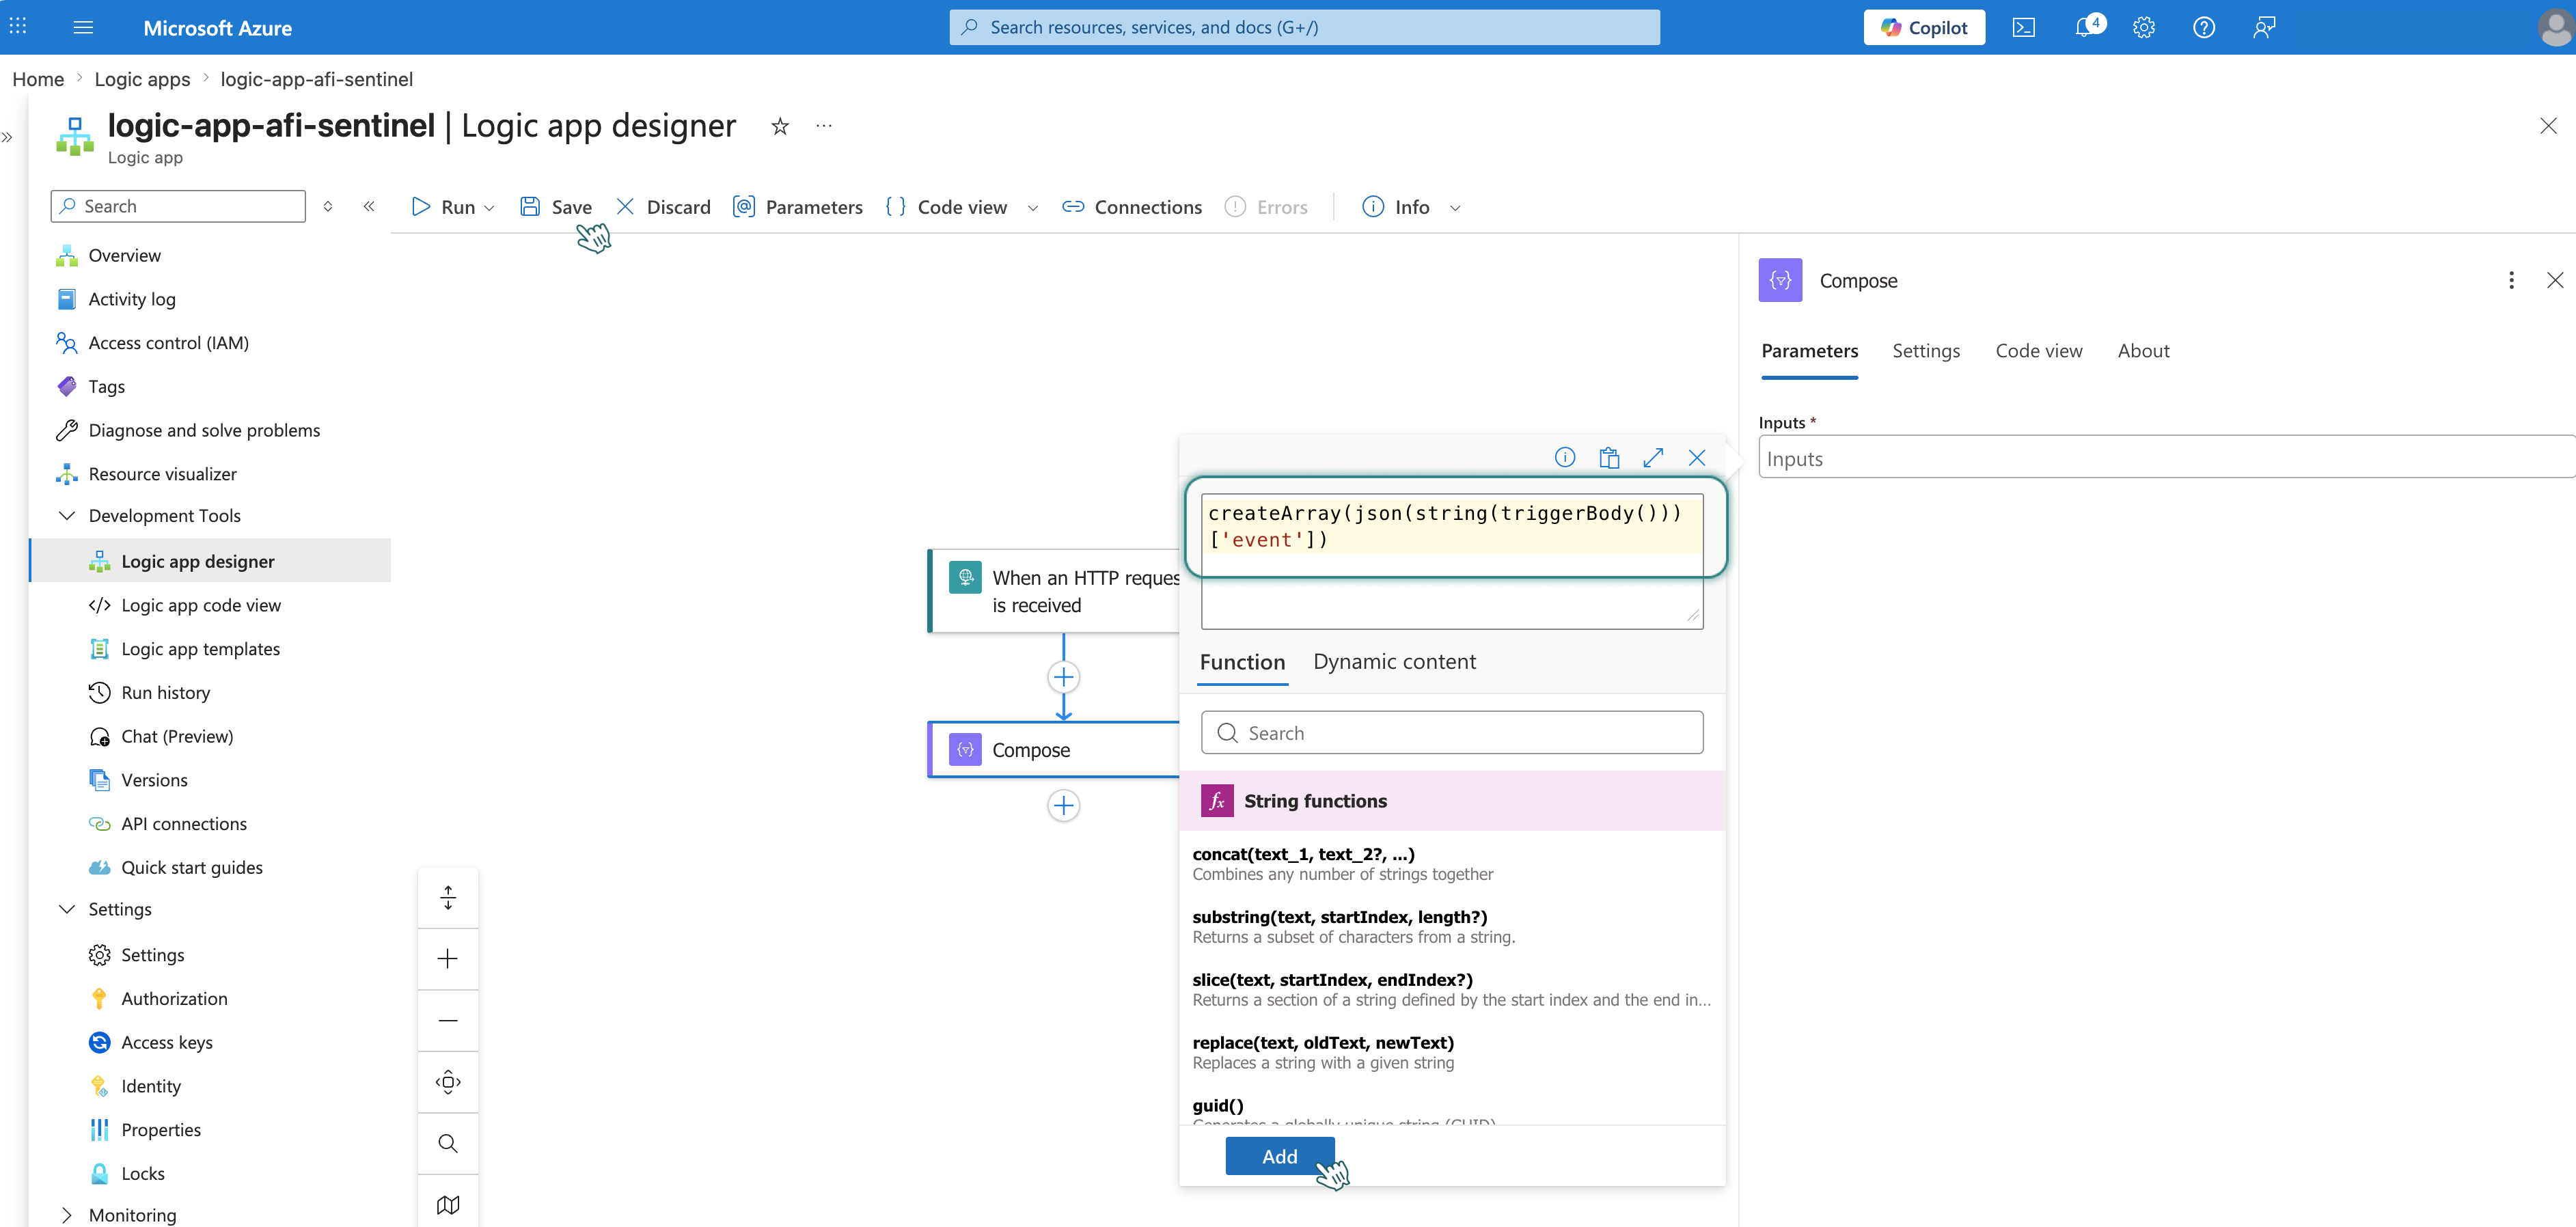
Info
The Logs Ingestion API expects an array. This action wraps Afi's JSON body in an array.
Step 3 - Create action HTTP
- Below the action in the workflow editor, click + → Add an Action.
-
Search for HTTP and select it.
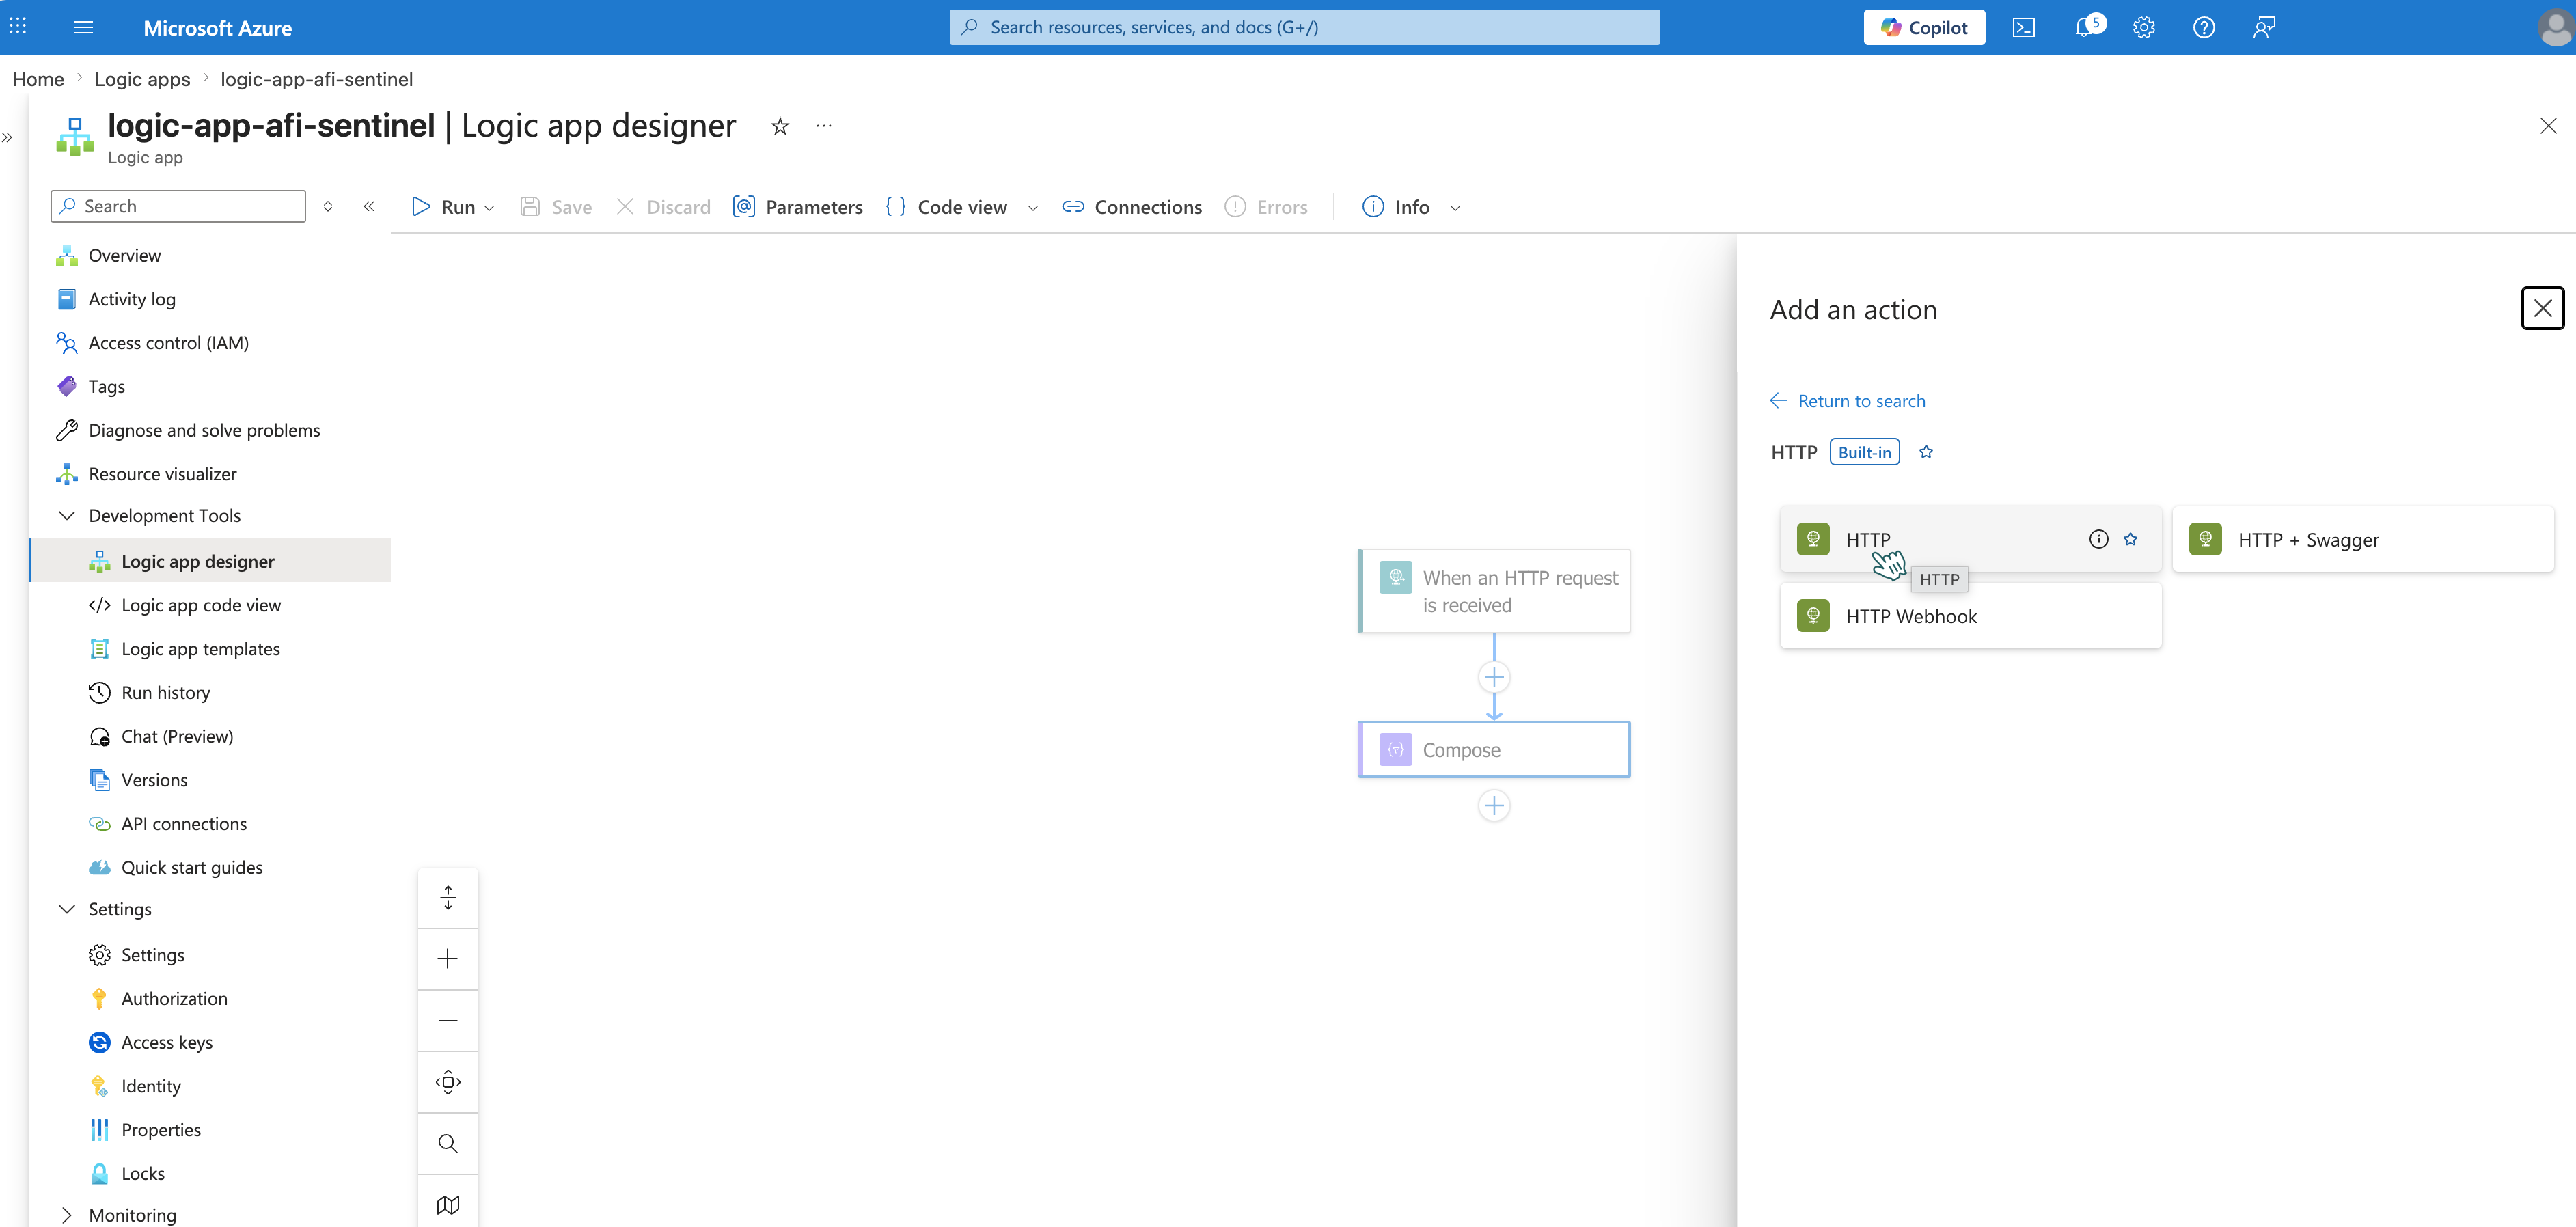
-
Configure the following fields:
URI: Build using your saved values:
https://<DCE-LOGS-INGESTION-URI>/dataCollectionRules/<DCR-IMMUTABLE-ID>/streams/<STREAM-NAME>?api-version=2023-01-01
Where:
<DCE-LOGS-INGESTION-URI>— Logs Ingestion URI from Step 2 Part 2<DCR-IMMUTABLE-ID>— immutableId from Step 2 Part 3<STREAM-NAME>— outputStream from Step 2 Part 3
Example:
https://dce-afi-logs-abc1.eastus-1.ingest.monitor.azure.com/dataCollectionRules/dcr-0123456789abcdef/streams/Custom-AfiSentinelAuditLogs_CL?api-version=2023-01-01
Method: POST
Headers:
| Key | Value |
|---|---|
| Content-Type | application/json |
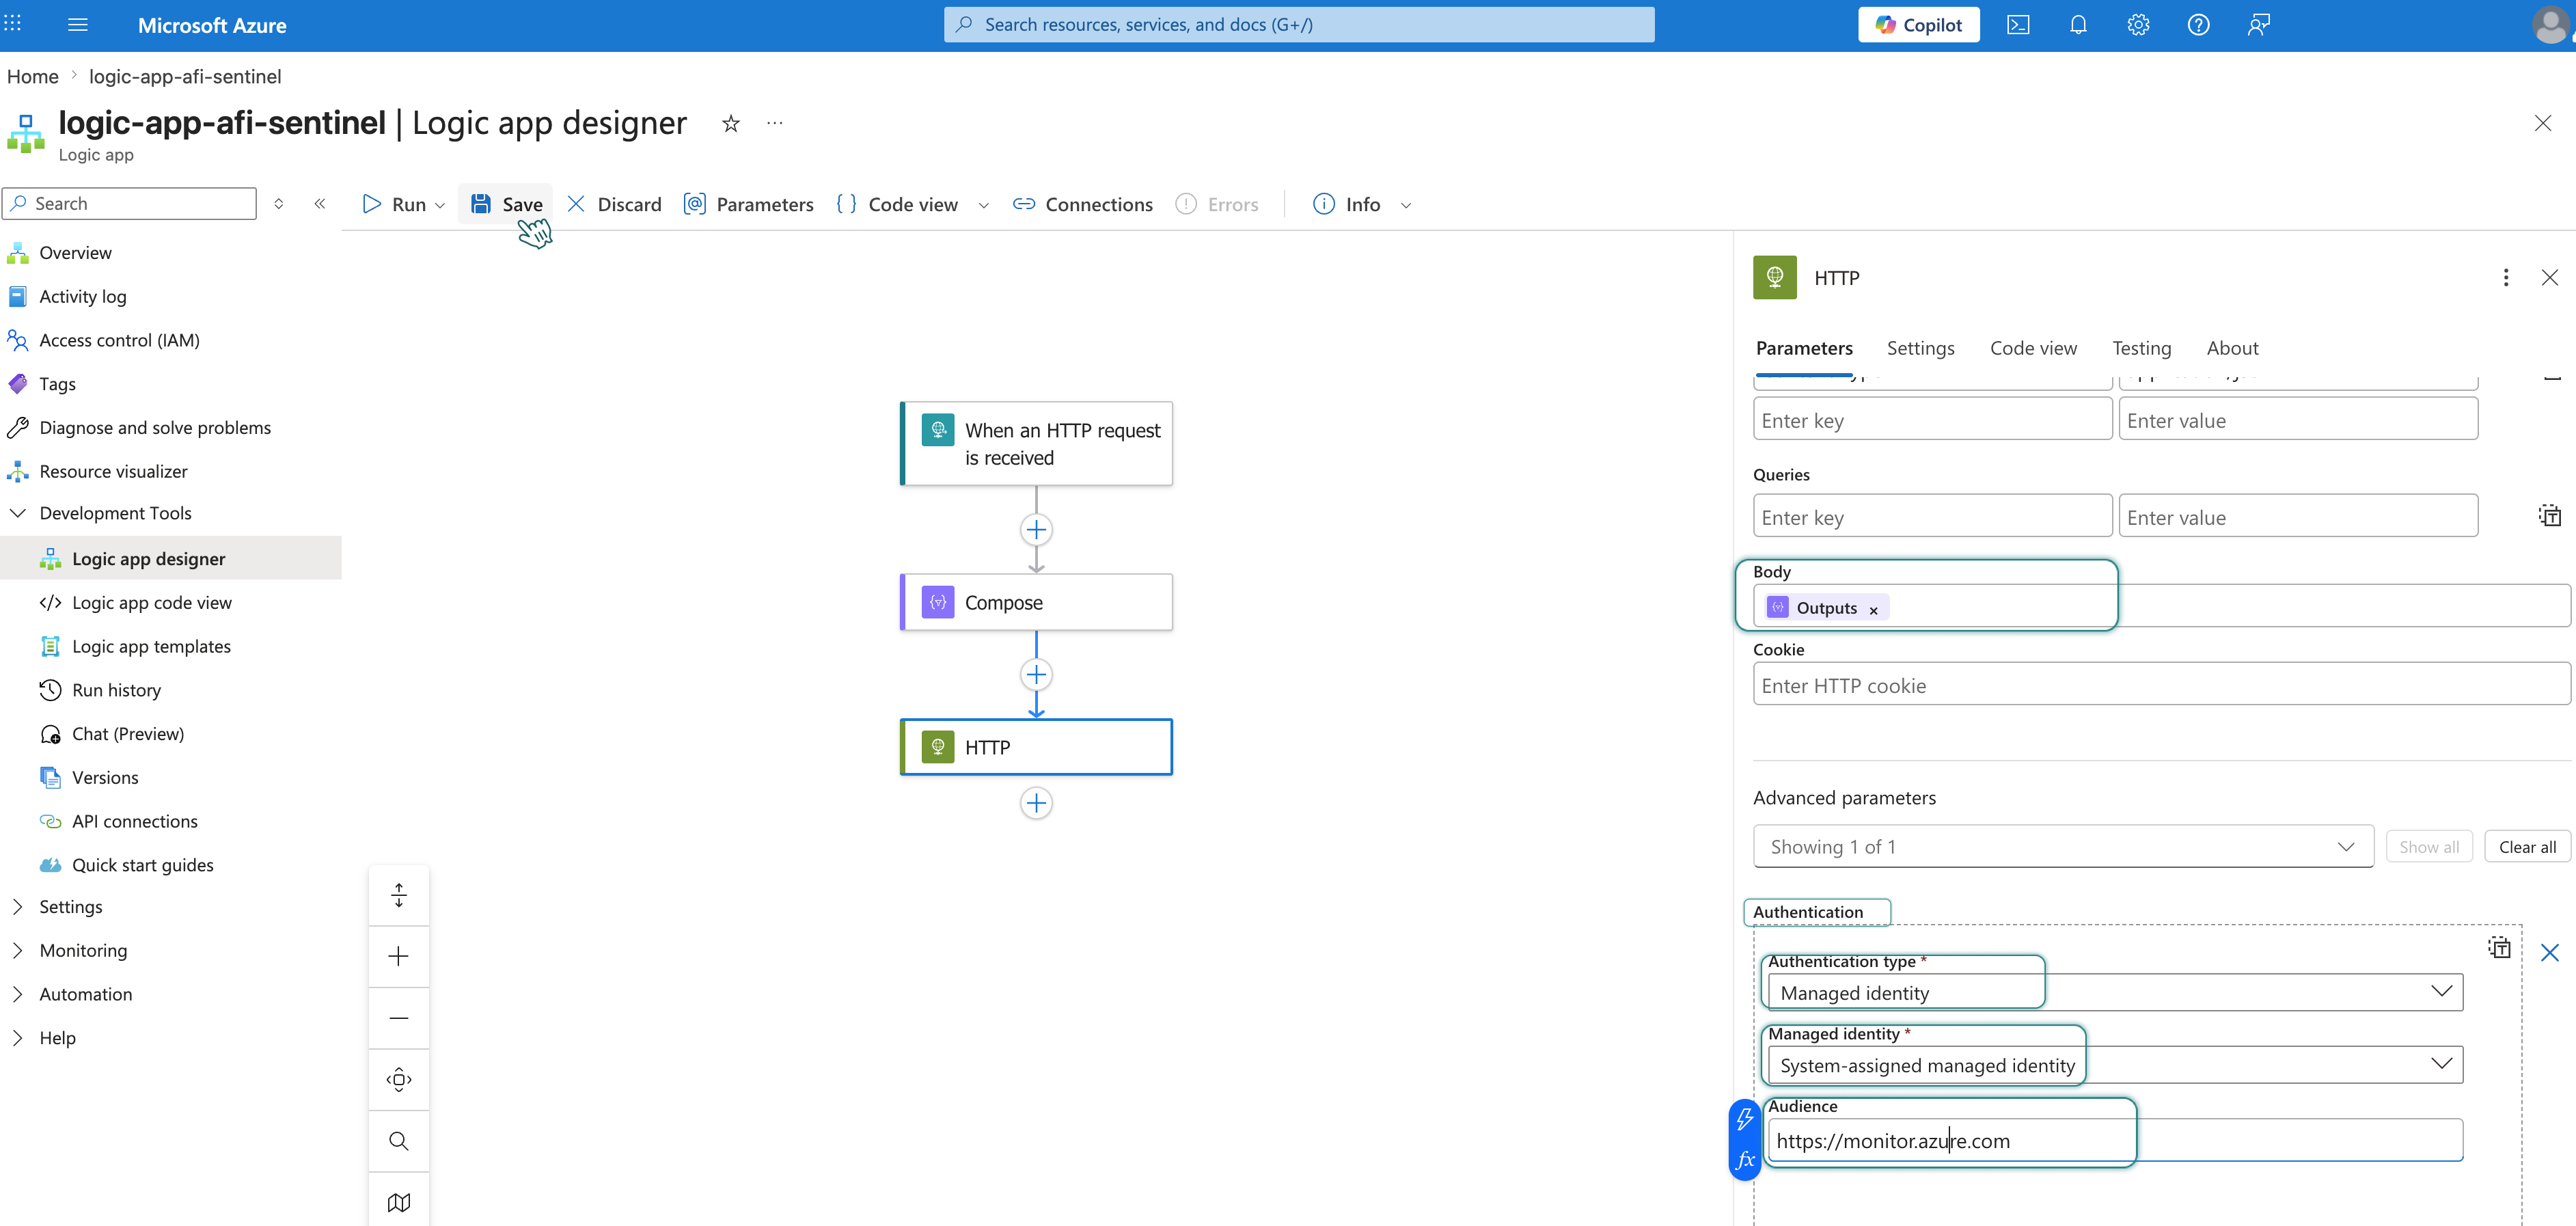
Body: Click on the Body field, then click the ⚡️ icon and select Outputs.
Step 4 - Configure authentication in HTTP action
- Click Advanced parameters → select Authentication.
- Set Authentication type to Managed Identity.
- Configure:
| Setting | Value |
|---|---|
| Managed identity | System-assigned managed identity |
| Audience | https://monitor.azure.com |
-
Click Save.
Part 6: Configure Webhook on the Afi-side
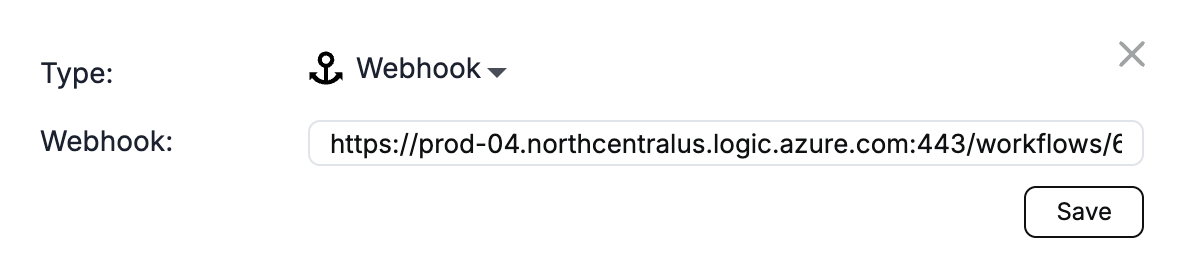
Go to Configuration → SIEM tab to create a channel with the following parameters:
- Endpoint: Webhook
-
Webhook: Webhook URL from Step 1 Part 5
Part 7: Test integration
Step 1 - Generate test audit event
Perform an auditable event on the Afi-side:
- Browse a backup
- Start a restore or export
- Run a search query
Step 2 - Check Logic App
- Open your Logic App (e.g.,
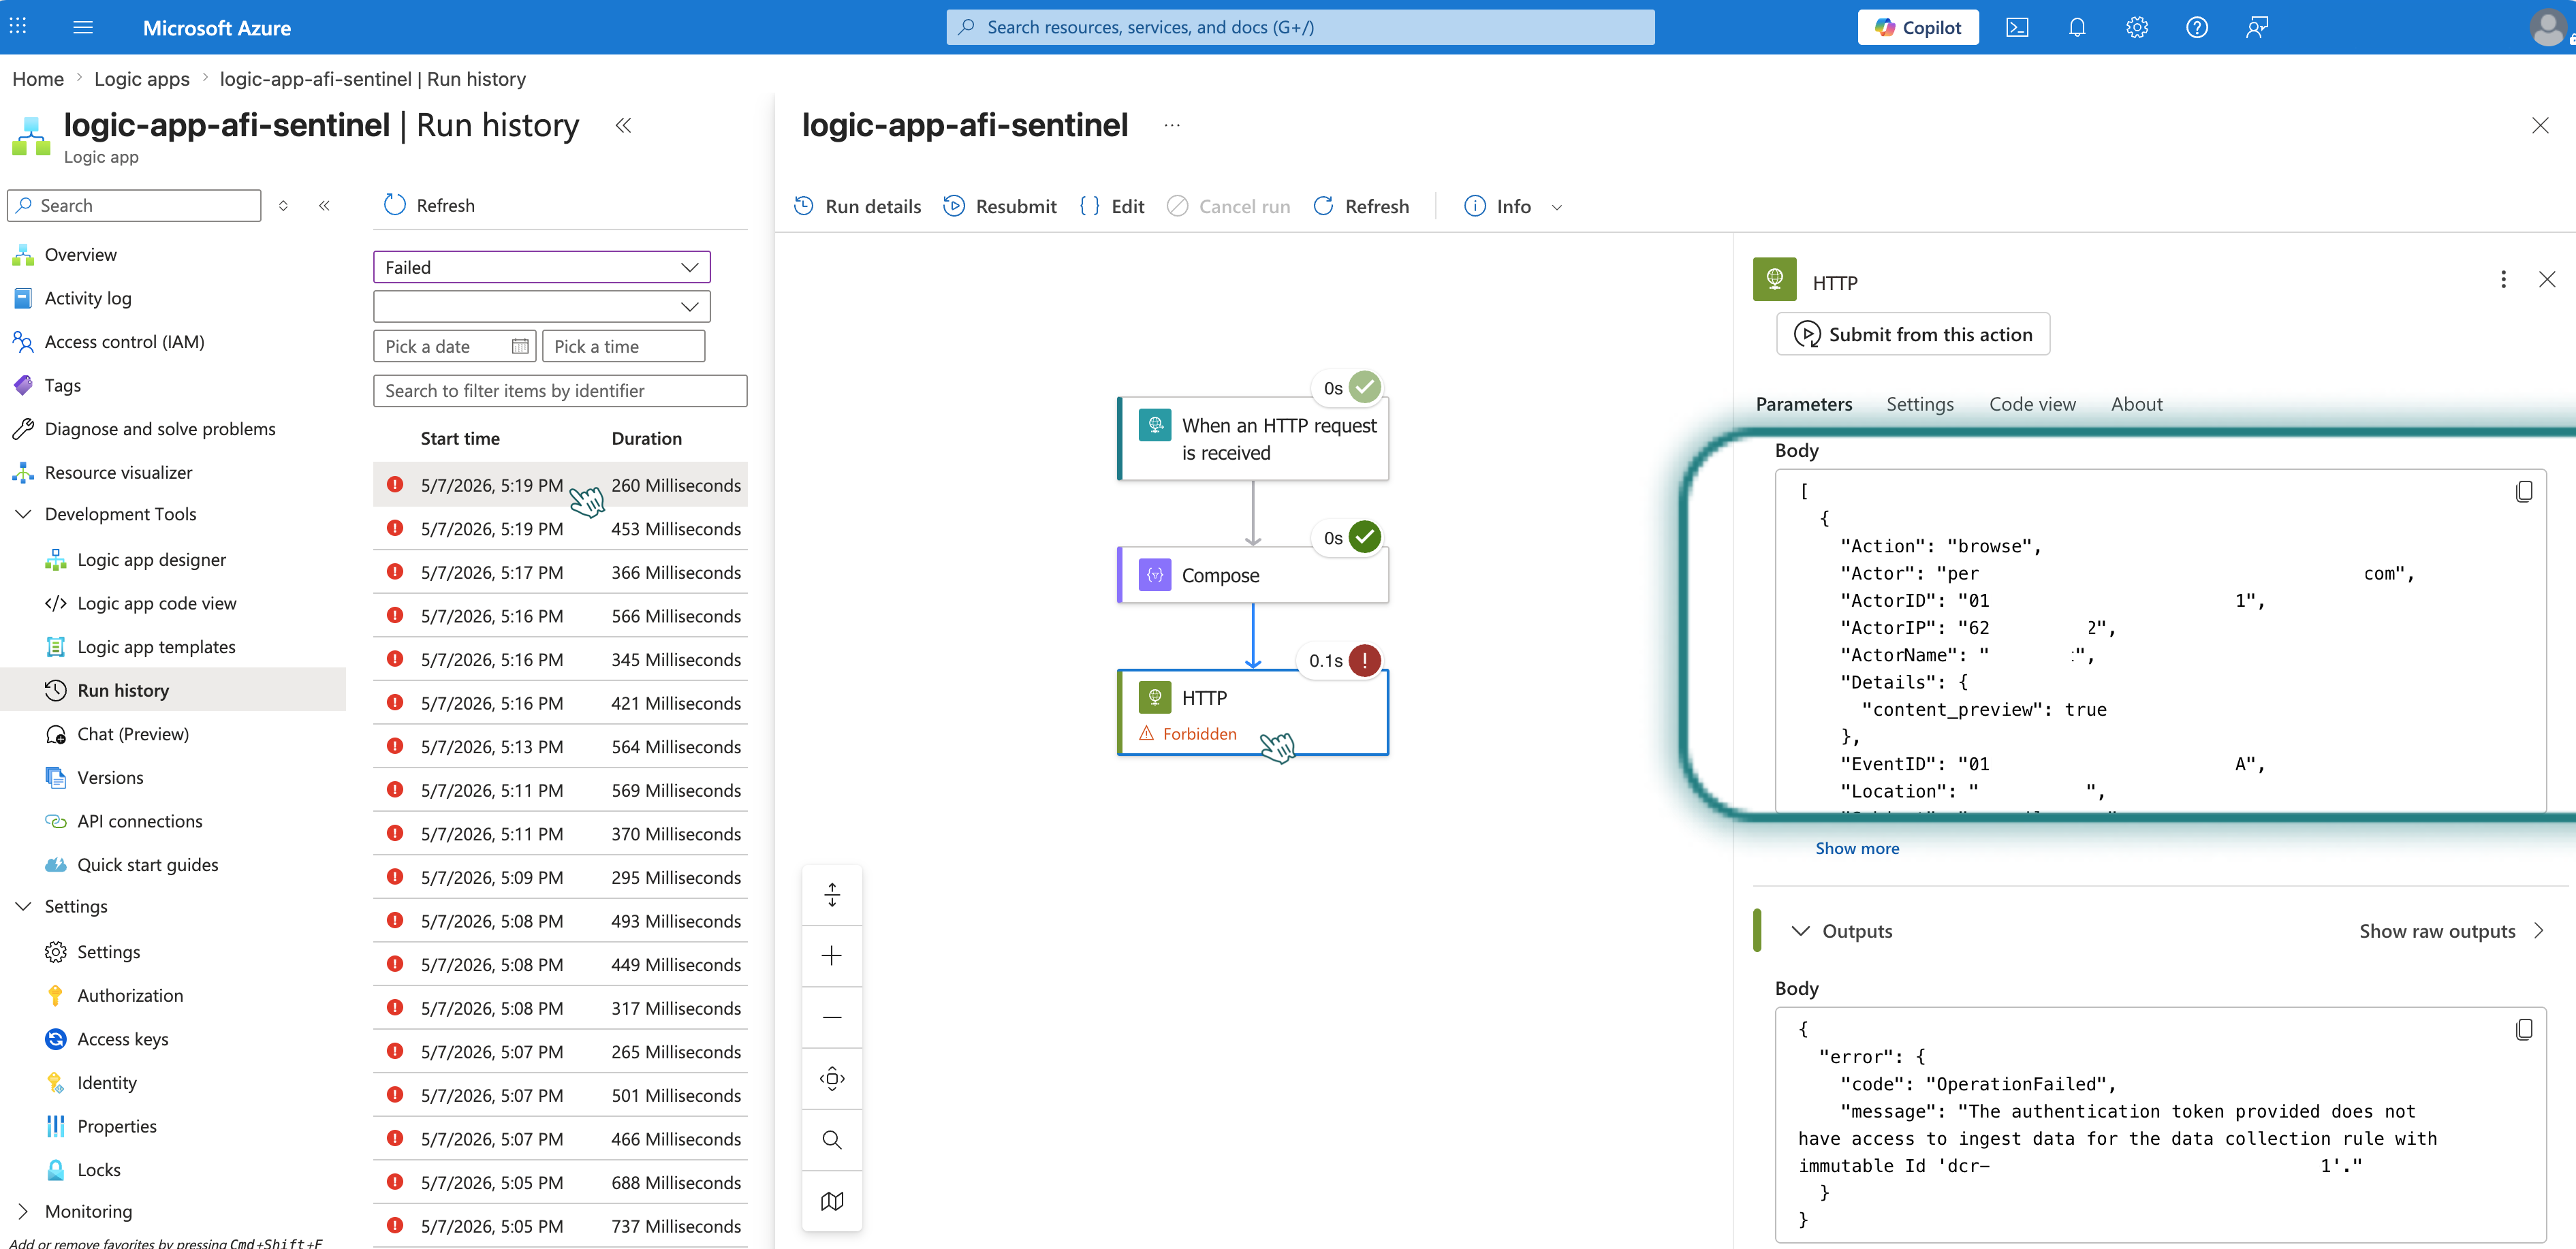
logic-app-afi-sentinel) and go to Overview → Run history. -
Refresh the history. You should see a new run triggered by your test event.
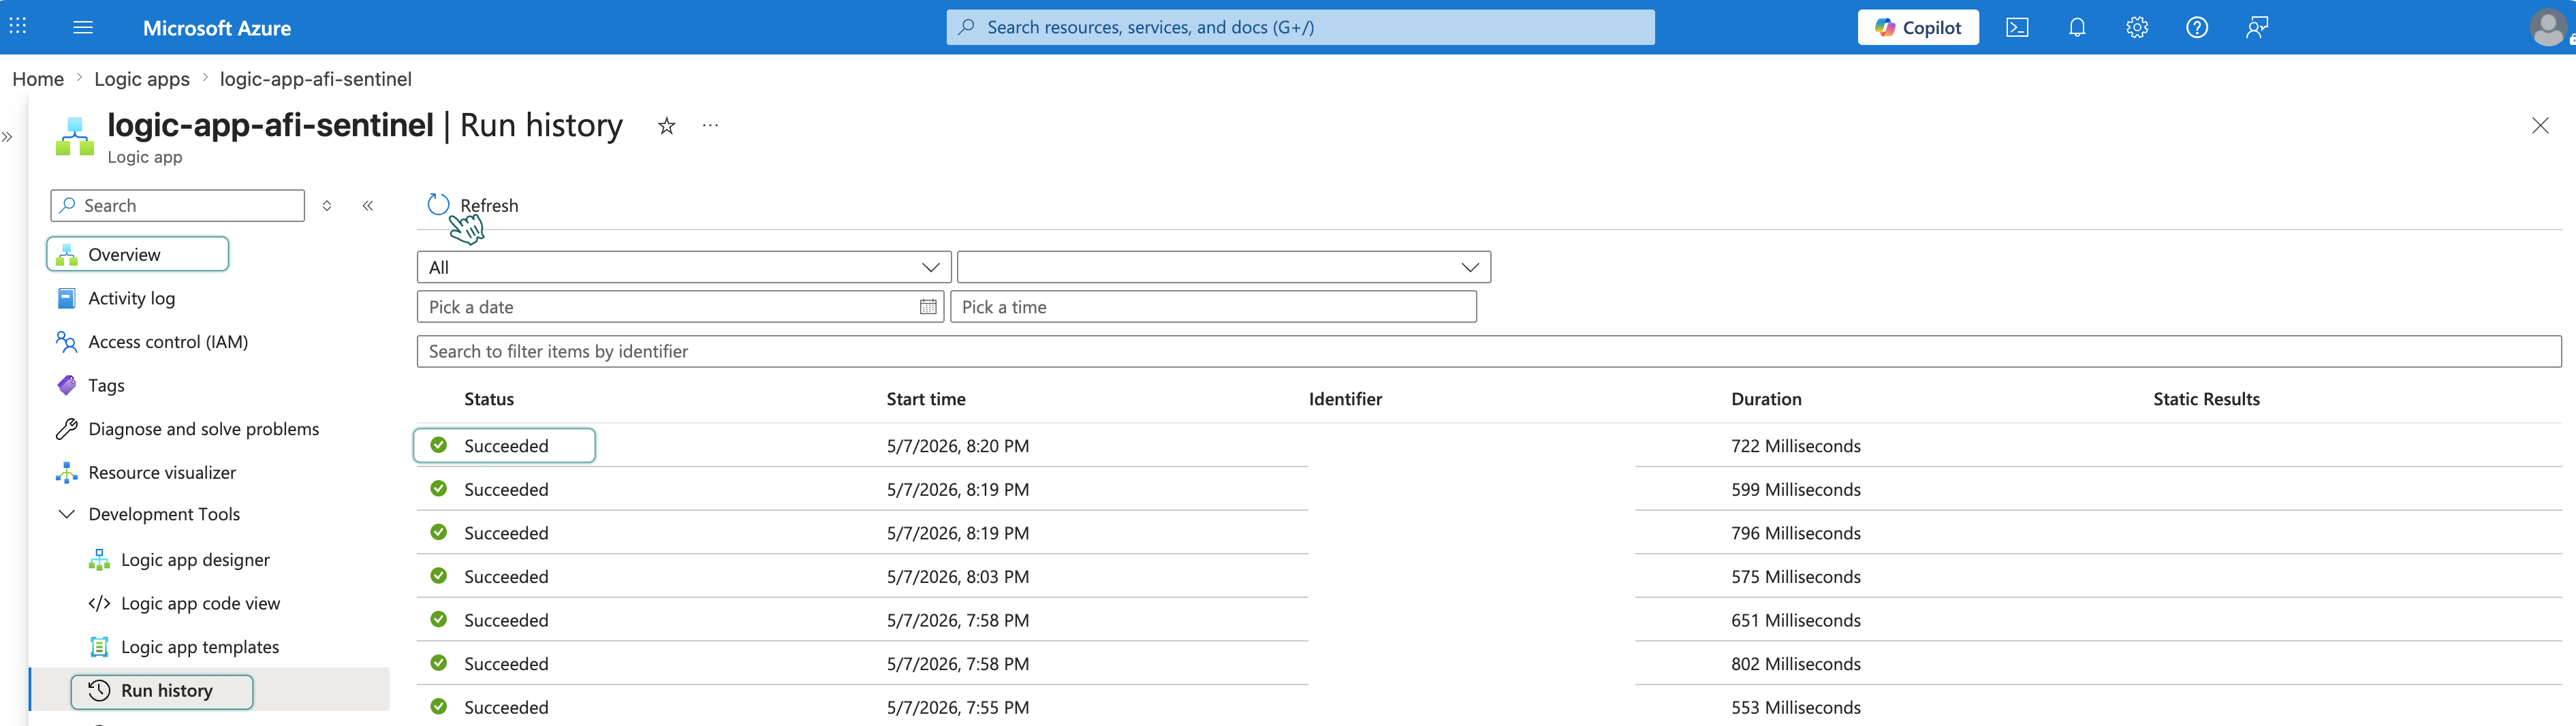
-
Verify that the run status is Succeeded. If it failed, click on the run to see error details.
Part 8: Check test audit events in Microsoft Sentinel
Finally, verify that Microsoft Sentinel has received the audit events.
- Open Microsoft Sentinel and select your workspace (e.g.,
logaw-afi-sentinel). -
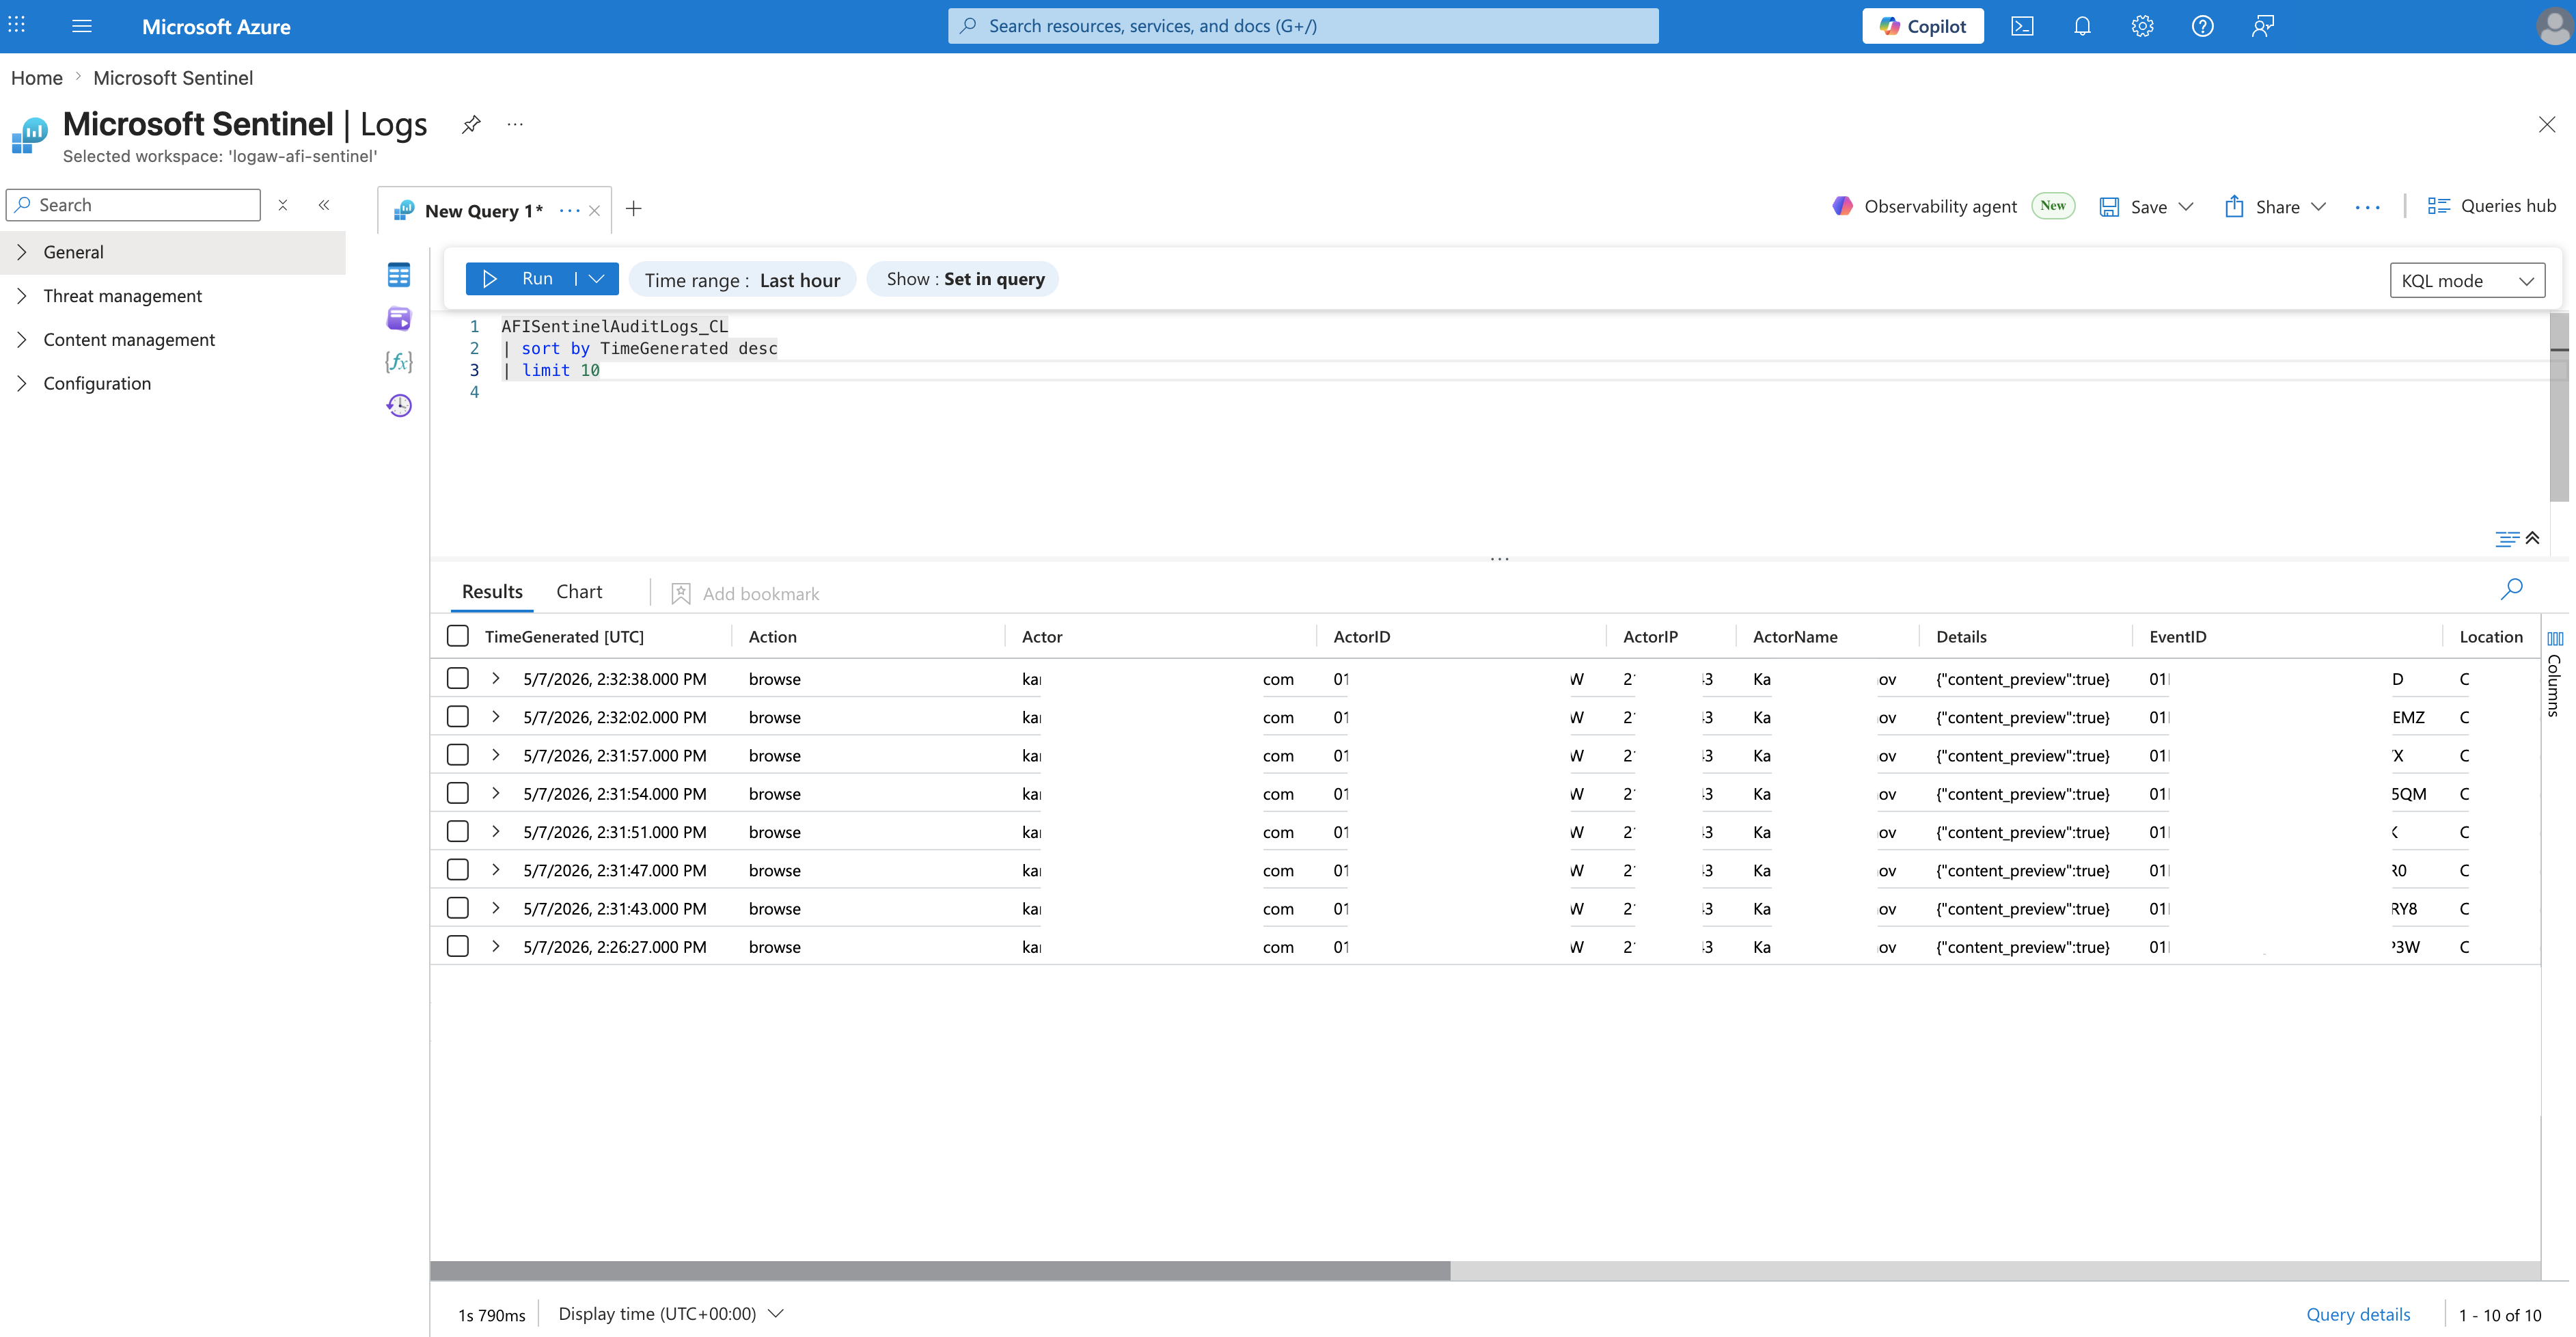
In the left menu, go to General → Logs to open the query editor.
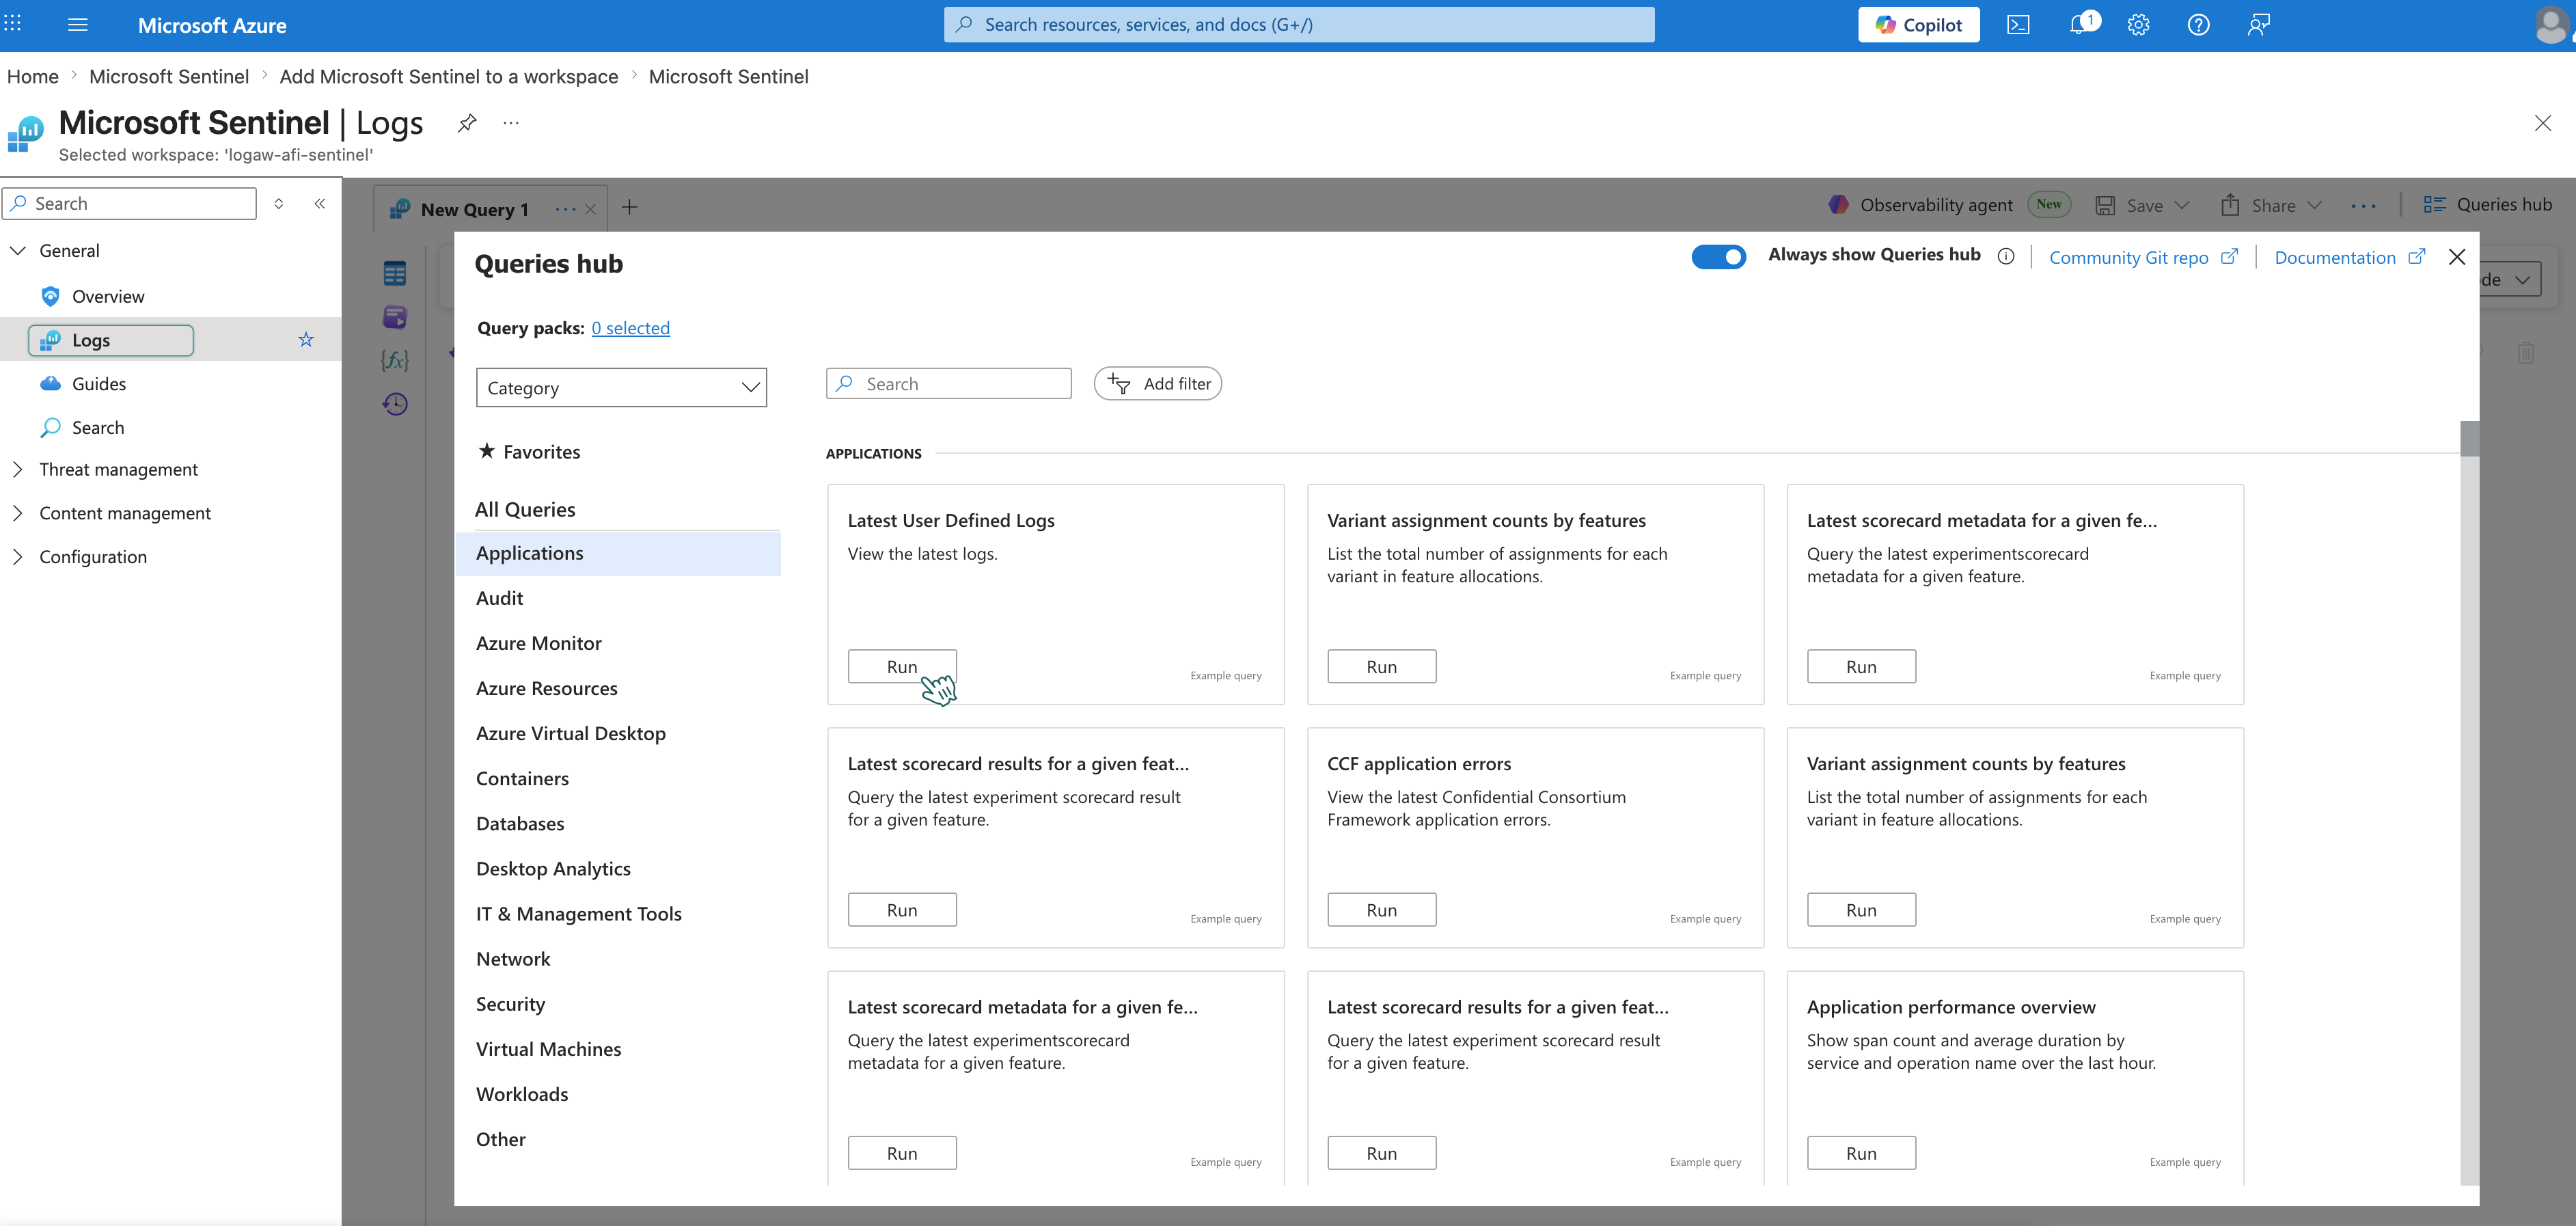
-
Run the following query to see recent audit events:
-
You should see your test audit events in the results.
Info
Initial data may take up to 15 minutes to appear in Microsoft Sentinel.
Optional: Review and Add Event Fields
After testing, you may find that some fields from Afi aren't appearing in Microsoft Sentinel, or that you want to remove fields you don't need. The initial sample used minimal fields to pass validation — you can now adjust the schema based on actual event data.
- Open your Logic App (e.g.,
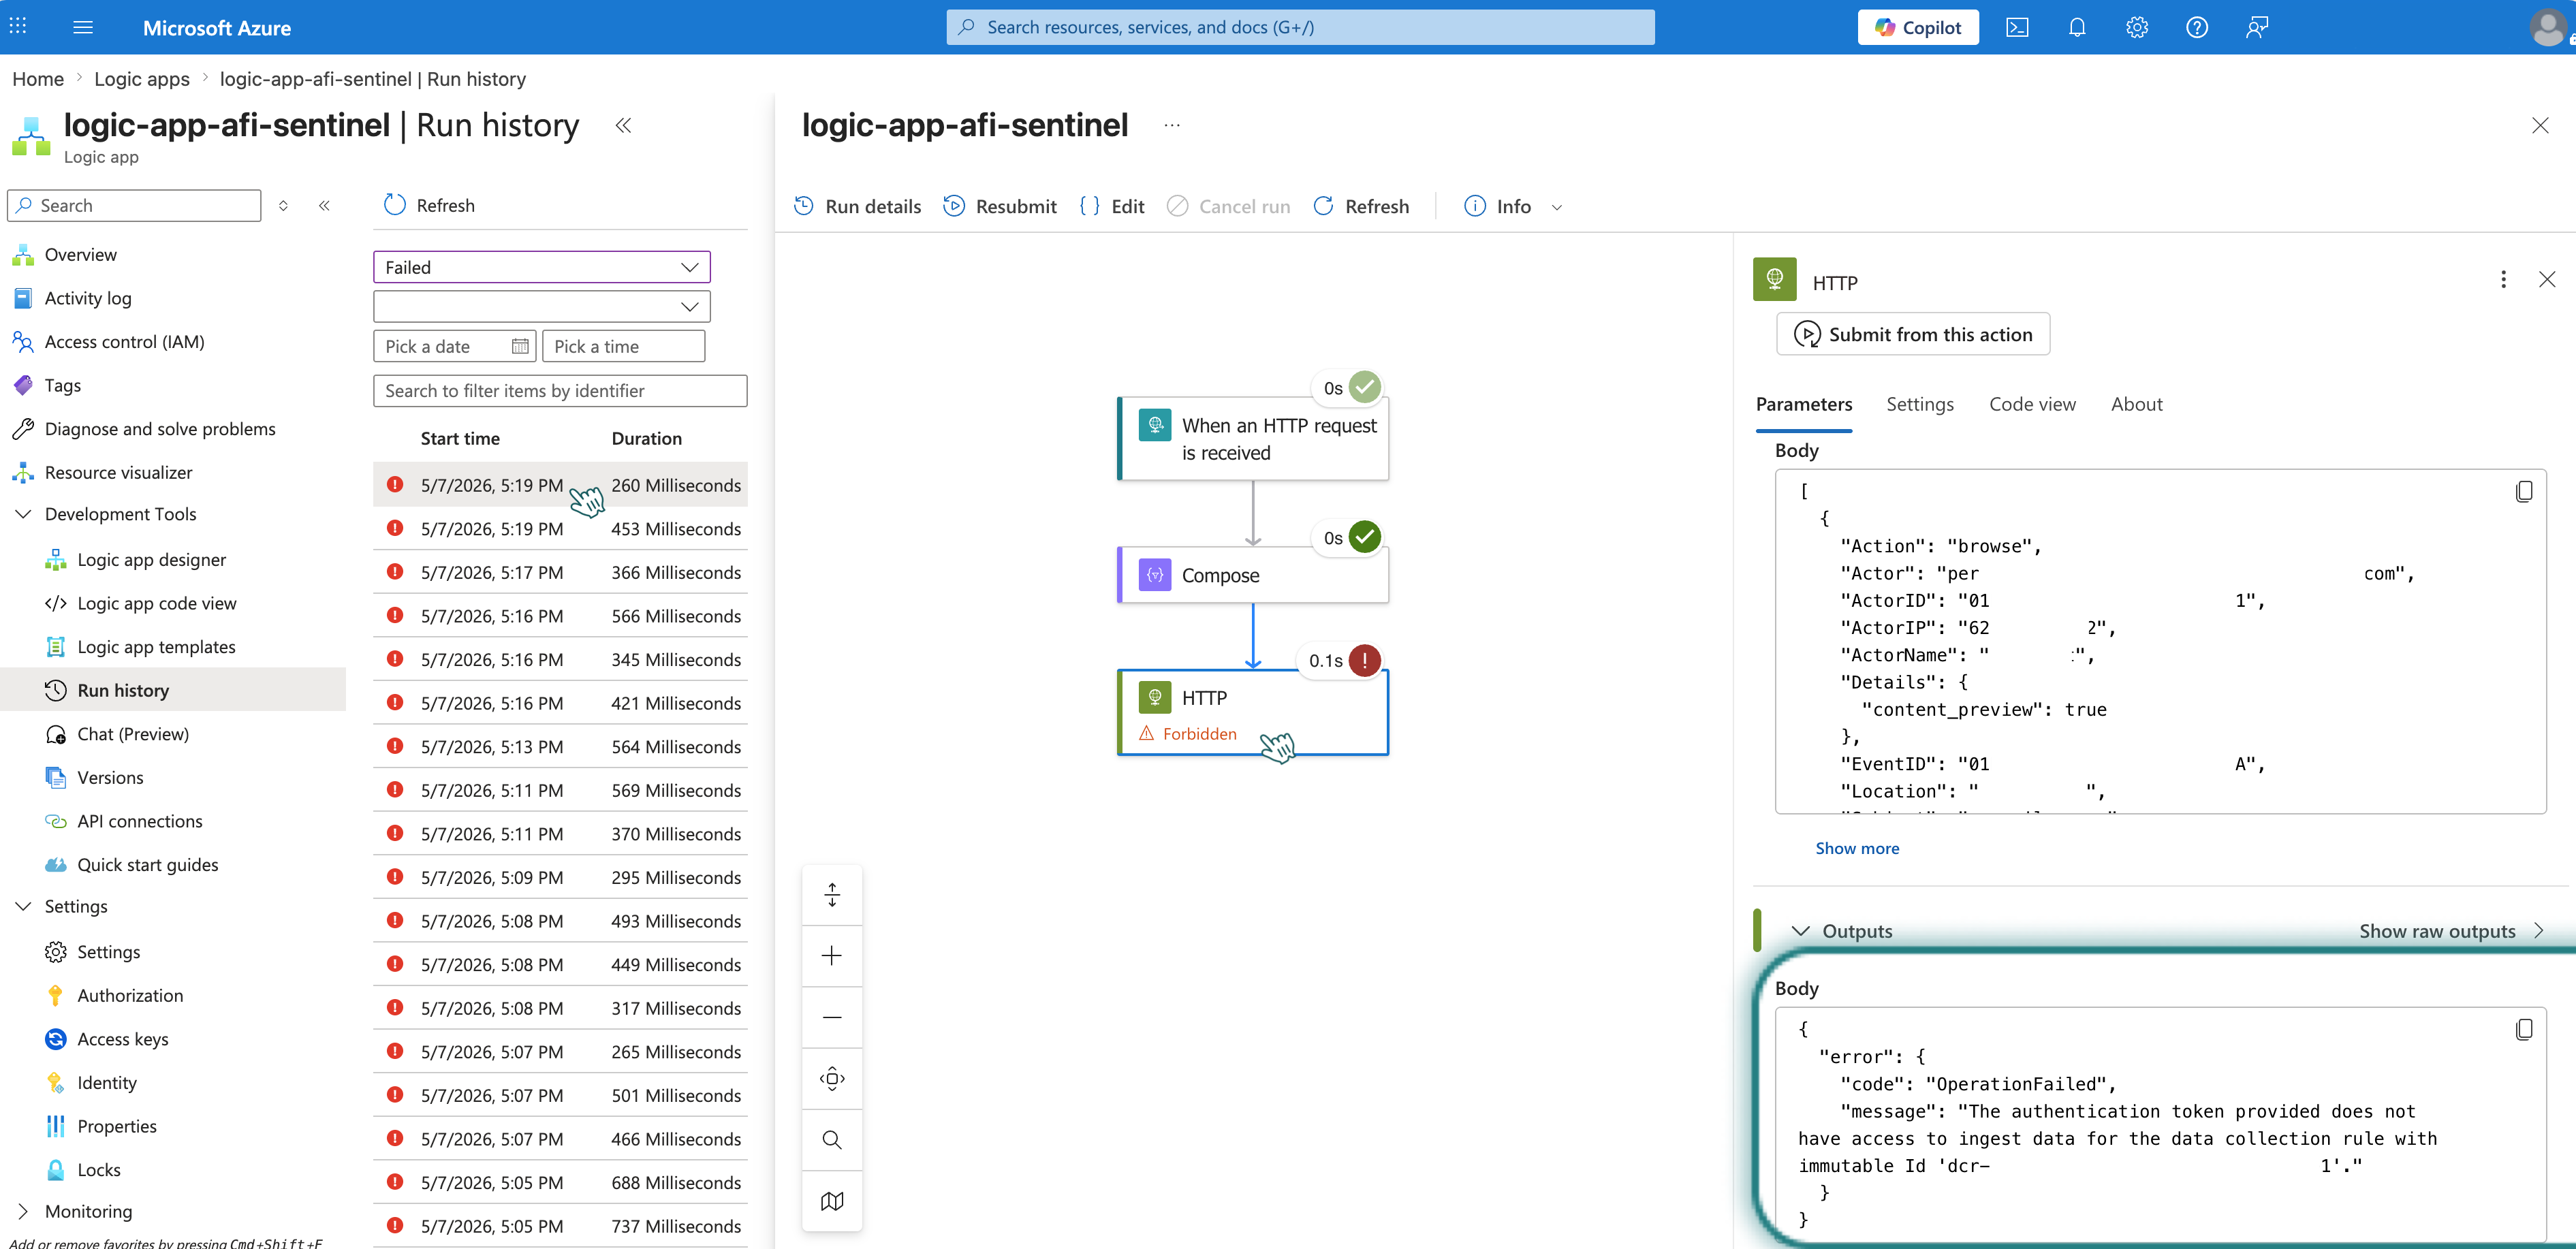
logic-app-afi-sentinel) and go to Overview → Run history. - A list of runs triggered by your test events should appear. Click on one to view details.
- Click the HTTP action to expand its details.
-
Review the Body section — this shows all fields that Afi includes in webhook requests.
-
To modify which fields appear in Microsoft Sentinel, update both the custom table schema and streamDeclarations in the Data collection rule.
Step 1 - Update custom table schema
- Go to Log Analytics workspaces and open your workspace (e.g., logaw-afi-sentinel).
- In the left menu, navigate to Settings → Tables.
-
Click ... on
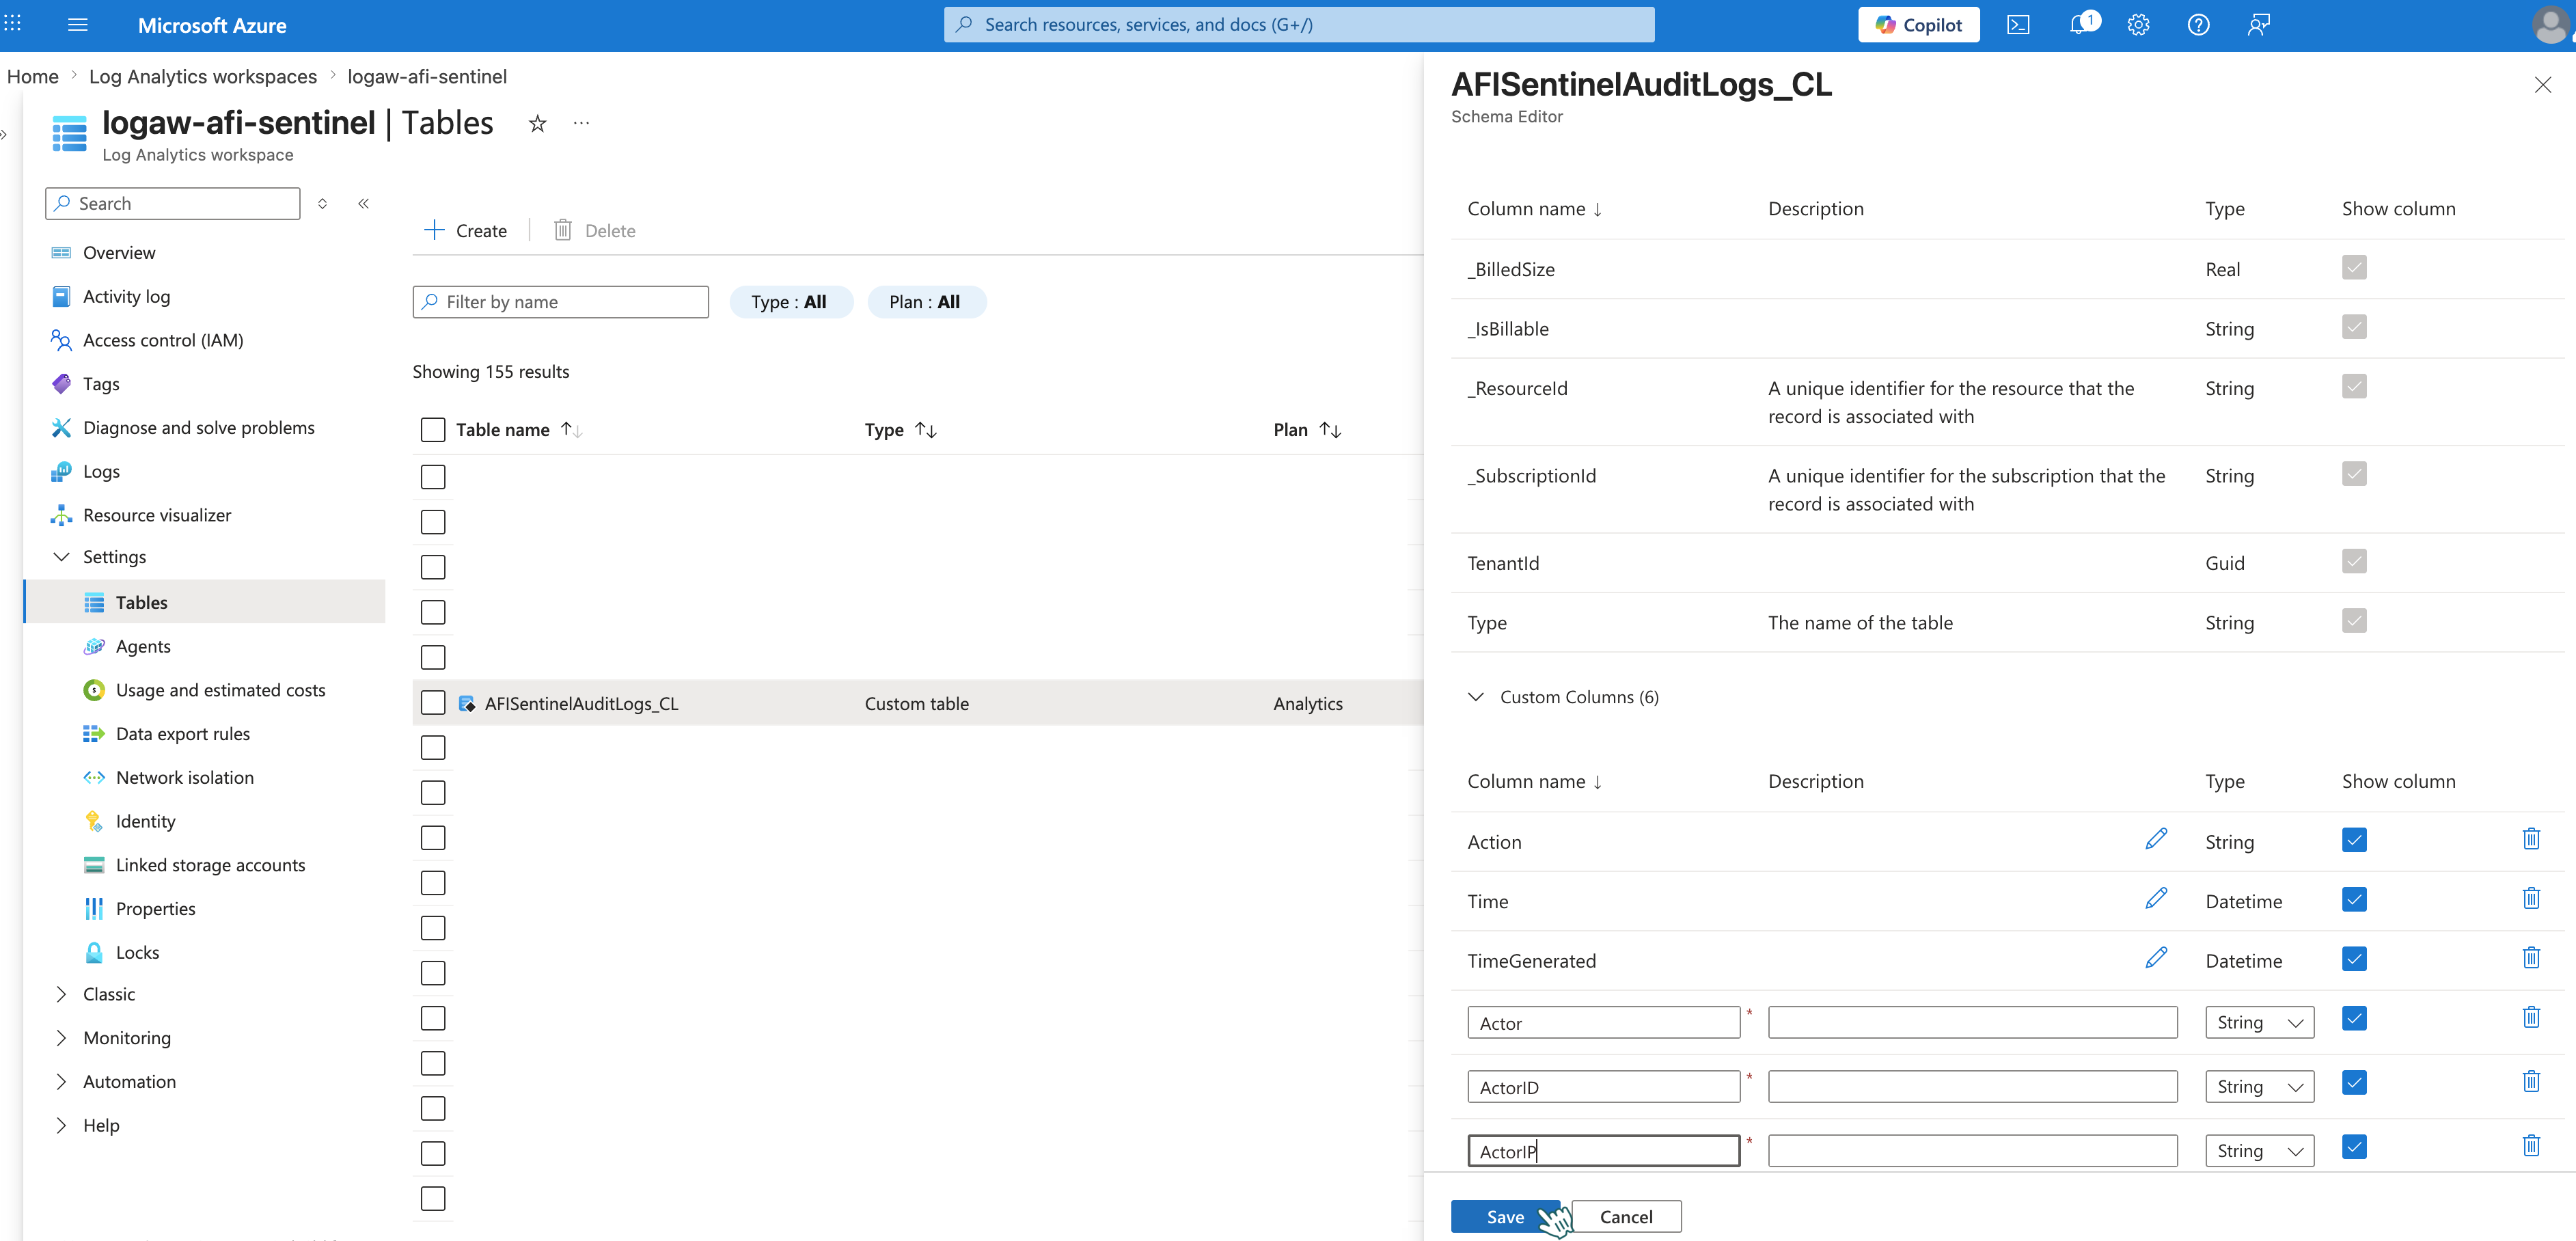
AfiSentinelAuditLogs_CL→ Edit schema.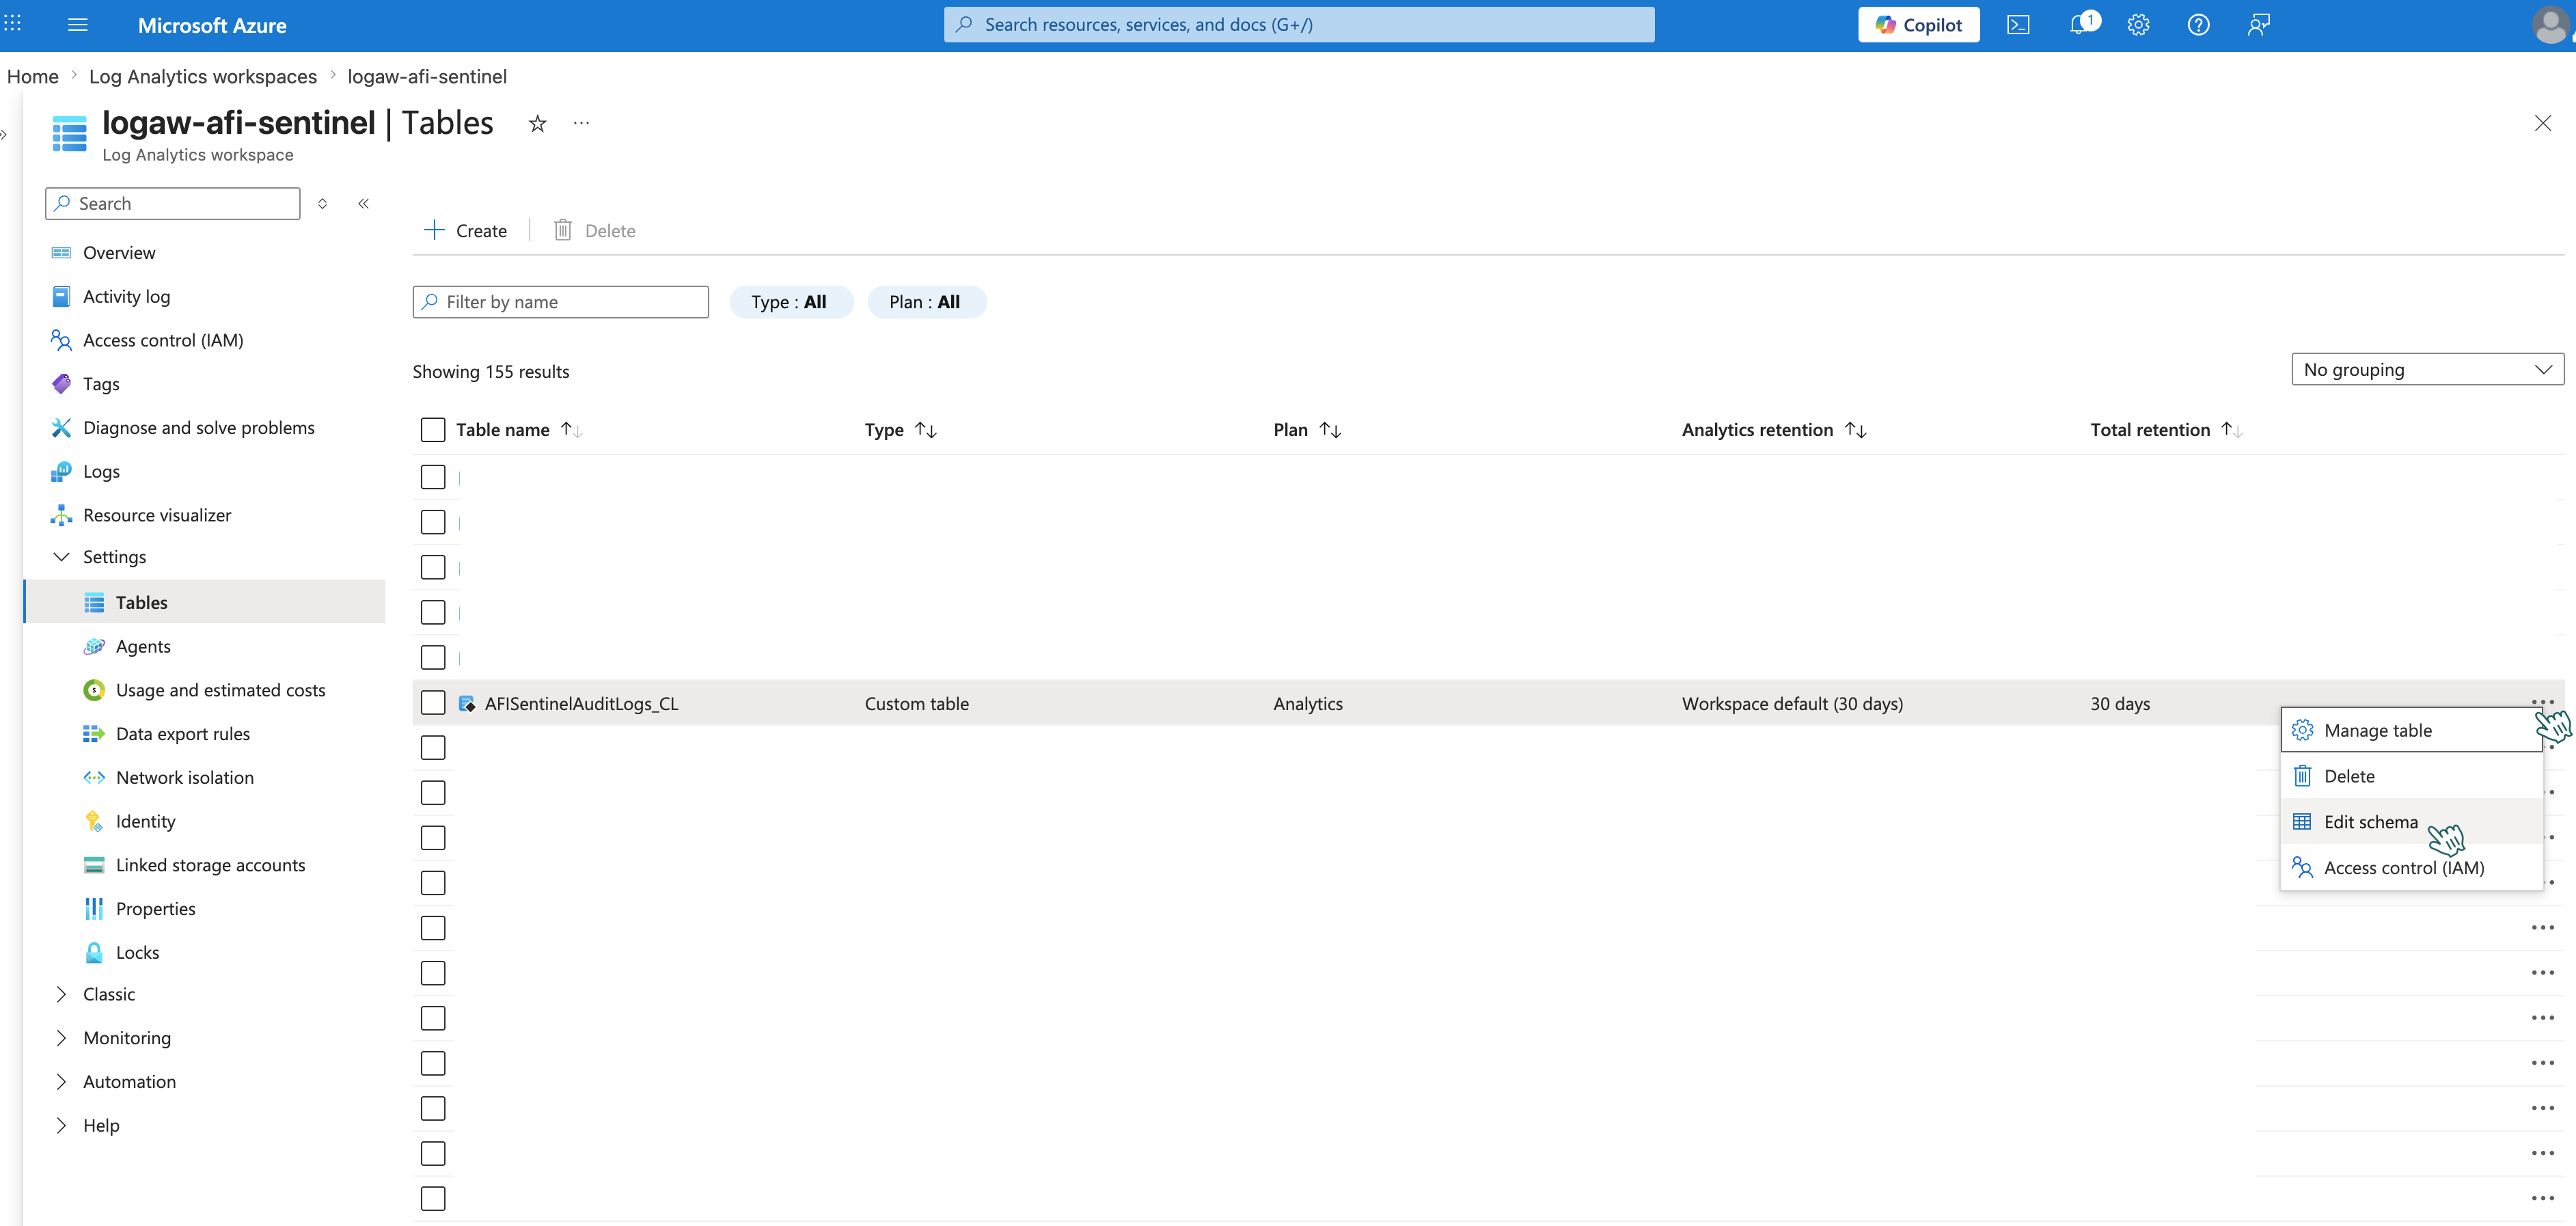
-
Add or remove fields as needed, then click Save.
Step 2 - Update streamDeclarations in the Data collection rule
- In Azure Portal, open Cloud Shell (top right
>_icon) and select Bash. - Run:
az monitor data-collection rule show \
  --name "dcrule-afi-sentinel" \
  --resource-group "resource-group-afi-sentinel" \
  -o json > dcr-current.json
- Click Manage files → Download and enter the filename
dcr-current.json. - Edit the file locally, adding the same fields to
streamDeclarations: - Click Manage files → Upload and select the updated
dcr-current.json. - Run:
az monitor data-collection rule create \
  --name "dcrule-afi-sentinel" \
  --resource-group "resource-group-afi-sentinel" \
  --rule-file dcr-current.json
- Verify the update by opening JSON View in your Data collection rule.
Info
The custom table schema and Data collection rule are separate and do not sync automatically.
Step 3 - Check test audit events in Microsoft Sentinel
Check that your field changes appear correctly in Microsoft Sentinel.